

Halloween Strawberries
As the sun sets on Halloween night, my kitchen transforms into a hub of creativity with these whimsical Halloween Strawberries. Each chocolate-dipped berry brings the joy of trick-or-treating to life, making it just right for both kids and adults.
Using a piping bag to craft spooky faces and detailed designs ensures these treats don’t just look good—they capture the playful essence of Halloween.
Ingredients That Bring Halloween Strawberries to Life
- Semi-Sweet Chocolate Chips: These provide a rich, deep cocoa flavor that complements the natural sweetness of strawberries. Perfect for drizzling or piping spooky details.
- White Chocolate Chips: Silky and smooth, they add a creamy contrast. When tinted with a few drops of orange gel food coloring, they become ideal for those classic Halloween hues.
- Large Strawberries: Choose the juiciest, most vibrant strawberries for dipping. They’re the star of the show, bringing a juicy, refreshing bite to every chocolaty treat.
- Orange Gel Food Coloring (Optional): A fun addition for transforming your white chocolate into a bright orange, capturing the essence of pumpkins and fall festivities.
- Key Technique: Piping Bag Mastery: Using a piping bag filled with melted chocolate lets you add thin lines and intricate designs, ensuring each strawberry becomes a mini masterpiece. It’s all about that extra touch of elegance—right at your fingertips!
- Candy Eyes: These add a playful face to your strawberries. With a dab of chocolate, they stick right on, creating whimsical personalities.
- Crushed Chocolate Cookies (Optional): Sprinkle a little cookie dust for a “dirt” effect, adding texture and a touch of fun to your spooky creations.
- Gummy Worms (Optional): For an extra layer of whimsy, drape gummy worms over your strawberries. They bring a delightful, chewy texture that kids and adults alike will adore.
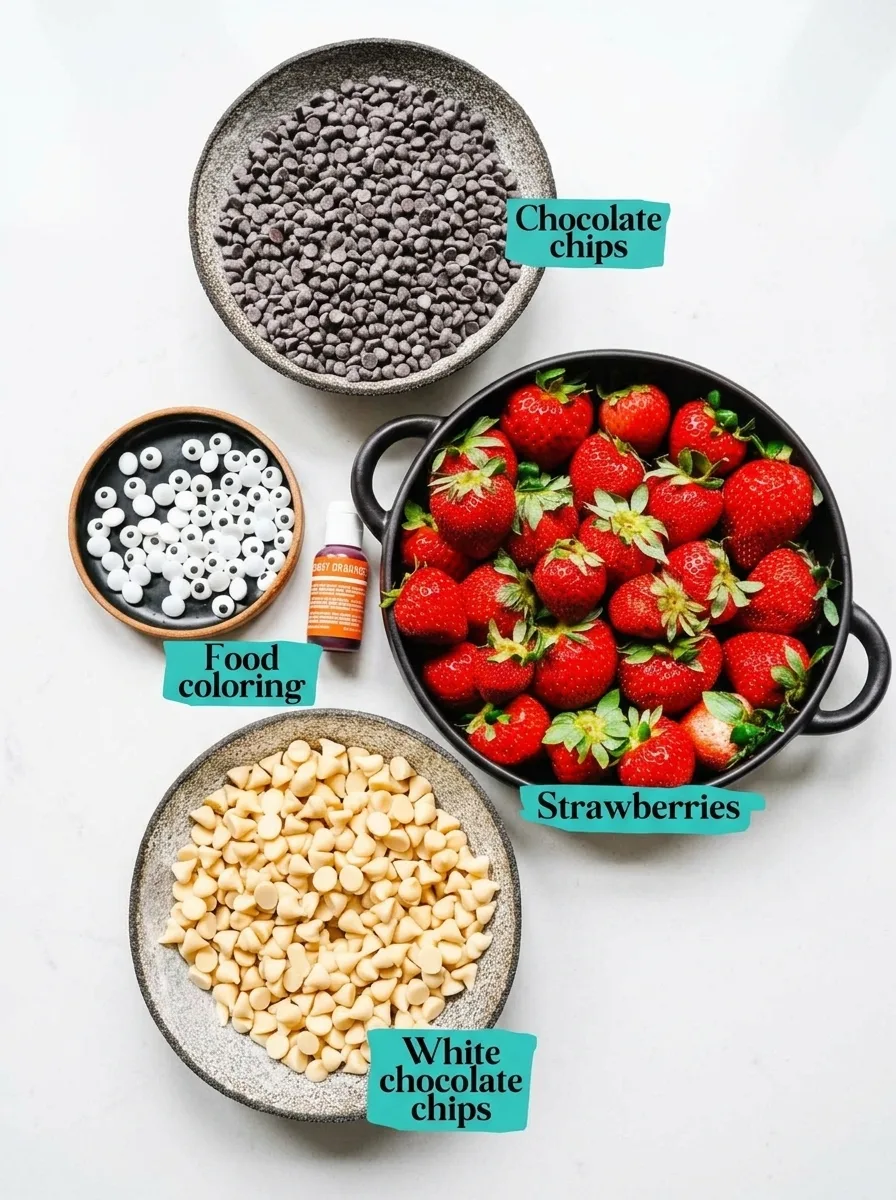
Dive into your pantry, gather these ingredients, and get ready for a Halloween crafting session that brings sweet, spooky smiles to all faces.
Crafting Your Halloween Strawberries
In just 20 minutes, you’ll transform fresh strawberries into whimsical Halloween delights. Each step in this playful culinary adventure captures the fun and mystery of the season. Let’s dive in!
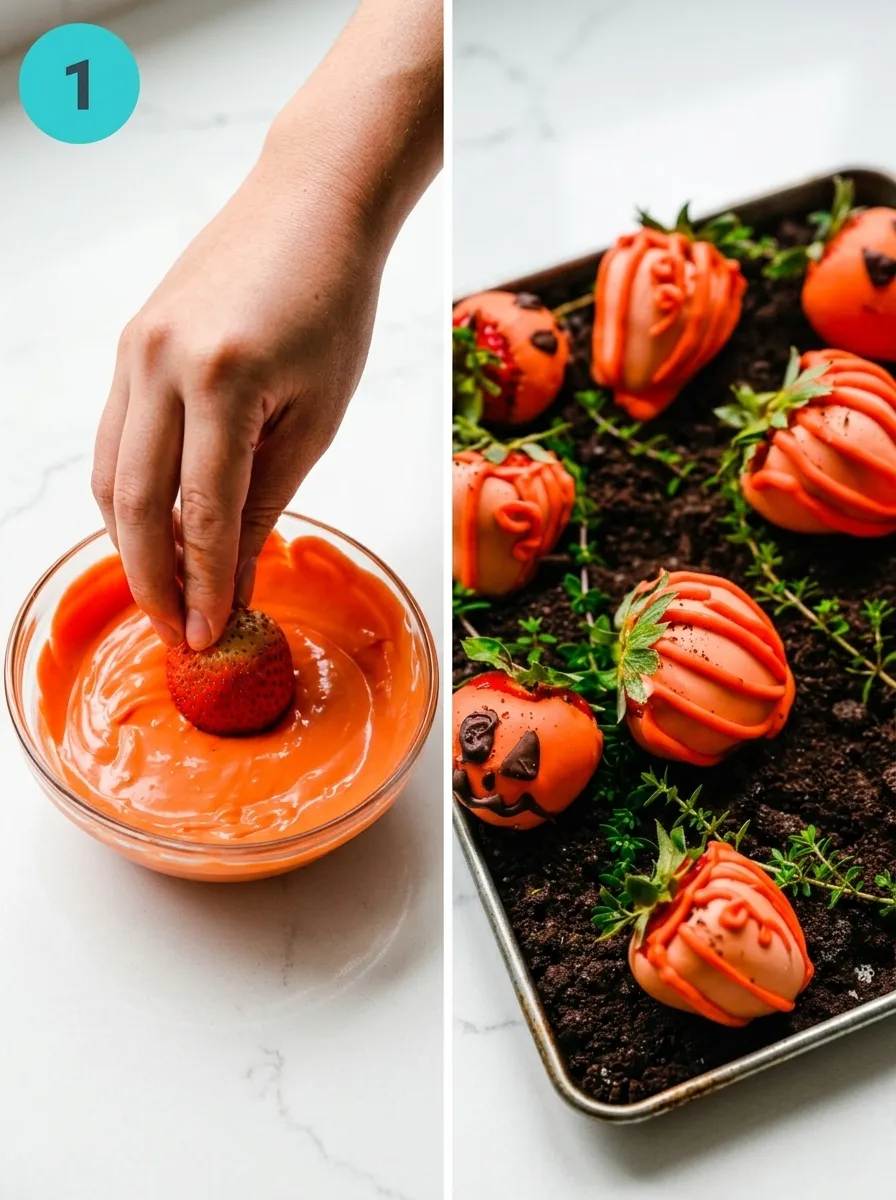
- Melt White Chocolate: Add 6 oz white chocolate chips to a heat-safe bowl. Microwave in 20-30 second intervals, stirring each time until smooth and creamy. You’ll know it’s ready when the chocolate is glossy and wafts of sweet aroma fill the air.
- Color Chocolate Orange: Mix in a few drops of orange gel food coloring, whisking until the color is vibrant and even. Adjust the hue to your liking for a pumpkin-bright finish.
- Dip Strawberries: Gently dip each of the 24 strawberries into the orange chocolate, letting excess drip back into the bowl. Place them on a parchment-lined baking sheet, watching as they glisten in the light.
- Pipe Pumpkin Lines: Once the chocolate sets (speed this up by chilling in the fridge for a few minutes), fill a piping bag with the remaining orange chocolate. Draw thin, wavy lines to give each strawberry a charming pumpkin persona.
- Melt Semi-Sweet Chocolate: In a clean heat-safe bowl, repeat the process with 6 oz of semi-sweet chocolate chips. Microwave in intervals, stirring until silky and fragrant.
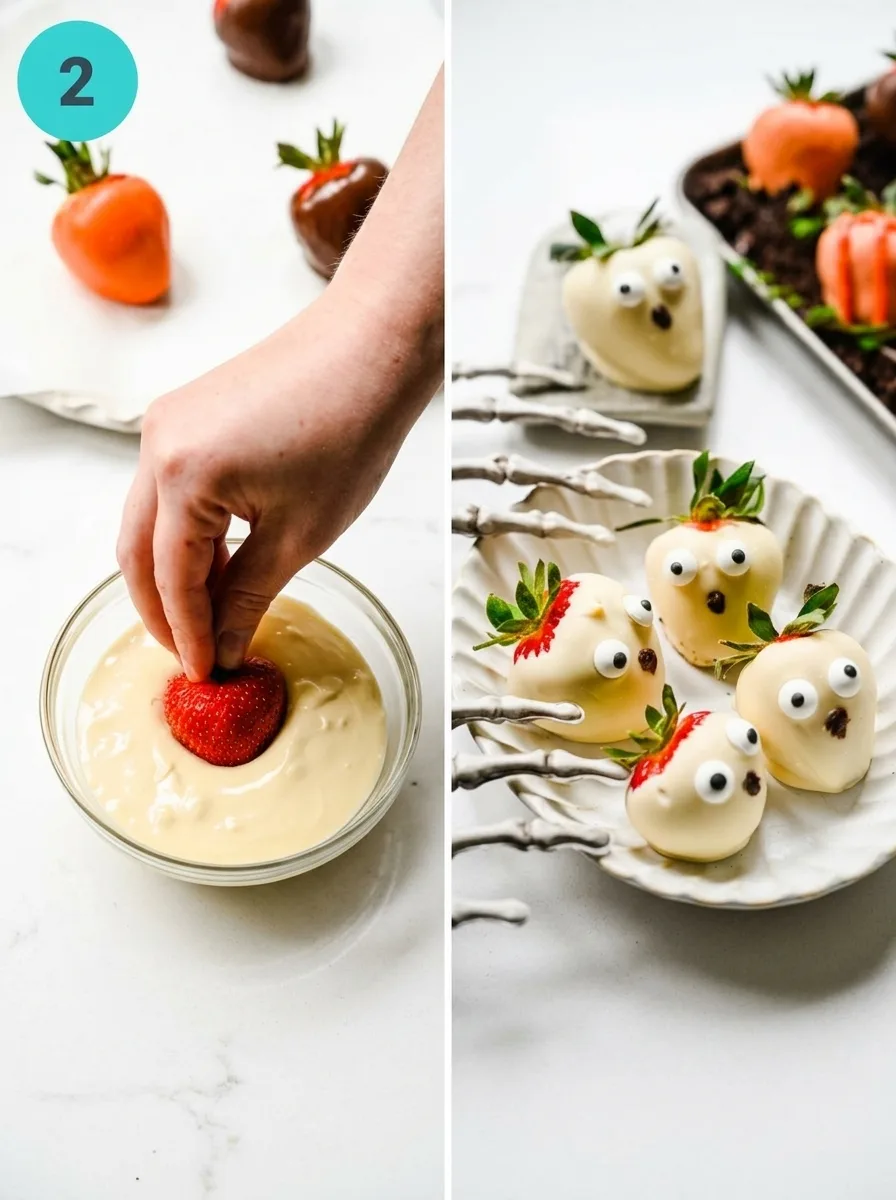
- Decorate Faces: Use a toothpick or piping bag to apply the semi-sweet chocolate, crafting spooky faces or adding candy eyes. Each face should whisper tales of Halloween night.
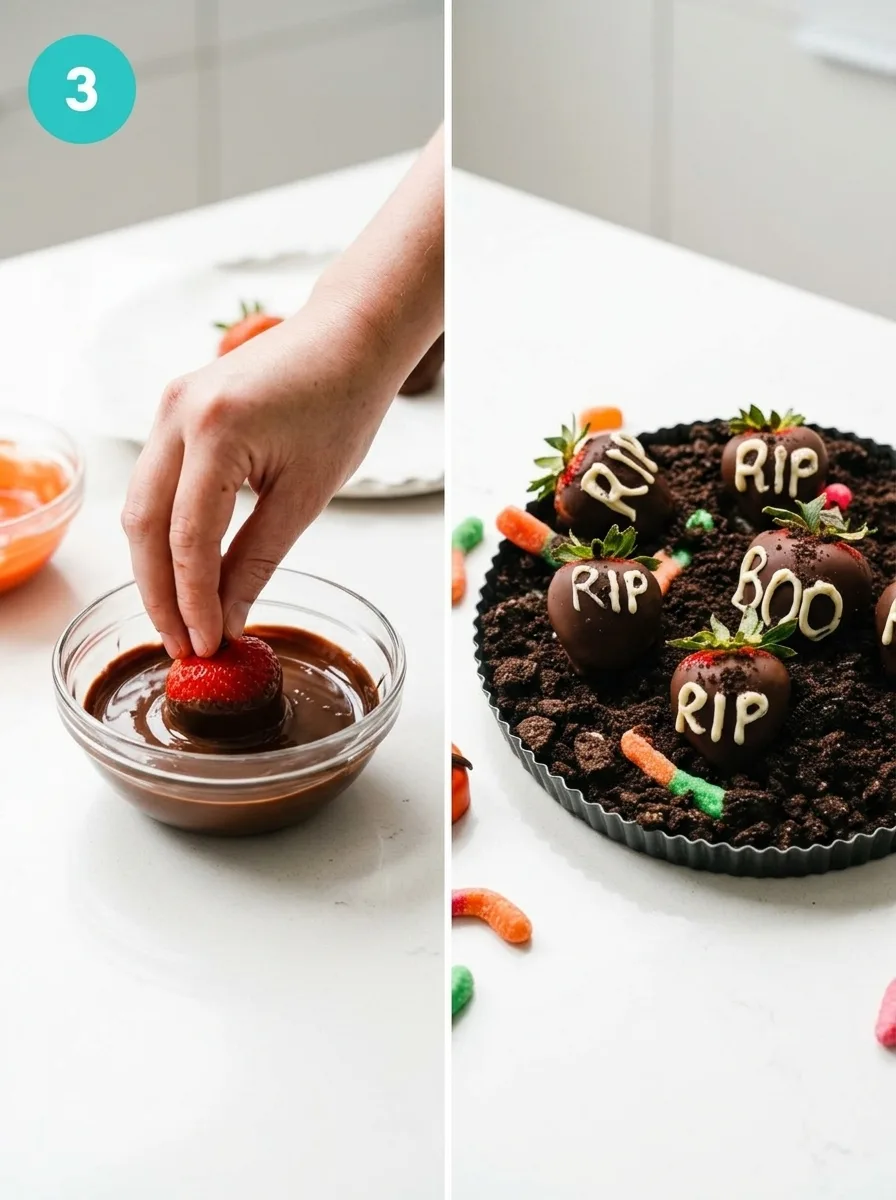
- Finalize with Messages: For an extra spooky touch, use the melted white chocolate to pipe ghostly phrases like “boo” or “RIP” on the chocolate-dipped strawberries, allowing the words to appear like playful spirits dancing across them.
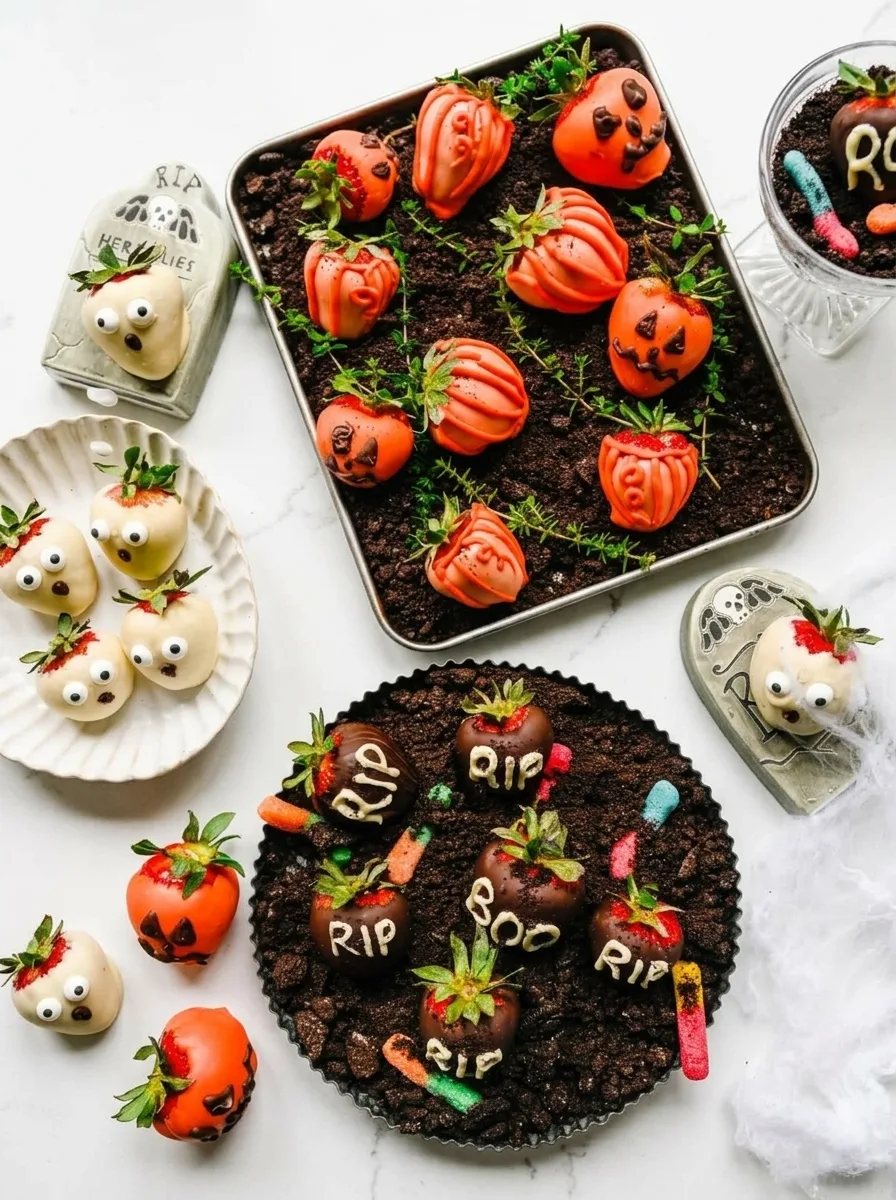
And there you have it—your very own batch of Halloween Strawberries, each a testament to both creativity and simplicity. Share these sweet treats with friends and family or enjoy them yourself, savoring the spirit of Halloween.
Spooktacular Variations & Creative Twists
As I got lost in a web of chocolate and spooky fun, I realized how versatile these Halloween Strawberries could be. Here are a few variations to make them truly your own:
- Vegan Delight: Looking for a plant-based option? Simply swap in dairy-free chocolate chips for both the semi-sweet and white chocolate.
- Vibrant Colors: For more intense hues, use gel food coloring instead of liquid. It offers richer colors without altering the consistency of your melted chocolate.
- Candy Coatings: Grab pre-colored candy melts. They come in festive shades and free you from the dyeing process.
- DIY Piping Bag: Don’t have a piping bag on hand? Just snip a corner off a zip-top bag, and voilà—you’ve got a homemade piping tool.
Experiment with these ideas and let each strawberry tell its own Halloween story. The kitchen is your spooky playground!
Keeping the Magic Alive
To keep your Halloween Strawberries as enchanting as when you first created them, store them in an airtight container in the refrigerator. They’ll stay fresh for up to two days. Make sure they cool completely before sealing them in the container—this helps prevent condensation. While these little treats are best enjoyed fresh, freezing isn’t recommended as it can alter the texture.
When it’s time to indulge again, there’s no need to reheat, but letting them sit at room temperature for a few minutes brings them back to their delightful, ready-to-eat state. Enjoy them as a spooky snack or alongside a ghoulish punch!
A Ghoulishly Good Pairing: Serving Suggestions & Final Verdict
As the night fills with excitement, these Halloween Strawberries become the star of your spooky spread, bringing a delightful mix of whimsy and indulgence to your festivities.
Perfect Pairings
- Spooky Punch: The effervescence and fruity notes of a Halloween-themed punch complement the rich chocolate and sweet strawberries, creating a refreshing contrast.
- Cheese Platter: A selection of sharp and creamy cheeses offers a savory counterpoint, enhancing the sweetness of the strawberries.
- Popcorn Cauldron: Light and crispy popcorn adds a fun texture that contrasts with the smooth chocolate.
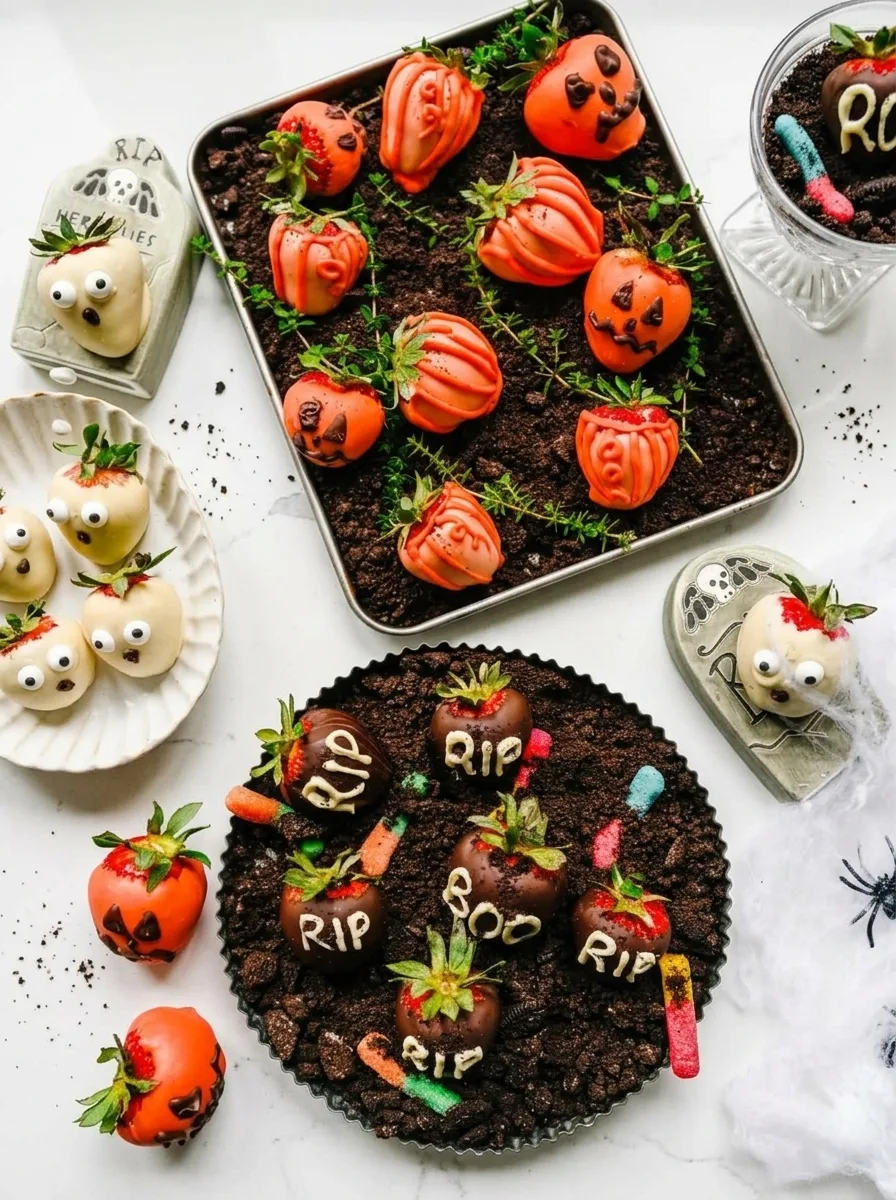
Bewitching Garnishes
- Candy Eyes: Adding candy eyes makes each strawberry come alive, turning these treats into playful characters.
- Crushed Chocolate Cookies: Sprinkling crushed cookies adds a delightful crunch and gives your strawberries a “dirt” effect that’s perfectly spooky.
- Gummy Worms: Drape a gummy worm over the top for a creepy-crawly touch, enhancing the playful Halloween vibe.
As the laughter flows and the night grows chilly, these strawberries bring warmth and fun. Whether you’re hosting a gathering or snuggling up with a movie, they add a festive flair that’s hard to resist. How will you unleash your creativity this Halloween? Let me know in the comments—I’m always eager for spooktacular ideas!
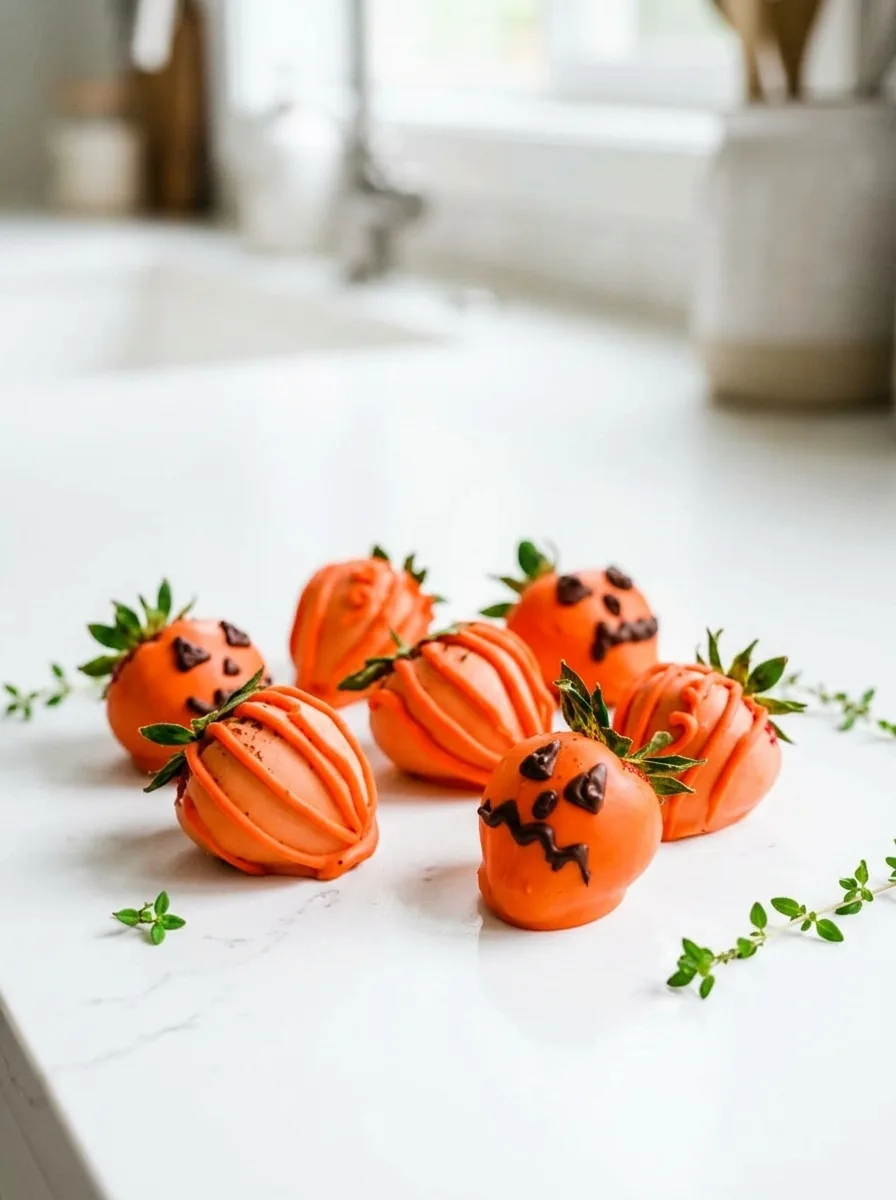
Halloween Strawberries
Ingredients
Method
- Add white chocolate to a heat safe bowl. Microwave in 20-30 second intervals, stirring well between each interval, until fully melted.
- Add in a few drops of orange gel food coloring and whisk well.
- Dip each strawberry in chocolate, then transfer to a parchment paper lined baking sheet.
- , we added a little extra orange food coloring into the chocolate for a more vibrant orange. We then use a piping bag to pipe thin lines to resemble a pumpkin. Wait until the first layer of chocolate is set before piping the lines. You can speed this up by refrigerating them for a few minutes.
- , we used a toothpick to draw spooky faces onto the strawberries using semi-sweet melted chocolate.
- Add white chocolate to a heat safe bowl. Microwave in 20-30 second intervals, stirring well between each interval, until fully melted.
- Dip each strawberry in chocolate, then transfer to a parchment paper lined baking sheet.
- Wait until the chocolate is set, then use melted chocolate to secure the candy eyes to the strawberry. Pipe an "o" shape with melted chocolate for the mouth.
- Add semi sweet chocolate to a heat safe bowl. Microwave in 20-30 second intervals, stirring well between each interval, until fully melted.
- Dip each strawberry in chocolate, then transfer to a parchment paper lined baking sheet.
- Wait until the chocolate is set, then use a piping bag filled with melted white chocolate to pipe phrases like "boo" or "RIP".


0 Comments