

Halloween Cake with Eyeballs (surprisingly easy chocolate cake)
There’s a quiet magic to the kitchen at spiilled when Halloween approaches. I love transforming ordinary ingredients into a spine-chilling spectacle. This Halloween Cake with Eyeballs—a surprisingly easy chocolate cake—began as a whimsical idea, inspired by a rainy evening filled with dreams of festive treats. The aroma of rich chocolate fills the air, promising to captivate even the most mischievous guests.
The secret to its perfection lies in the boiling water, activating the cocoa powder and ensuring a tender, decadent cake that’s a joy to enjoy.
The Ingredients Behind Halloween Cake with Eyeballs
- Granulated Sugar: Provides the sweetness, but you can also use coconut sugar for a hint of caramel, or runny honey for a natural twist.
- Flour: Holds the cake structure while staying tender.
- Cocoa Powder: I used Dutch-process to deliver that deep, rich chocolate flavor we crave.
- Baking Powder and Baking Soda: Our trusty leaveners, giving the cake its delightful rise.
- Salt: A pinch to enhance all those flavors.
- Eggs: Essential for binding and adding richness to the cake. For an egg-free version, chia eggs work wonders!
- Milk: Any milk of choice will do. It adds moisture and richness to this chocolatey delight.
- Oil: Keeps our cake incredibly moist. Use your favorite kind here.
- Vanilla Extract: Adds a lovely warmth and depth, complementing the chocolate beautifully.
- Key Technique: Boiling Water: Incorporating boiling water into the batter is magic. It intensifies the chocolate flavor and creates a lusciously moist texture.
- Cream Cheese: For the frosting, it brings a delightful tanginess that balances the cake’s sweetness.
- Unsalted Butter: Adds a creamy, rich consistency to the frosting.
- Powdered Sugar: Sweetens the frosting to perfection while keeping it smooth.
- Strawberry Jam: Without chunks, it’s perfect for a slightly eerie, glossy finish on those eyeballs!
- Canned Lychees and Blueberries: Together, they create the most fun and spooky edible “eyeballs” for decoration.
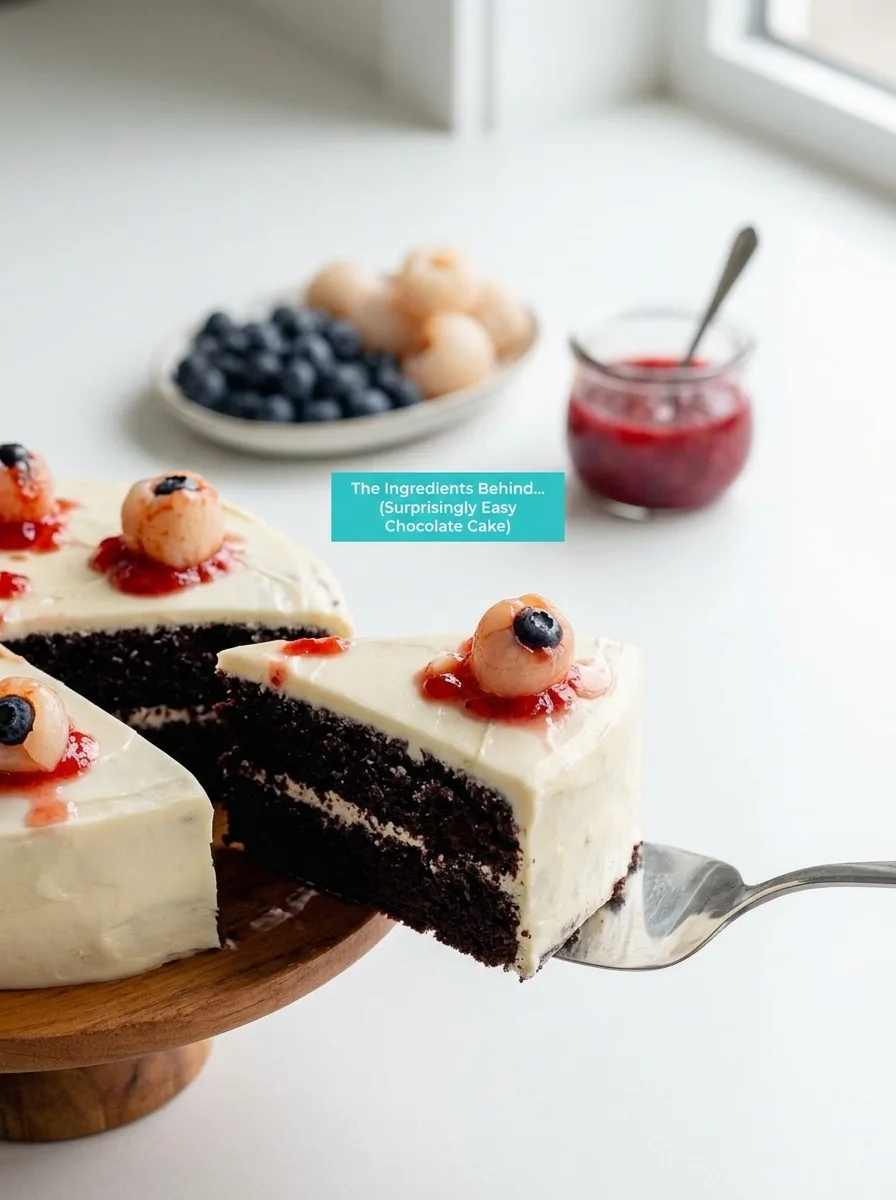
Let’s bring some fun to your Halloween spread!
Crafting Your Halloween Cake with Eyeballs
With a total time of just 180 minutes, this enchanting Halloween cake is a delightful fusion of spookiness and chocolatey richness. As we embark on this culinary adventure, let’s turn up the magic in the kitchen.
- Prepare Your Pans:
Preheat your oven to 350°F (175°C). Line the bottoms of two 8-inch round cake pans with parchment paper and grease the sides. You’ll hear a gentle hiss from the sizzling butter, welcoming you to this confectionery journey. - Mix Dry Ingredients:
In a large bowl, stir together 2 cups of sugar, 1 ¾ cups of flour, ¾ cup of cocoa, 1 ½ teaspoons each of baking powder and baking soda, and 1 teaspoon of salt. Feel those fine grains slip through your fingers, like magic gathering force. - Combine Wet Ingredients:
Add 2 large eggs, 1 cup of milk, ½ cup of oil, and 2 teaspoons of vanilla extract to the dry mixture. Stir in 1 cup of boiling water—watch as the steam embraces the rich chocolate aroma. - Bake the Cakes:
Divide the batter evenly between the pans. Bake for 25 minutes. Check for doneness with a toothpick; it should come out with some moist crumbs clinging, like a little ghost of batter. - Cool the Cakes:
Let the cakes cool in their pans for 5 minutes. Gently turn them onto a rack to cool completely—about 2 hours. Patience is key as the anticipation builds! - Make the Frosting:
In a medium bowl, beat 16 ounces of cream cheese and ¼ cup of butter together at medium speed until well combined. It may look a bit rustic and crumbly, but we’re all about character here. - Add Sweetness:
Gradually beat in 1 ⅓ cups of powdered sugar, a pinch of salt, and ½ teaspoon of vanilla until smooth. If it feels soft, chill for an hour, stirring once to maintain consistency. - Decorate the Cake:
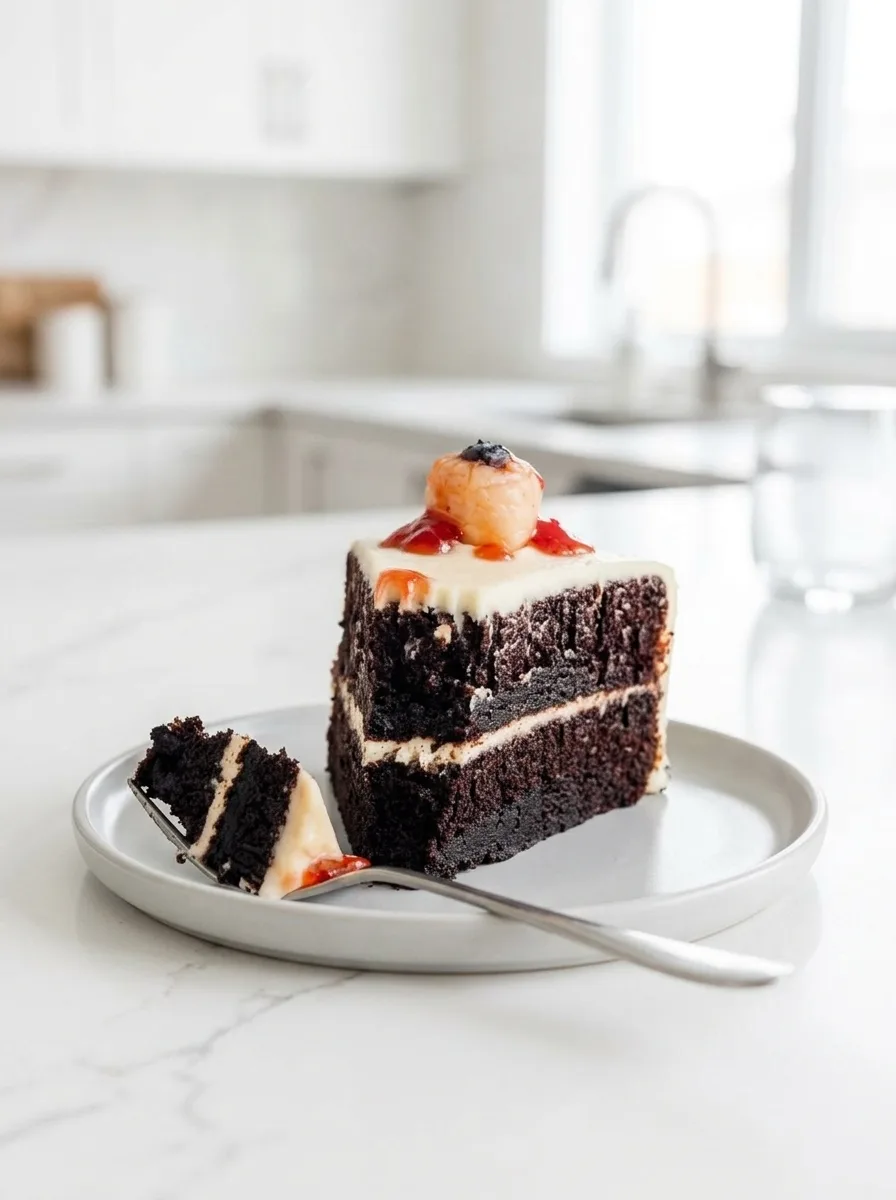
Once your cake is frosted and chilled, it’s time to get spooky. Rinse and dry the lychees. Nestle a blueberry in each to create your edible eyeballs. Top each blueberry with a touch of strawberry jam.
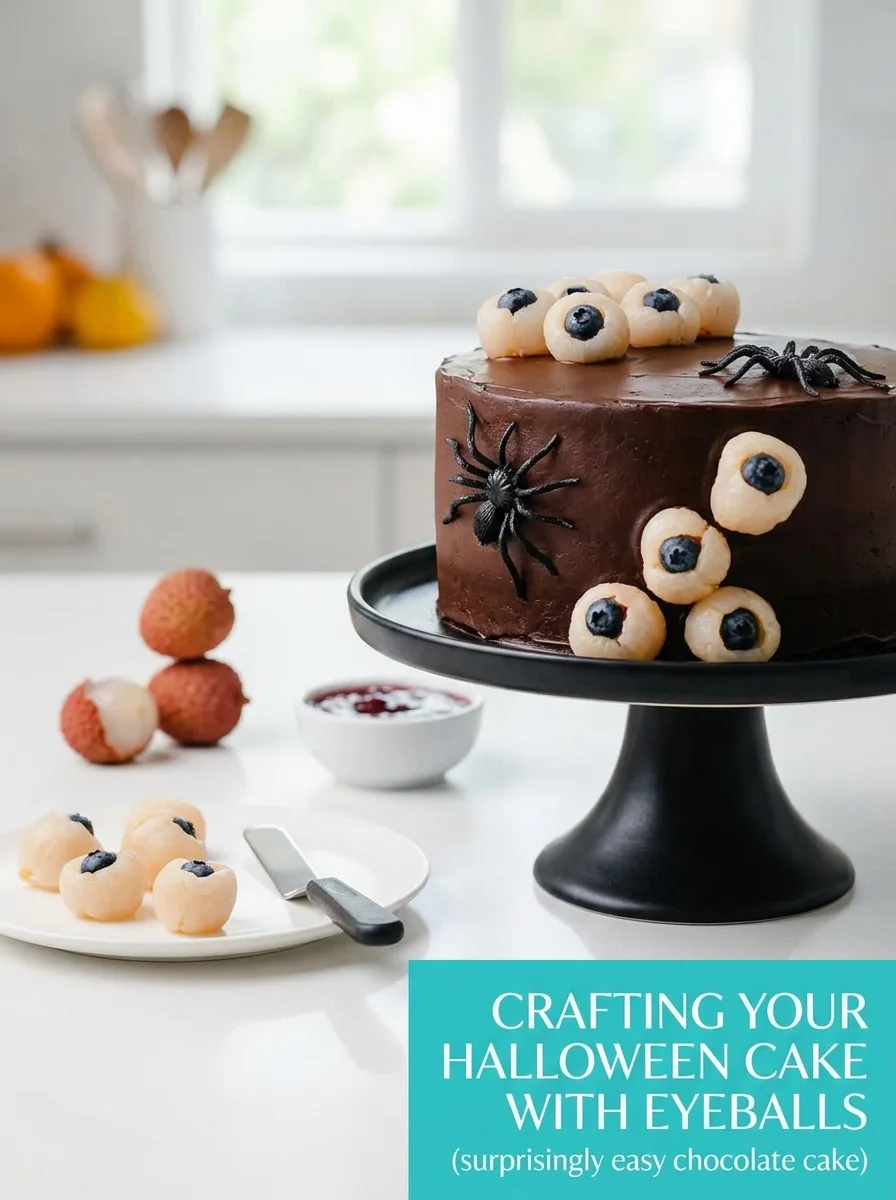
As you place those eerie eyeballs, the transformation is complete! Your guests will be positively bewitched. Enjoy every spine-tingling bite!
Spooky Twists & Tricks for Your Cake
Making this Halloween Cake with Eyeballs your own is part of the fun. Here are a few easy variations to inspire your culinary creativity:
- Flour Power: Use regular, whole wheat, or gluten-free flour, depending on what suits your pantry and dietary needs. Each type brings its own texture, so feel free to experiment!
- Egg-cellent Choices: Go traditional with eggs or opt for chia eggs for an egg-free version. Both yield a delightful cake, so whichever you choose, you’re in for a treat.
- Sweet Tooth Swap: Whether you’re using regular sugar, coconut sugar, or honey, each option sweetens the cake beautifully. Adding more powdered sugar to the frosting enhances its sweetness to your preference.
- Oil Your Way: Use your favorite type of oil—be it canola, vegetable, or coconut. Each adds a subtle layer of flavor and moisture, making the cake irresistibly tender.
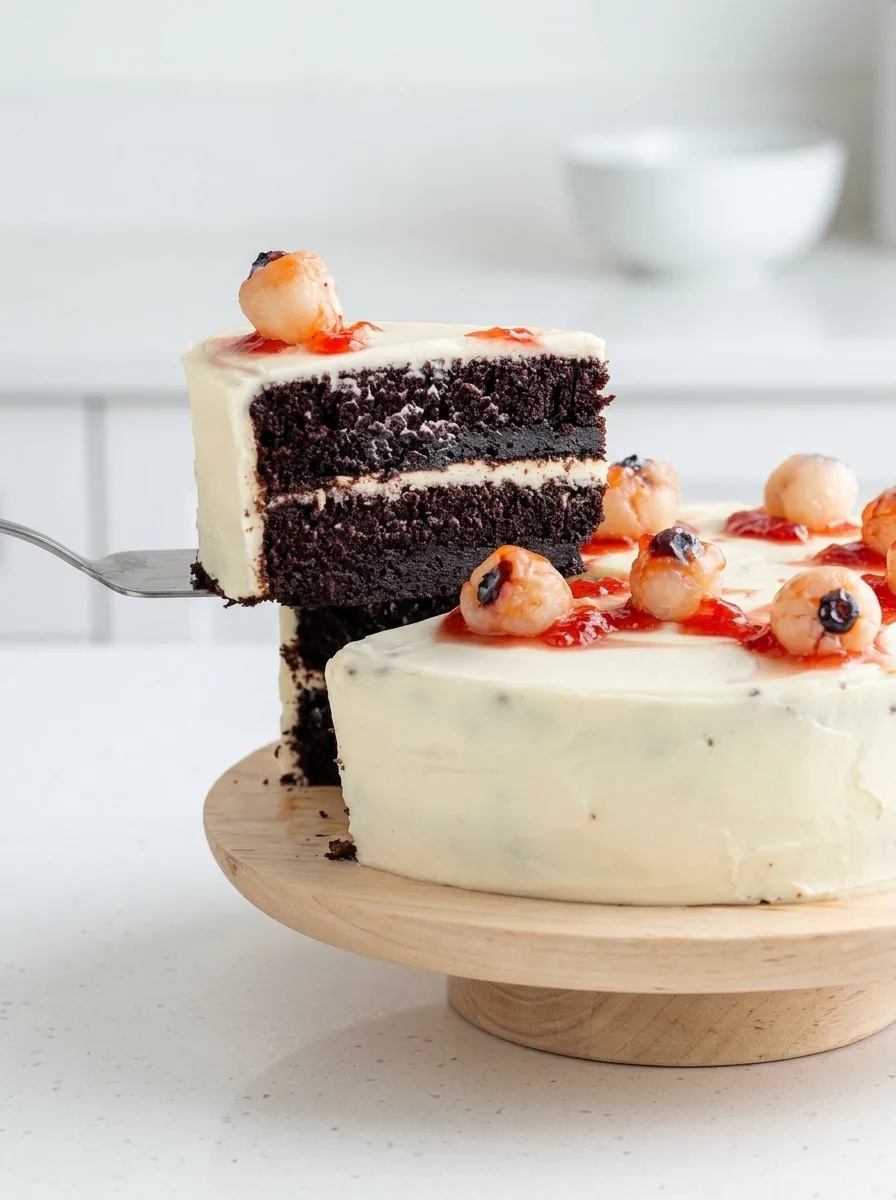
These variations allow your Halloween masterpiece to reflect what you love best. Whether you’re indulging chocolate-craving goblins or hosting a spooky soirée, this cake is ready to adapt and delight!
Keeping Those Creepy Confections Fresh
Once the Halloween festivities wrap up, you’ll want to store your cake properly to keep those ghoulish goodies fresh. In the fridge, the cake keeps well for up to four days. Just be sure to remove those eyeball decorations if you’re storing for more than a day—as fun as they are, they can get a bit funky over time. If you’re planning to freeze leftovers, take the eyeballs off first and wrap the cake slices securely in plastic wrap. They’ll stay good for a few months. Always let the cake cool completely before sealing it up to prevent any unwanted moisture from sneaking in.
To bring your cake back to life after it’s been chilling, let it sit at room temperature for about 30 minutes before serving. This gentle warming does wonders in preserving that luscious, moist texture. You don’t want to lose that rich decadence when sharing another spooky slice!
Bewitching Pairings for Your Halloween Cake with Eyeballs
As you unveil this hauntingly incredible Halloween cake, you’ll want to complement its rich, chocolatey flavor with some equally enchanting sides and garnishes. Let’s enhance the experience with a few magical pairings that will delight your taste buds.
Enchanting Side Dishes
- Vanilla Bean Ice Cream: The creamy, smooth texture and subtle sweetness provide a perfect contrast to the cake’s richness, creating a balance with every bite.
- Spiced Apple Cider: Warm and fragrant, this drink pairs beautifully with the cake’s chocolate depths. The cinnamon and apple notes add a cozy, autumnal feel.
- Roasted Pumpkin Seeds: Their crunchy, slightly salty nature brings out the sweetness in the cake while offering a playful textural contrast.
Mystical Garnishes
- Shaved Dark Chocolate: A touch of elegance, this garnish intensifies the cake’s chocolate notes and adds a satisfying, bitter contrast to the sweet frosting.
- Fresh Raspberries: Bright and tart, these berries cut through the creaminess and add a refreshing twist.
- Powdered Sugar Dusting: A whimsical sprinkle of snow-like sugar adds visual intrigue and a hint of sweetness without overpowering the cake’s deep flavors.
As you gather around with loved ones, sharing stories and bites of this enchanting cake, don’t be surprised if it becomes the star of your Halloween festivities. What pairings or garnishes would you choose to embrace the spooky spirit?
Halloween Cake with Eyeballs (surprisingly easy chocolate cake)
Ingredients
Method
- Preheat your oven to 350 °F (175 °C). Line 2 round 8" cake pans with parchment paper on the bottom and then grease the sides of the pans.
- In a large bowl, stir together the sugar, flour, cocoa, baking powder, baking soda and salt.
- Add eggs, milk, oil and vanilla.
- Mix until combined and then stir in the boiling water. The batter will be almost as thin as water.
- Divide the batter between the two pans.
- Bake for 25 minutes or until a toothpick comes out with maybe some moist crumbs, but no uncooked liquid.
- Let cool for 5 minutes in the pans, and then turn out onto a rack to cool. Let cool completely, about 2 hours, before frosting.
- In a medium mixing bowl, beat the cream cheese and butter together with an electric hand mixer at medium speed until well combined. It's okay if it looks a little crumbly.
- Gradually beat in the powdered sugar until totally combined and then beat in the salt and vanilla. If it's firm enough, frost the cake.
- If you want it firmer, refrigerate for about an hour, stirring the frosting after about 30 minutes. Don't let it chill too long before frosting your cake, though, because it gets quite firm, like a cream cheese tart filling. If that happens, just bring it to room temperature and then frost.
- The frosting firms up once refrigerated but gets softer as it sits at room temperature. I think it's best to chill the frosted cake until firm so that you can add the eyeballs + jam without worrying about the jam getting watery.
- I'd recommend decorating just a few hours before serving so that the jam doesn't start to run. I also recommend not transporting the decorated cake. It's best to transport the frosted cake and then decorate it once you get to your destination. It really only takes a few minutes.
- Rinse the lychees and pat them dry with paper towels.
- Place a blueberry in the center of the lychee and place on a paper towel-lined plate until all the eyeballs are ready. Place the eyeballs on the frosted cake (blueberry facing up).
- Spread about 1 - 1 1/2 teaspoons of jam over each eye and slightly onto the frosting. Use however many you think is enough.
- Keep chilled until ready to serve. It's fine to sit out at a party for a few hours. Store leftovers in the fridge for up to 4 days. The jam will probably get weird. I'd probably remove the decorations if you want to store it more than a day. You can also remove the eyeballs and freeze slices for a few months.


0 Comments