

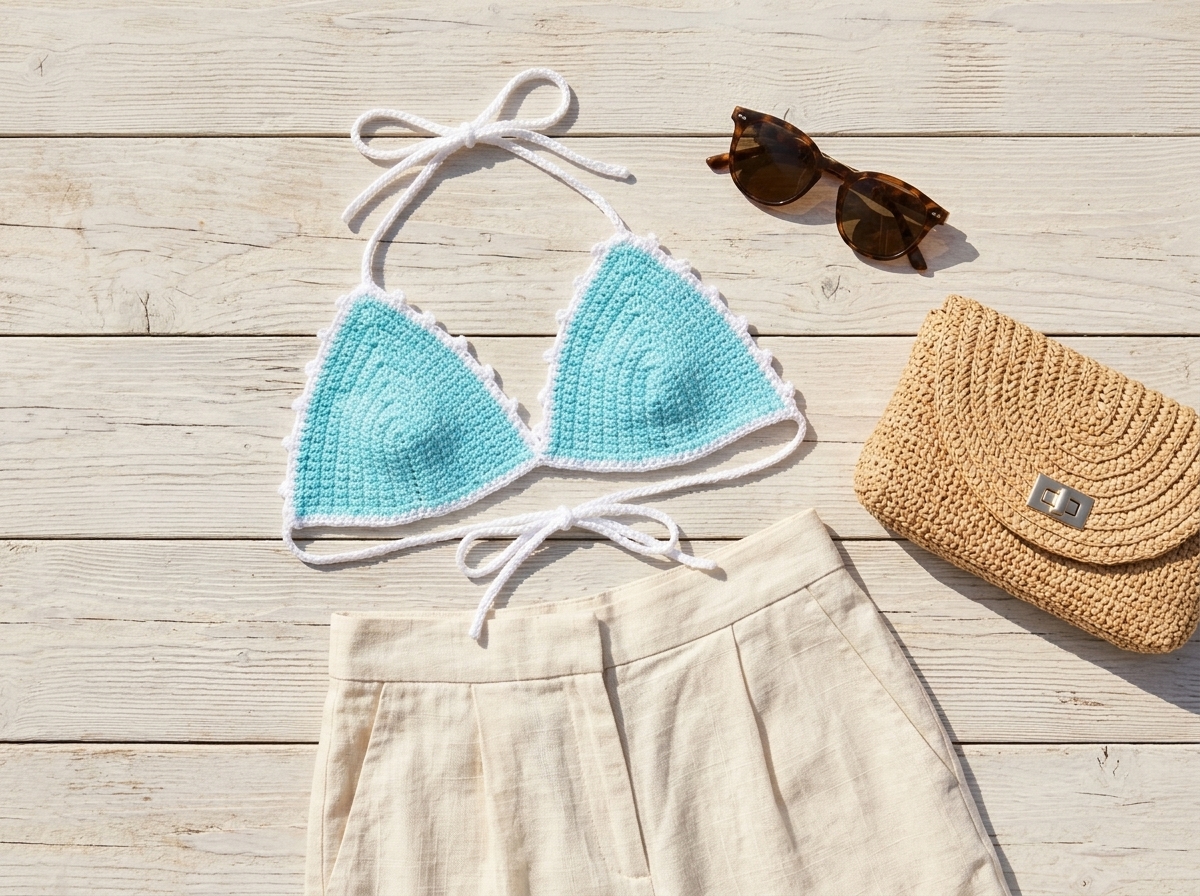
Making your own crochet bikini top is one of the fastest, most rewarding warm-weather projects a beginner can tackle. You only need one skein of breathable cotton yarn and four basic stitches. Better yet, you can finish a custom-fitted triangle halter top in a single afternoon.
Furthermore, this seamless U-row cup design adapts effortlessly to every bust size. Pair your finished piece with swim bottoms for the pool. Alternatively, style it with linen shorts and a breezy crochet shrug bolero for coastal getaways.
Why 100% Cotton Yarn Matters for a Crochet Bikini Top.
First of all, fiber choice determines how your handmade swimwear behaves around water. For ocean or pool swimming, always stitch your crochet bikini top with 100% mercerized cotton. Blends containing at least 90% cotton also perform reliably. Cotton fibers hold their stitch structure when wet and dry cleanly in the sun without sagging.
By contrast, standard acrylic yarn absorbs heavy water and stretches out of shape quickly. However, if you wear this bralette strictly as a dry festival crop top, soft acrylic works nicely. Caron Simply Soft feels especially plush and budget-friendly for dry summer outfits.
Cup Sizing, Hook Gauge, and Starting Chain Guide.
Each triangle cup grows outward from a vertical center chain in inverted U-shaped half-rounds. Consequently, adjusting coverage for your exact body is remarkably simple. Specifically, your starting chain length controls cup height, while the number of turned U-rows controls overall cup width.
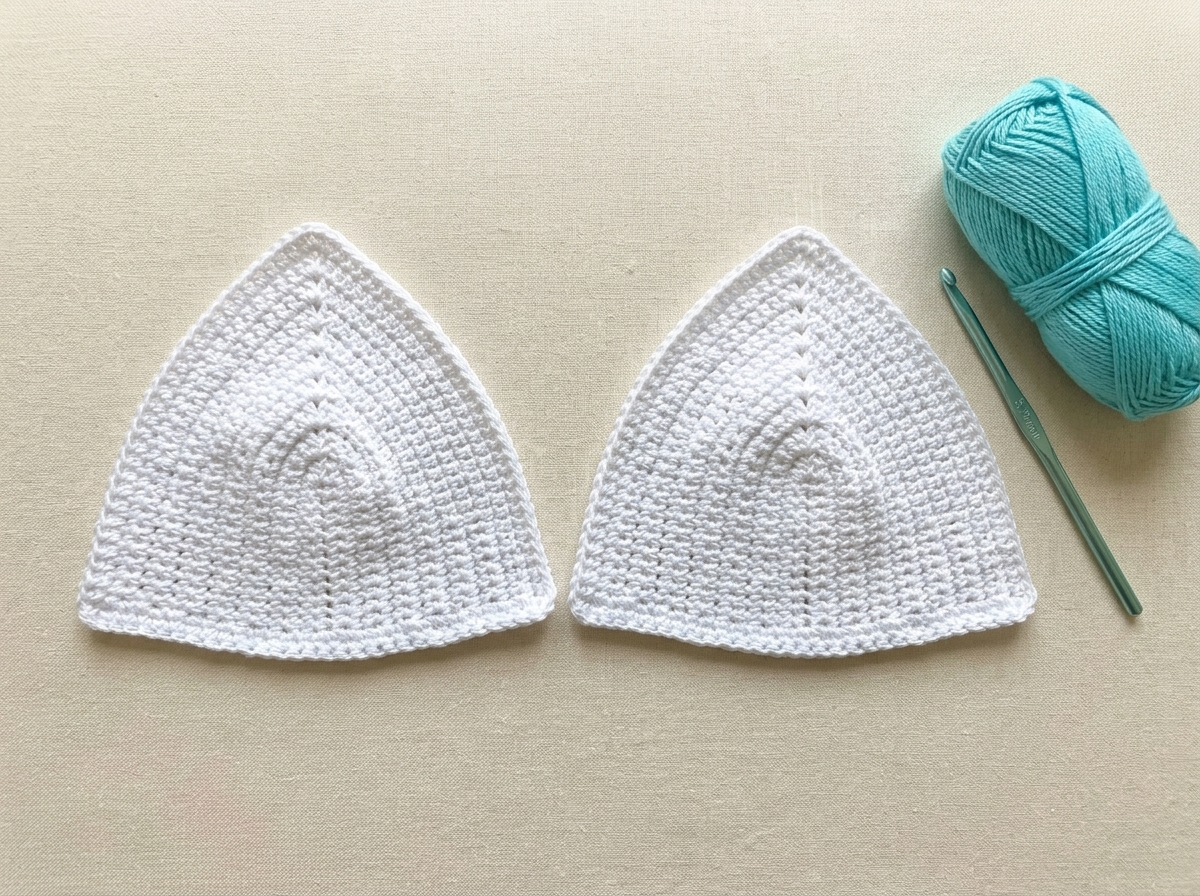
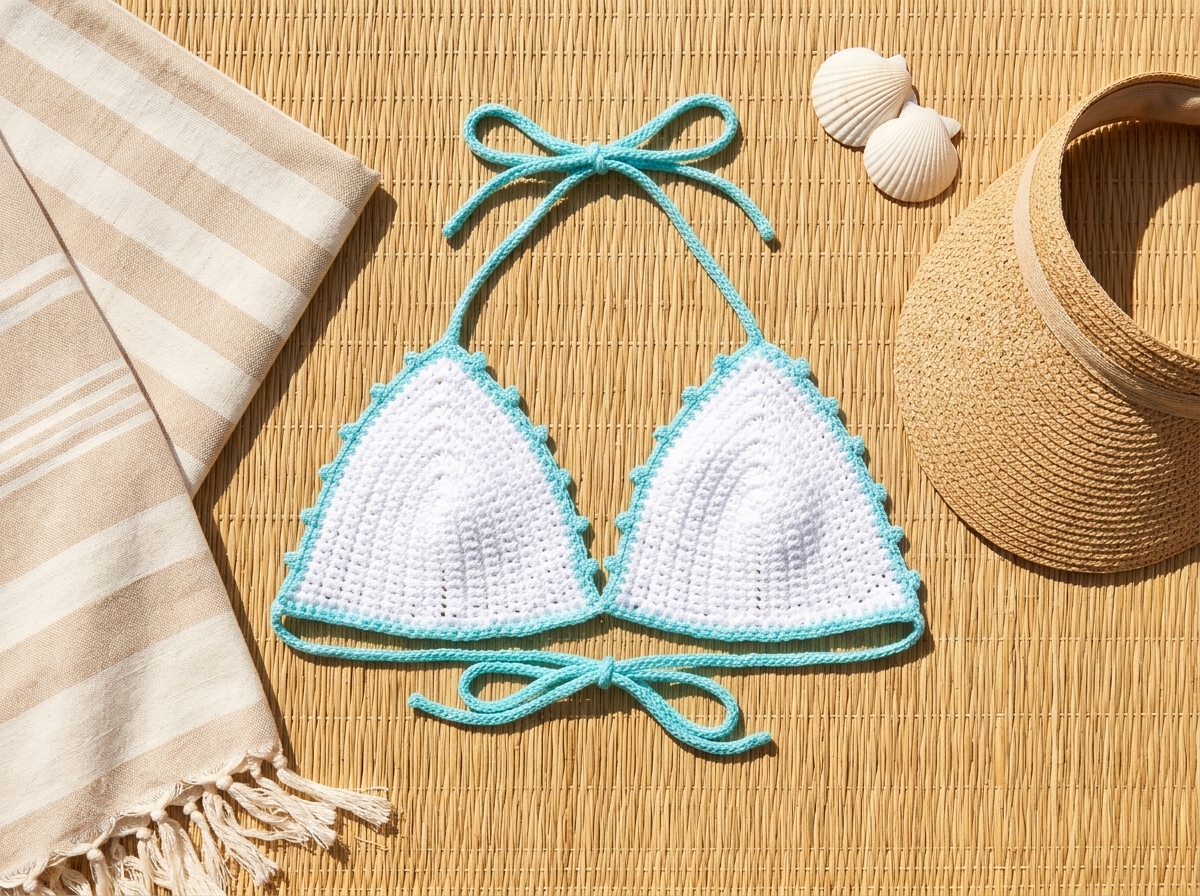
For example, starting with 10 chains creates a shorter, wider demi triangle like the aqua colorway. Meanwhile, 13 chains produces a classic taller triangle like the white sample. Furthermore, fuller busts such as DD and above can simply add 5 extra chains to the starting foundation. Then, work additional rows until coverage feels secure. Remember that the finishing border adds one final single crochet row around every edge.
| Cup Size Range. | Starting Foundation Chain. | Typical U-Row Count. | Approx. Bottom Edge Stitches. |
|---|---|---|---|
| XS / Petite Demi (AA to A). | Ch 10 (shorter, wider profile). | 10 to 12 half-rounds. | 20 to 24 sc across bottom. |
| Small / Medium Standard (B to C). | Ch 13 (standard written cup). | 13 to 14 half-rounds. | 26 to 28 sc across bottom. |
| Large (C to D). | Ch 15 to Ch 16. | 15 to 17 half-rounds. | 30 to 34 sc across bottom. |
| XL / Fuller Bust (DD+). | Ch 18 (+5 chains from standard). | 18 to 22 half-rounds. | 36 to 44 sc across bottom. |
Materials and Tools You Will Need.
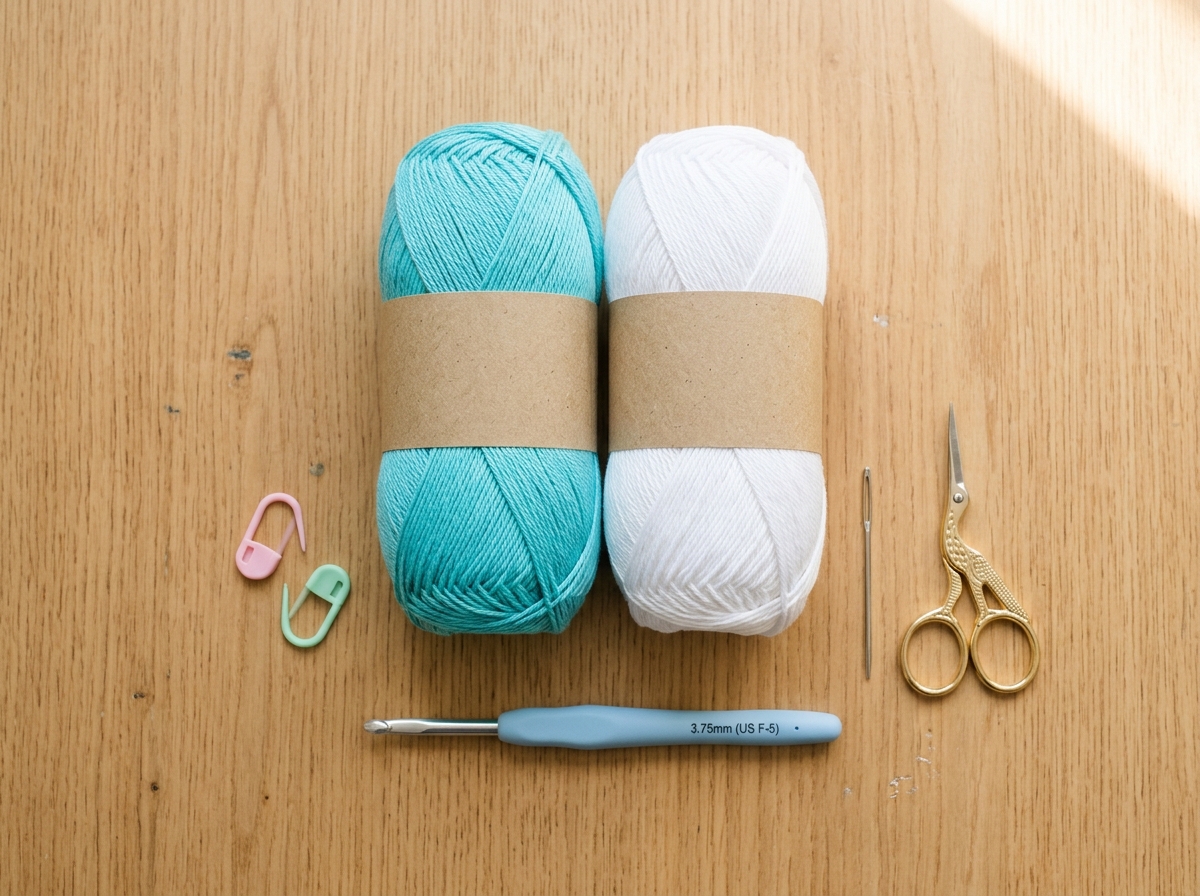
One standard skein of sleek Category 4 medium cotton yarn provides plenty of yardage for any adult size. That single skein easily covers both cups plus long halter and ribcage straps. Grab a second contrasting skein if you want two-tone picot edging like the aqua and white versions shown here.
- Yarn. 1 skein of 100% mercerized cotton Category 4 yarn (such as Lion Brand 24/7 Cotton, 100 g / 186 yds). Add a small amount of contrasting cotton yarn if you want two-tone borders and ties.
- Crochet Hook. 3.75 mm (US F-5) ergonomic crochet hook for a dense, opaque fabric. Use a 3.25 mm (US D-3) hook for tighter stitches, or a 4.50 mm (US 7) hook for looser drape.
- Tapestry Needle. Blunt metal or plastic yarn needle for weaving in tail ends securely.
- Scissors. Sharp embroidery scissors for crisp yarn cuts.
- Stitch Marker (Optional). Helpful for marking the center ch-1 peak space at the top of each cup.
Stitches and Abbreviations (US Crochet Terms).
Every part of this crochet bikini top uses beginner-friendly US crochet stitches. Review the quick stitch definitions below before tying your slip knot. If you need a matching carryall for beach days, pair this project with our crochet granny square bag.
- ST. Stitch (the next chain or stitch you work into).
- YO. Yarn over (wrap working yarn over your hook).
- CH. Chain stitch.
- SS. Slip stitch (insert hook into stitch or chain, YO, and pull straight through both loops on hook).
- SC. Single crochet (insert hook, YO, pull up a loop, YO, and pull through both loops on hook).
- Picot (p). Chain 3, insert your hook into the 1st chain, YO, and pull through for a tiny point.
Step-by-Step Crochet Bikini Top Pattern.
Part 1: Crocheting the Two Triangle Cups (U-Shaped Half-Rounds).
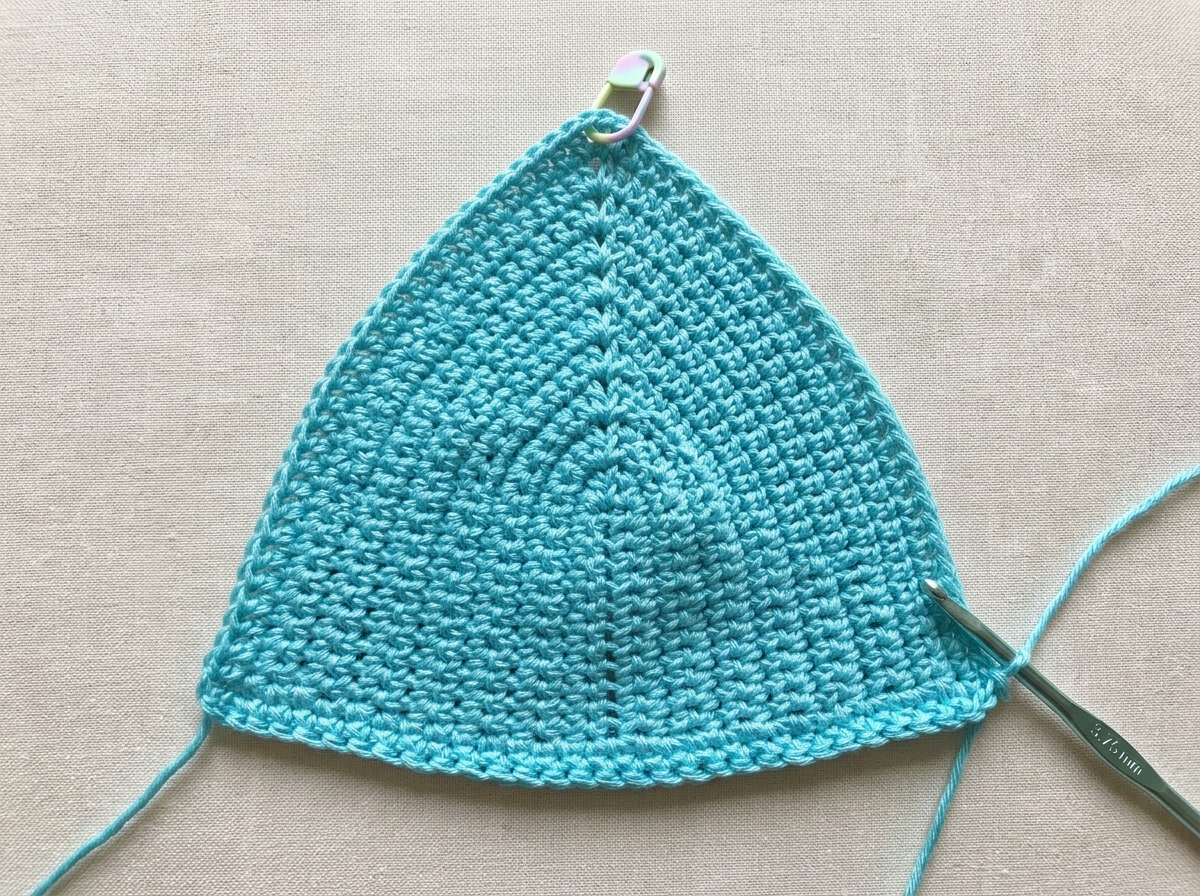
Instead of flat horizontal rows, you will crochet each cup in turned half-rounds shaped like an inverted U. First, stitch up one side of the foundation chain and work an increase at the top point. Next, stitch down the opposite underside of the chain before turning.
- Foundation Chain. Attach your main yarn color to the 3.75 mm hook with a slip knot and CH 13. Use CH 10 for a shorter, wider cup, or CH 18 for fuller bust sizes.
- Round 1 (Setup U-Row). Work 1 SC into the 2nd CH from your hook. Continue with 1 SC in each remaining chain to make 12 SC total. Into that 13th (last) chain, work 1 more SC so it holds 2 SC total. Next, CH 1 and work 2 more SC into that exact same last chain. Rotate slightly to work down the opposite underside loops of your chain. Work 12 SC down the back side until reaching your starting base, and mark the top CH-1 space if desired.
- Round 2. CH 1 and turn your work. Work 1 SC into each SC up the side until reaching the CH-1 peak space from the previous row. Into that CH-1 space, work (1 SC, CH 1, 1 SC). Next, work 1 SC into each SC down the opposite side to the bottom edge.
- Rounds 3 to 14 (or Desired Coverage). Repeat Round 2 continuously until your triangle reaches your preferred width and height. Keep in mind that the border adds one final row of SC around the entire cup. Standard Small/Medium cups typically use 14 half-rounds.
- Bottom Edge of Cup. At the end of your final half-round, CH 1 and rotate 90 degrees toward the flat bottom edge. Work 1 SC evenly into the end of each row across the bottom. For a 14-round cup, you will finish with approximately 28 SC across.
- Make the Second Cup. Fasten off, trim your yarn, and repeat Steps 1 through 5 identically so you have two matching unjoined cups.
Part 2: Joining the Cups, Straps, and Picot Border.
Now you will connect both cups, build four sturdy straps, and add crisp picot points in one continuous round. Use your main yarn color for a solid look, or switch to a contrasting color for high-impact summer trim.
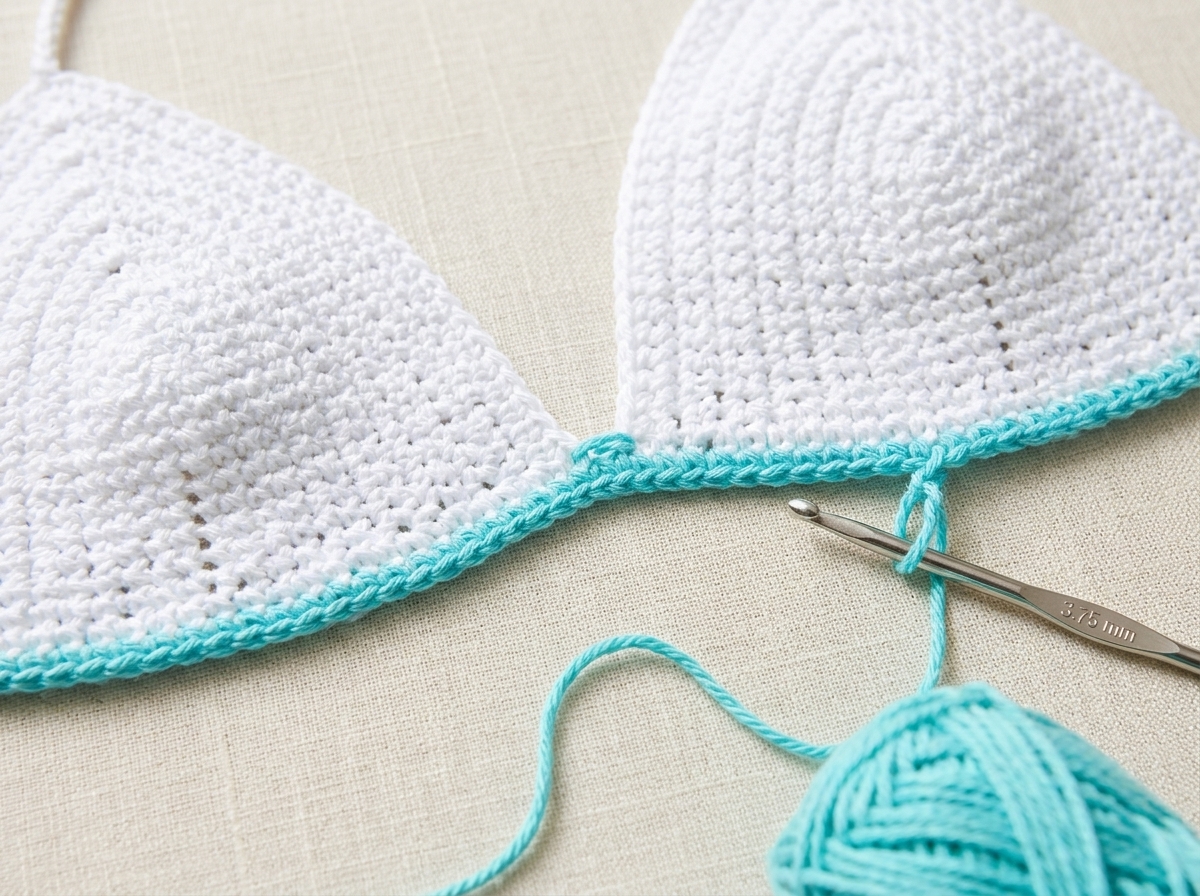
- Join Bottom Edges Across Both Cups. With right sides facing up, attach your border yarn to the bottom outer right corner of the first cup. Work 1 SC into each stitch across the flat bottom of Cup 1. At the inner corner, CH 1 and SS directly into the bottom inner corner of Cup 2. Then, work 1 SC into each stitch across the bottom of Cup 2 to its far outer corner.
- First Back Ribcage Strap (CH 75). At that outer bottom corner of Cup 2, CH 75 (adjust chain count for shorter or longer ties). Starting in the 2nd CH from your hook, SS back down every chain until returning to the cup corner.
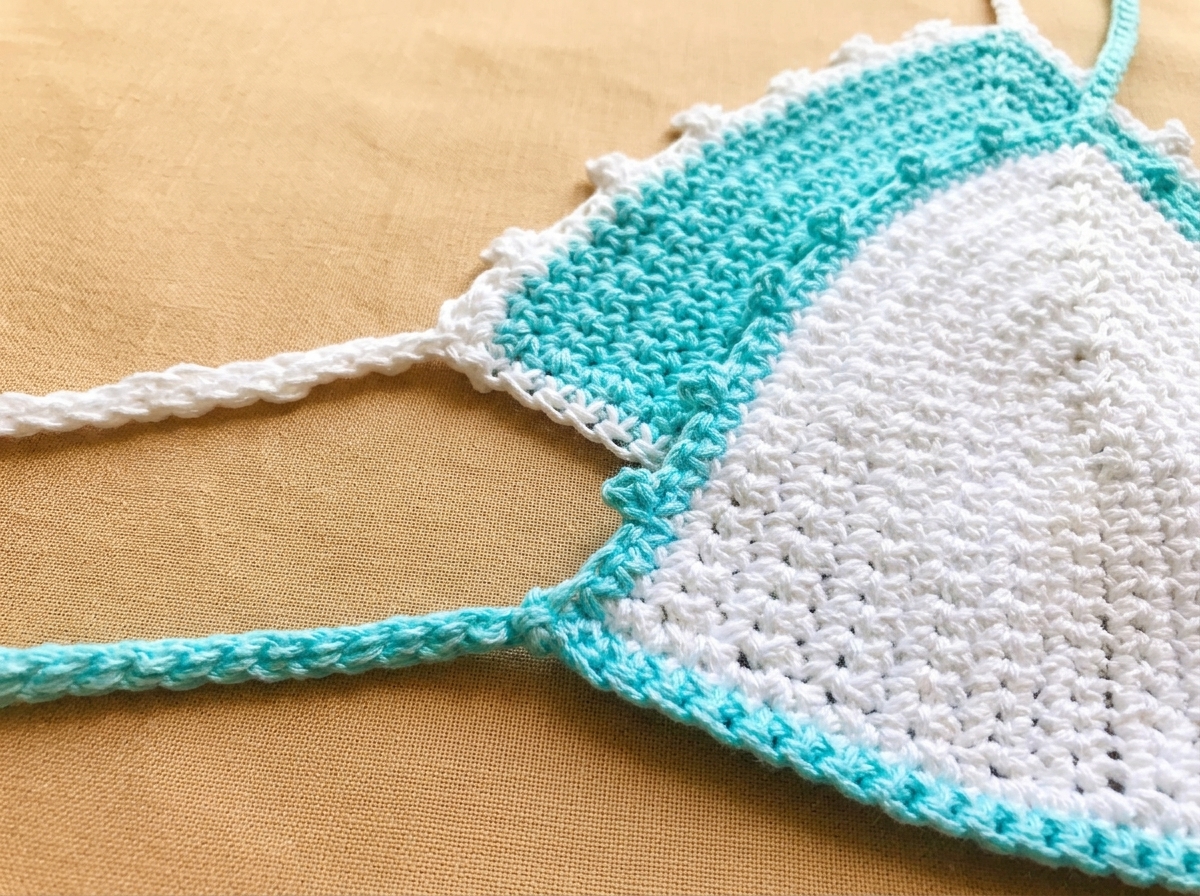
- Outside Cup Picot Border. Turning up the outer edge of Cup 2, work 1 SC in the next 3 stitches, then make 1 picot (p). Next, repeat *1 SC in the next 4 stitches, make 1 picot (p)* up to the top peak. Fewer than 4 stitches may remain before the peak (for instance, 2 or 3 SC). Simply note that exact number so you can mirror it symmetrically on the inner edge.
- First Halter Neck Strap (CH 80). At the top peak of Cup 2, CH 80 for the halter neck tie. Work 1 SS back down every chain to the first chain, then SS into the top stitch of the cup.
- Inside Cup Picot Border and Center Bridge. Work down the inner edge of Cup 2 by matching your outer top stitch count before the first picot. For example, if 3 SC sat above your top outer picot, start with 3 SC, p first. Next, repeat *4 SC, p* down to the center so every picot pair aligns at the exact same height! At the middle gap, work 1 SC directly into the CH-1 space connecting both cups.
- Border and Neck Strap on First Cup. Mirror your bottom picot spacing up the inner edge of Cup 1, repeating *4 SC, p* up to the peak. At the top peak of Cup 1, CH 80 and SS back down every chain for your second neck strap. Next, SS into the top stitch and work down the outer edge matching your top offset with *4 SC, p* repeats.
- Final Back Strap (CH 75) and Fasten Off. Back at the starting corner, CH 75 and SS back down every chain to form the fourth tie strap. Finally, SS into the very first SC of your border and fasten off. Weave all yarn tails securely inside the dense single crochet stitches.
Custom Care, Lining, and Styling Tips.
Mercerized cotton gives your finished crochet bikini top a subtle sheen and crisp stitch definition for sunny vacations. Follow these practical finishing habits so your handmade top lasts season after season.
- Tightening the Center Spine. Sometimes a tiny pinhole appears around your top increase chain on Round 1. Work your first 4 peak stitches snugly, or cinch the base loop with your tapestry needle when weaving in ends.
- Optional Swimwear Lining. Single crochet worked with a 3.75 mm hook already creates a very solid, opaque fabric. Even so, you can hand-whipstitch thin nylon-spandex swim lining triangles inside the cups for extra saltwater support.
- Rinsing and Flat Drying. After swimming in chlorine or salt water, rinse the top gently in cool fresh water. Press excess moisture into a towel without wringing, and lay flat in the shade to dry.
Frequently Asked Questions.
How much yarn does one crochet bikini top take?
One 100-gram skein (around 186 yards) of Category 4 mercerized cotton is plenty for one complete top. That single ball easily covers both cups, 80-chain neck ties, and 75-chain ribcage ties across almost any cup size.
How do I adjust this pattern for a DD or larger bust?
Increase your starting chain by 5 chains (starting with CH 18 instead of CH 13) for fuller vertical coverage. Afterward, continue repeating Round 2 until the cup spans comfortably from side to center.
Why are the straps worked with slip stitches instead of single crochet?
Working slip stitches back down each chain cord locks the cotton plies tightly together. As a result, the 80-chain halter ties resist over-stretching when tied behind your neck or wet from swimming.
Can I connect the two cups with a wider underband instead of a single row?
Yes, you certainly can! Before working the side ties and picot edging, crochet 4 to 6 rows of single crochet across the joined bottom edge. That wider band provides extra underbust stability.


0 Comments