

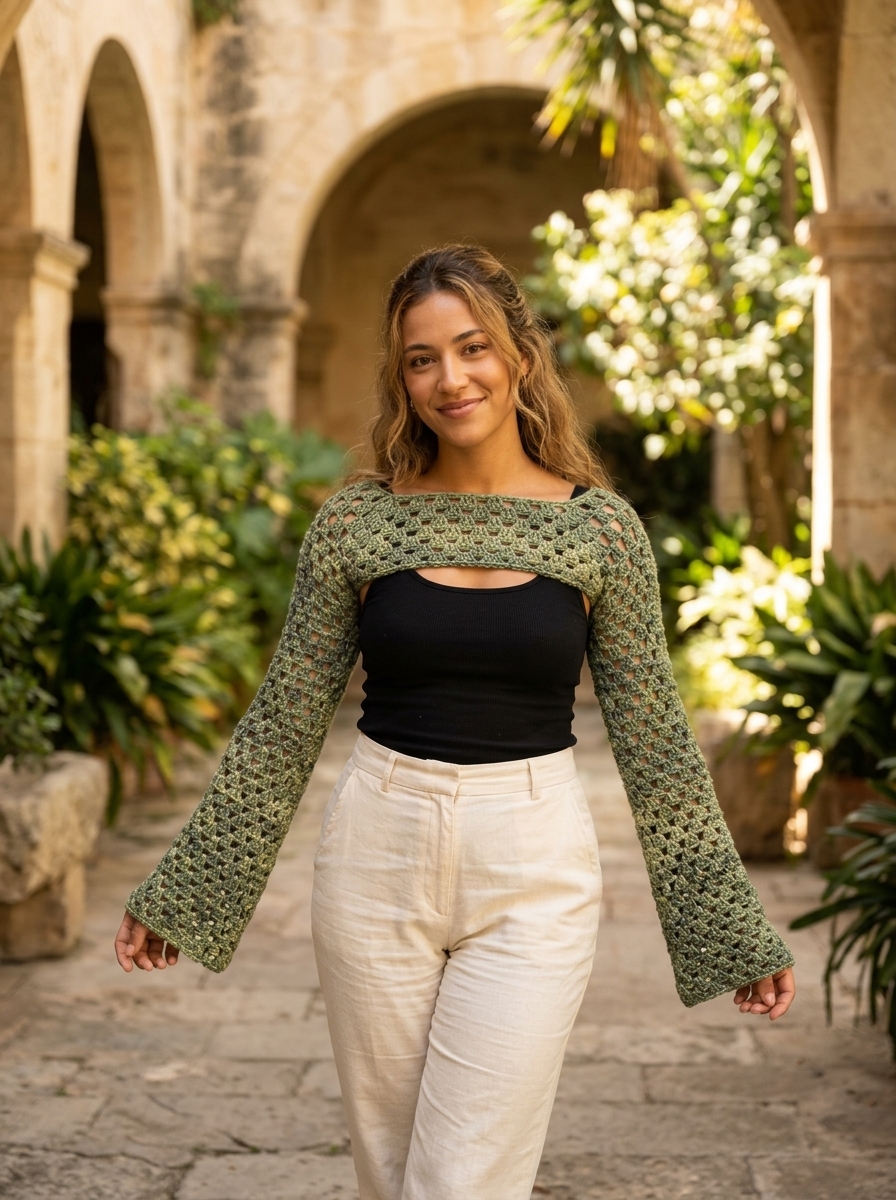
Layering a handmade crochet shrug bolero over a simple tank top or slip dress instantly transforms an everyday outfit into something whimsical and eye-catching. Better yet, this top-down raglan granny stitch design requires zero seaming and adapts effortlessly to any body size from XS to 5XL.
Instead of sewing separate front, back, and sleeve panels together, you will build one airy rectangular yoke right from the neckline down. Next, you simply pinch the corners under your arms, bridge the armholes in a single round, and work long, relaxed sleeves straight down to your wrists.
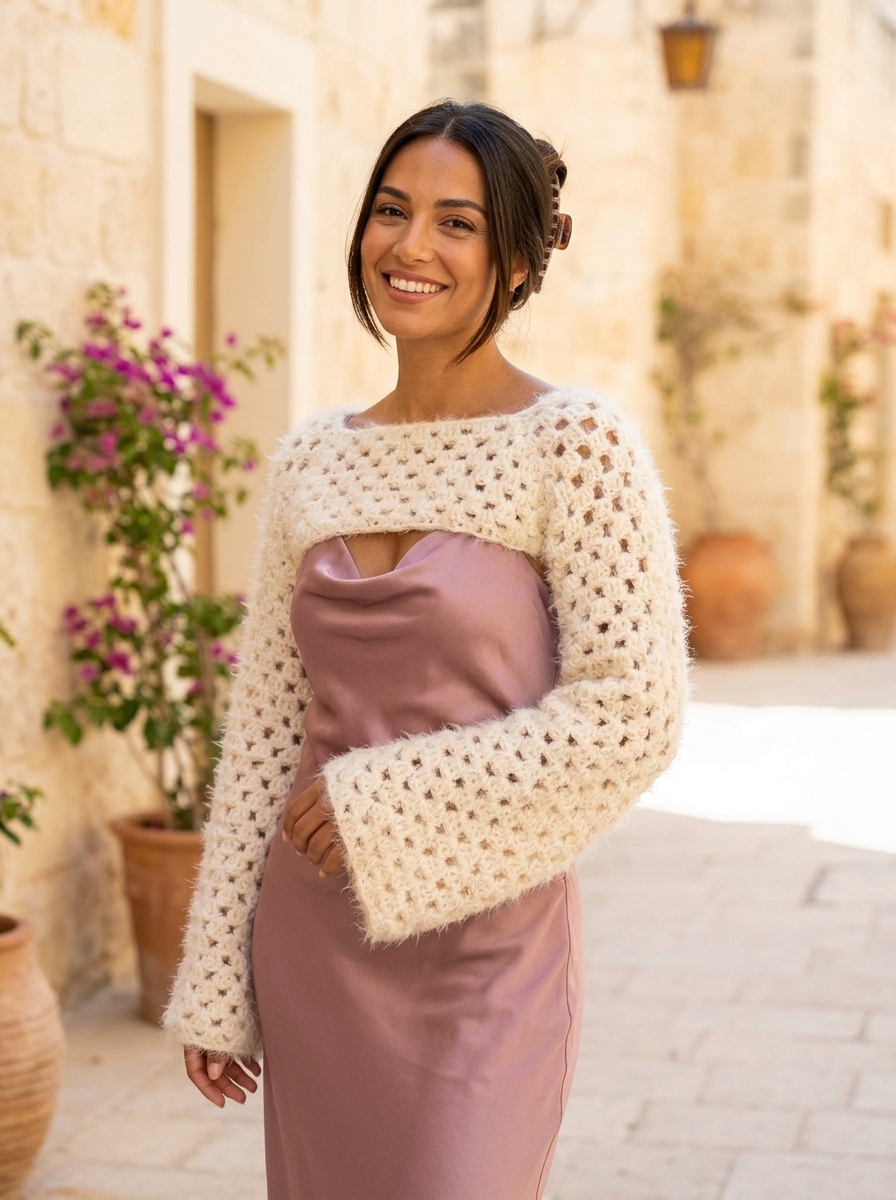
Why Makers Love This Top-Down Crochet Shrug Bolero.
First of all, traditional sweater patterns often intimidate beginners with complex armhole shaping and tedious mattress-stitch seams. Fortunately, this crochet shrug bolero relies entirely on classic three-double-crochet granny clusters worked into wide chain spaces. Because you insert your hook into open spaces rather than tight stitch tops, even fuzzy novelty yarns glide smoothly on a 6.00 mm hook.
Furthermore, top-down raglan construction lets you try the piece on as you go. Consequently, you never have to guess whether the shoulders or armholes will fit comfortably. Once the four mitered corners meet neatly beneath your underarms, your custom yoke is ready for sleeves. If you enjoy approachable wearable layers, explore our beginner crochet cardigan patterns next.
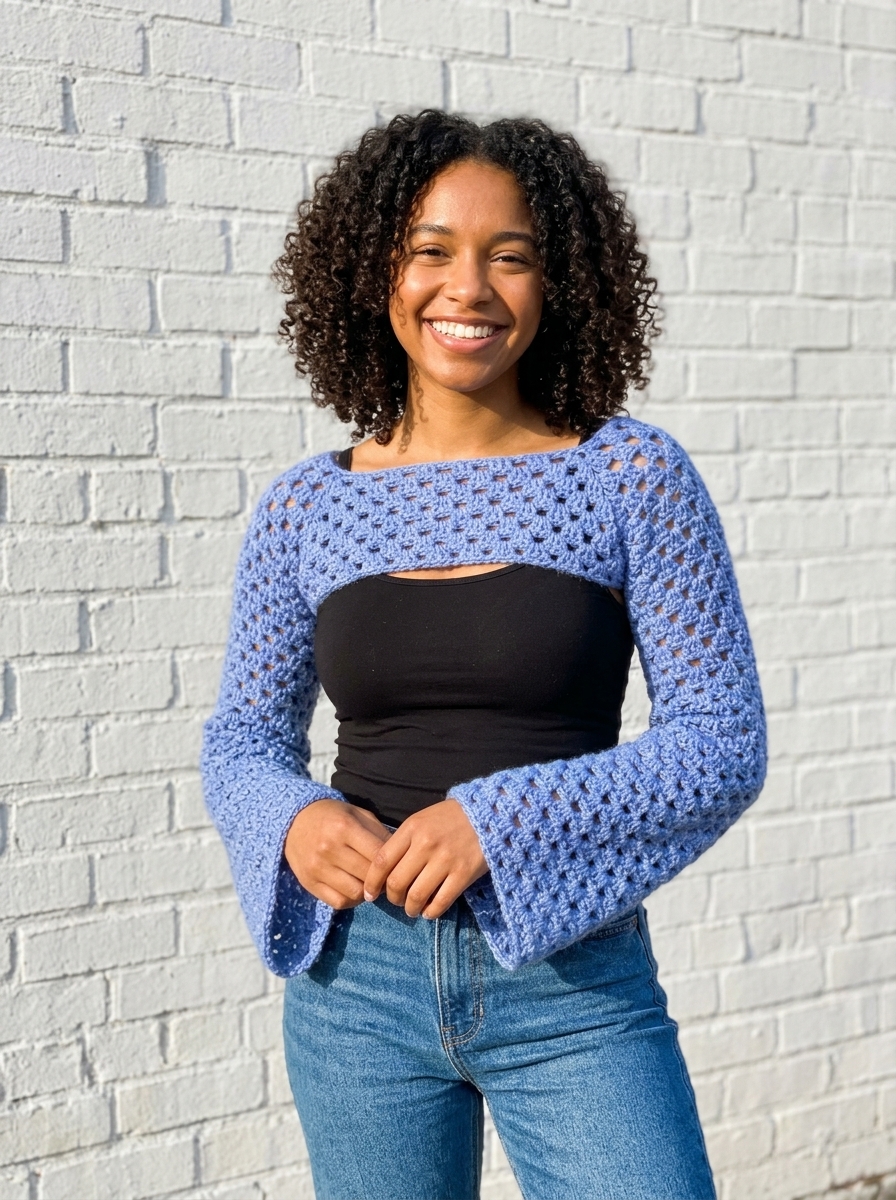
Sizing, Gauge, and Yarn Yardage Chart.
Before starting your foundation chain, crochet a quick flat swatch in granny clusters to verify your tension. Specifically, a four-inch square laid flat should measure four double crochet clusters wide by four cluster rows tall. Matching this gauge ensures that the 72-chain neckline sits gracefully across your collarbones without slipping off your shoulders.
Moreover, standard medium weight yarn amounts vary slightly depending on fiber loft and sleeve length. The table below lists approximate gram weights and yardage estimates for standard Category 4 medium worsted yarn across adult sizes XS through 5XL.
| Adult Size. | Approx. Yarn Weight Needed. | Estimated Worsted Yardage. | Typical Yoke Rounds Before Split. |
|---|---|---|---|
| XS / S. | 300 grams. | 550 to 660 yards (500 to 600 m). | 6 rounds (try on to confirm). |
| Medium (M). | 350 grams. | 640 to 770 yards (585 to 705 m). | 7 to 8 rounds. |
| Large / XL. | 400 grams. | 730 to 880 yards (670 to 805 m). | 8 to 10 rounds. |
| 2XL. | 450 grams. | 825 to 990 yards (755 to 905 m). | 10 to 11 rounds. |
| 3XL / 4XL. | 500 grams. | 915 to 1,100 yards (835 to 1,005 m). | 12 to 13 rounds. |
| 5XL. | 550 grams. | 1,000 to 1,210 yards (915 to 1,105 m). | 14 or more rounds. |
Materials and Tools You Will Need.
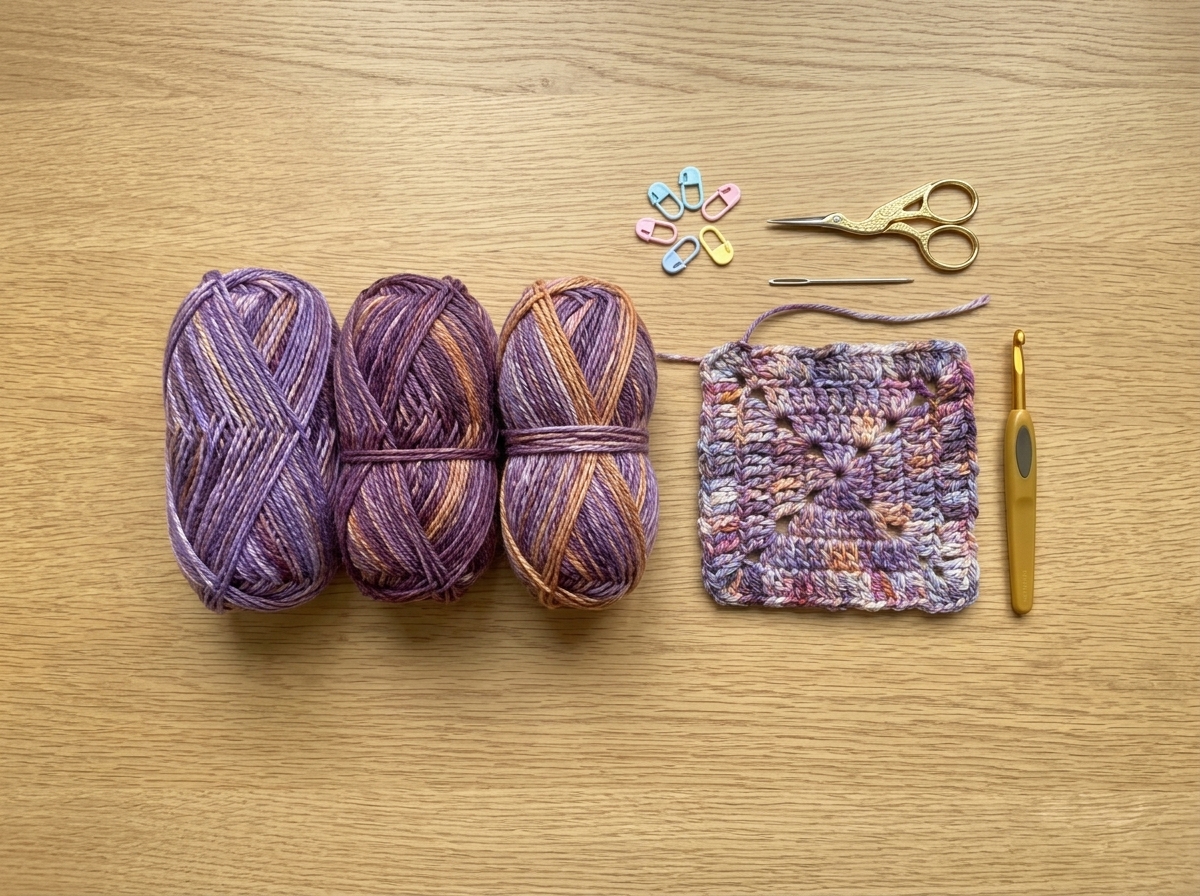
Gathering the right tools beforehand makes stitching your crochet shrug bolero smooth and relaxing. In addition, choosing a soft, drapey worsted yarn gives the cropped chest band and bell sleeves an effortless, fairy-inspired flow.
- Yarn. Category 4 medium worsted or aran weight yarn (300 g to 550 g depending on size). Hand-dyed merino worsted, blown alpaca blends like DROPS Air, brushed eyelash yarn, or soft acrylic worsted all work beautifully.
- Crochet Hook. 6.00 mm (US J-10) ergonomic crochet hook for airy drape and quick cluster stitches.
- Darning Needle. Blunt-tip metal or plastic tapestry needle for weaving in loose yarn tails securely.
- Scissors. Sharp embroidery or yarn shears for clean trims after fastening off each sleeve.
- Stitch Markers (Optional). Locking markers help track the first stitch of each round if you are brand new to turned rounds.
Stitches, Abbreviations, and Pattern Notes.
This pattern uses standard US crochet terminology throughout every round. Review the stitch abbreviations below before casting on your slip knot. If you already love cluster motifs from projects like our crochet granny square bag, these repeats will feel immediately familiar.
- Ch. Chain stitch.
- St(s). Stitch or stitches.
- Sl st. Slip stitch.
- Dc. Double crochet.
- Sc. Single crochet (optional for tidying neckline edges).
- Sk 2 ch. Skip two foundation chains.
- Ch space. Open chain-1 side space or chain-2 corner space.
- Rnd(s). Round or rounds.
- Dc Cluster. Work 3 double crochet stitches into the exact same chain or chain-1 space.
- Dc Cluster Corner (Increase). Work 1 dc cluster (3 dc), ch 2, and 1 more dc cluster (3 dc) all into the same corner ch-2 space.
Essential Construction Notes.
- Gauge Check. 4 inches by 4 inches (10 cm by 10 cm) laid flat equals 4 dc clusters wide by 4 dc cluster rows tall.
- Turning Chain Rule. Your beginning ch 2 always counts as the first double crochet stitch of the round. Therefore, ch 2 plus 2 dc worked into the starting space completes your very first 3-dc cluster.
- Stitch Placement. Always work your double crochet clusters directly into the open chain spaces rather than into the tops of stitches, unless a step states otherwise.
- Turn Every Round. Beginning in Round 2, you will turn your work after every slip-stitch join on both the yoke and sleeves. Consequently, your seams stay straight instead of twisting diagonally.
Step-by-Step Crochet Shrug Bolero Instructions.
Foundation Chain and Round 1: Rectangular Raglan Yoke Setup.
Start by chaining 72 loosely with your 6.00 mm hook. Although a 72-chain loop looks generous at first glance, it frames the collarbones cleanly and fits virtually every adult size once worked at gauge.
- Join the Ring. Carefully align your 72 chains so nothing twists. Insert your hook into the very first chain and work a sl st to form a wide ring.
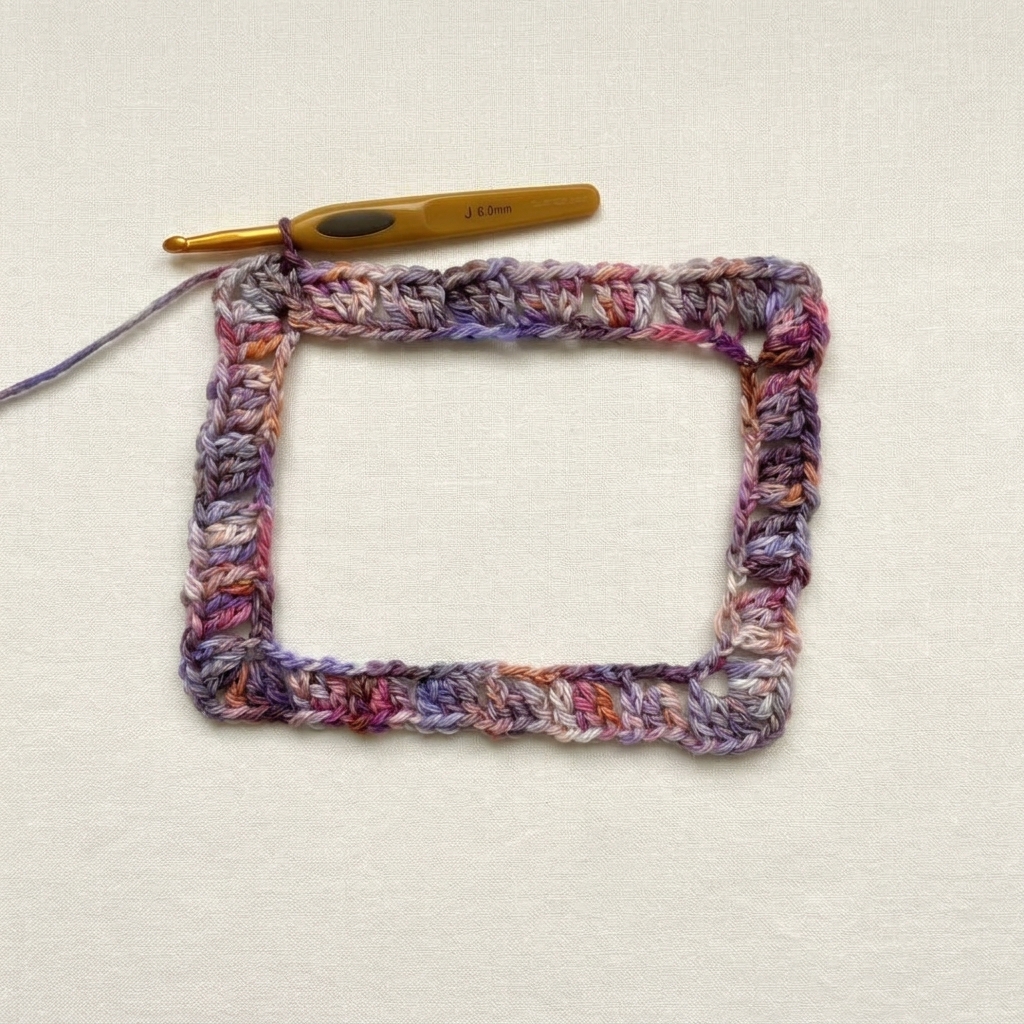
- First Corner. Ch 2 (counts as your first dc), then work 2 more dc into that same first chain to complete your opening cluster. Next, ch 2 and work 1 full dc cluster (3 dc) into that exact same chain. Your 1st dc cluster corner is now complete.
- Left Shoulder Side (4 Clusters). *Ch 1, sk 2 ch, and work 1 dc cluster into the next ch.* Repeat from * to * 3 more times so you have 4 side clusters along the short shoulder edge.
- Second Corner. Ch 1, sk 2 ch, and work (1 dc cluster, ch 2, 1 dc cluster) all into the next ch.
- Front Panel Side (6 Clusters). *Ch 1, sk 2 ch, and work 1 dc cluster into the next ch.* Repeat from * to * 5 more times so you have 6 side clusters spanning the chest edge.
- Third Corner. Ch 1, sk 2 ch, and work (1 dc cluster, ch 2, 1 dc cluster) all into the next ch.
- Right Shoulder Side (4 Clusters). *Ch 1, sk 2 ch, and work 1 dc cluster into the next ch.* Repeat from * to * 3 more times to form 4 matching shoulder clusters.
- Fourth Corner. Ch 1, sk 2 ch, and work (1 dc cluster, ch 2, 1 dc cluster) all into the next ch.
- Back Panel Side (6 Clusters) and Join. *Ch 1, sk 2 ch, and work 1 dc cluster into the next ch.* Repeat from * to * 5 more times. Finally, ch 1, skip the last 2 remaining chains, and sl st into the top of your beginning ch 2 (or into the snug loop right underneath that chain).
Rounds 2 to 6+: Expanding the Raglan Yoke to Fit Your Size.
Now you will grow all four sides evenly by adding one extra cluster per side on every round. Turning your piece after each join keeps the granny texture balanced on both the right and wrong sides.
- Start Round 2. Turn your work and ch 2. Work 2 more dc into that same ch-1 space right beneath your hook to complete your first cluster.
- Work Sides and Corners. Ch 1 and work 1 dc cluster into every ch-1 space along the side until you reach a corner ch-2 space. Into the corner ch-2 space, work 1 dc cluster corner (3 dc, ch 2, 3 dc), chaining 1 between every cluster around the rectangle.
- Close Round 2. Continue working 1 dc cluster into each side space and 1 dc cluster corner into each of the remaining corner ch-2 spaces around. End with ch 1 and sl st into the first stitch (beginning ch 2) of the round.
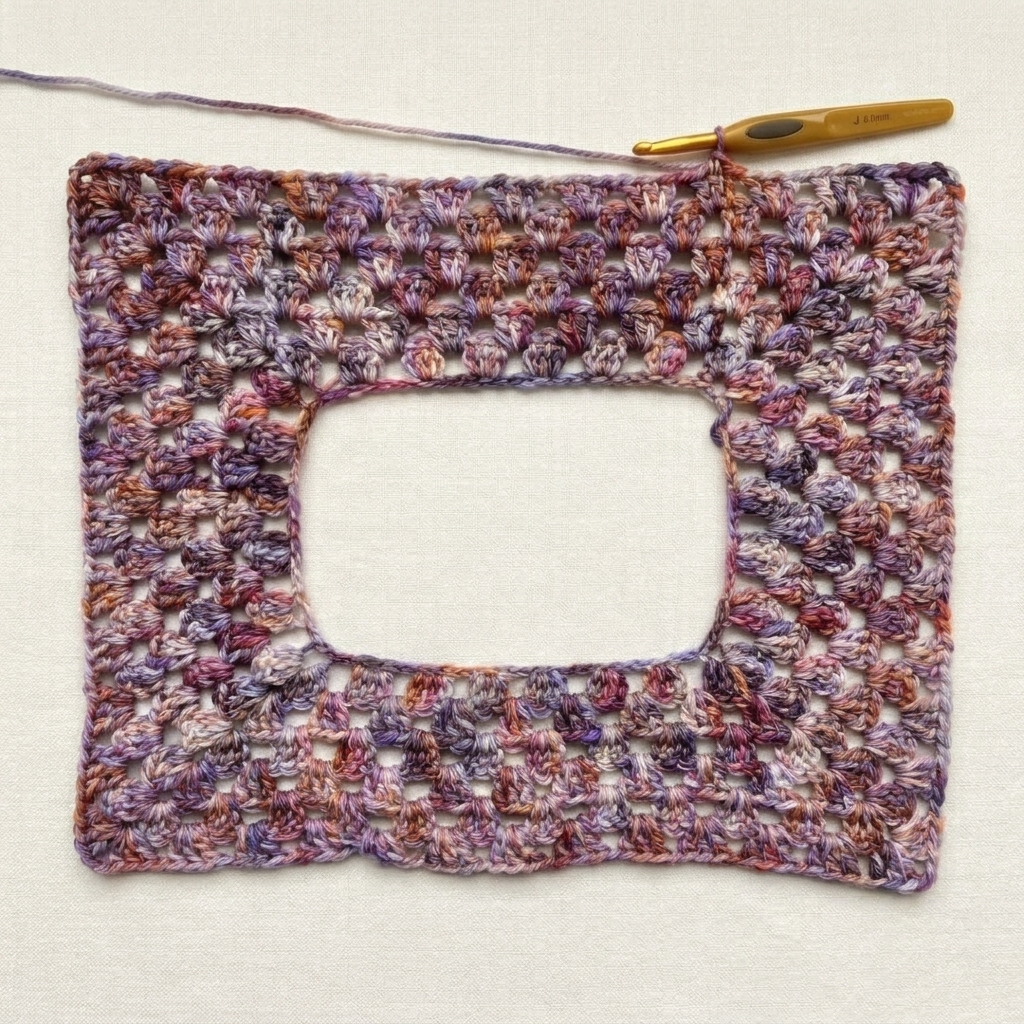
- Repeat for Your Custom Size (Rounds 3 and Beyond). Repeat Round 2 as many times as needed for your body measurements. For example, sizes XS and S typically require 6 total rounds, whereas Medium through 5XL require 7 to 14+ rounds.
Checking Your Custom Fit Under the Arms.
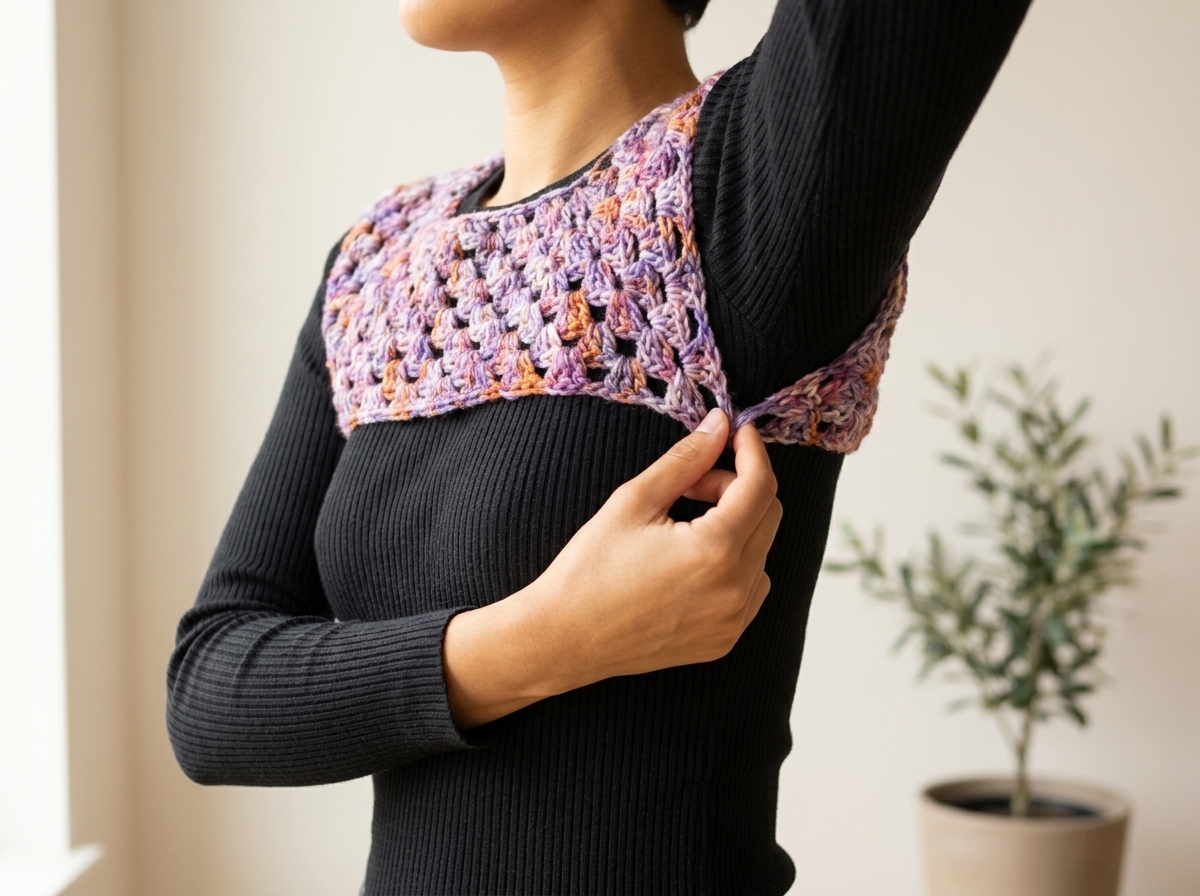
Slip the rectangular yoke over your head so the two shorter sides drape over your shoulders and the two longer sides rest across your upper chest and upper back. Next, reach under one arm and gently pinch the front corner ch-2 space and back corner ch-2 space together.
If both corners meet comfortably beneath your armpit without pulling across your bust or pinching your underarm, stop adding increase rounds. Conversely, if the corners feel tight or barely touch, simply crochet one or two additional repeats of Round 2 and test the fit again.
Round 7: Connecting the Corners Under the Arms (Armhole Split).
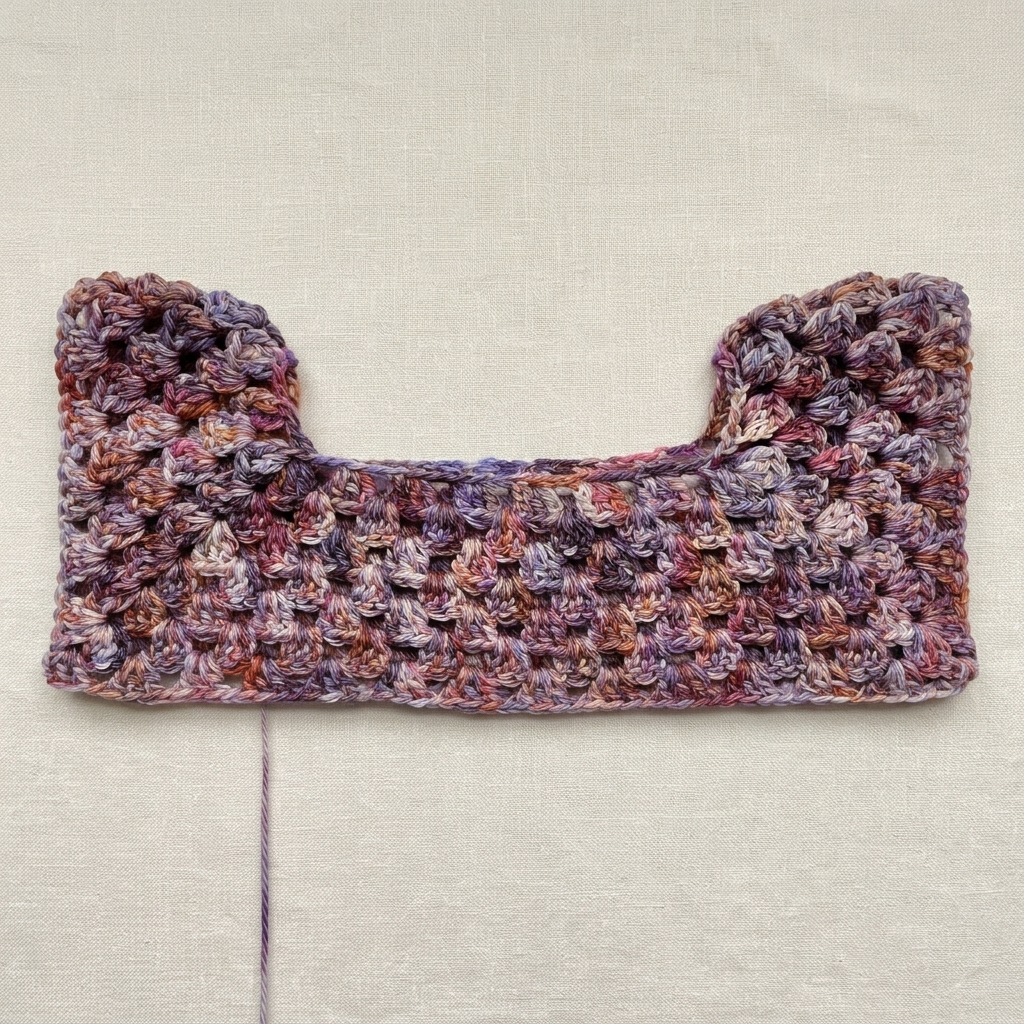
Once your yoke corners reach comfortably beneath your arms, this joining round bridges the front and back panels using a neat double-crochet-two-together stitch across each underarm. For size XS/S, this happens on Round 7; for larger sizes, work this step on whichever round follows your final yoke expansion.
- Begin the Joining Round. Turn your work, ch 2, and work 2 more dc into the same space. Continue working (ch 1, 1 dc cluster) into each ch-1 space along the panel until you arrive at the first corner ch-2 space.
- Start First Corner Half-Cluster. Ch 1 and work 2 dc into that corner ch-2 space. Next, start HALF of a double crochet in the same corner space: yarn over, insert your hook, pull up a loop, yarn over, and pull through 2 loops, then STOP with 2 loops still on your hook.
- Bridge Across to Next Corner. Fold the shoulder section in half and skip all dc clusters along the shoulder edge completely. Yarn over, insert your hook directly into the NEXT corner ch-2 space, pull up a loop, yarn over, and pull through 2 loops (3 loops now sit on your hook). Yarn over once more and pull through all 3 remaining loops on your hook.
- Finish First Armhole Bridge. Work 2 more dc into that second corner ch-2 space. Your front and back corners are now seamlessly locked together, forming your first armhole opening!
- Form Second Armhole and Finish Body. Work (ch 1, 1 dc cluster) into every ch-1 space across the next panel until reaching the third corner ch-2 space. Repeat Steps 2 through 4 across the third and fourth corners to form your second armhole. Finally, work (ch 1, 1 dc cluster) into every remaining ch-1 space to the end of the round, ch 1, and sl st into the beginning ch 2.
- Fasten Off or Lengthen Torso. Cut yarn and fasten off for the classic high-cropped bolero silhouette. Alternatively, before cutting your yarn, work 1 to 3 extra even rounds around the lower chest band if you prefer slightly more coverage.
Sleeves Rounds 1 to 32: Working Long Granny Cluster Sleeves.
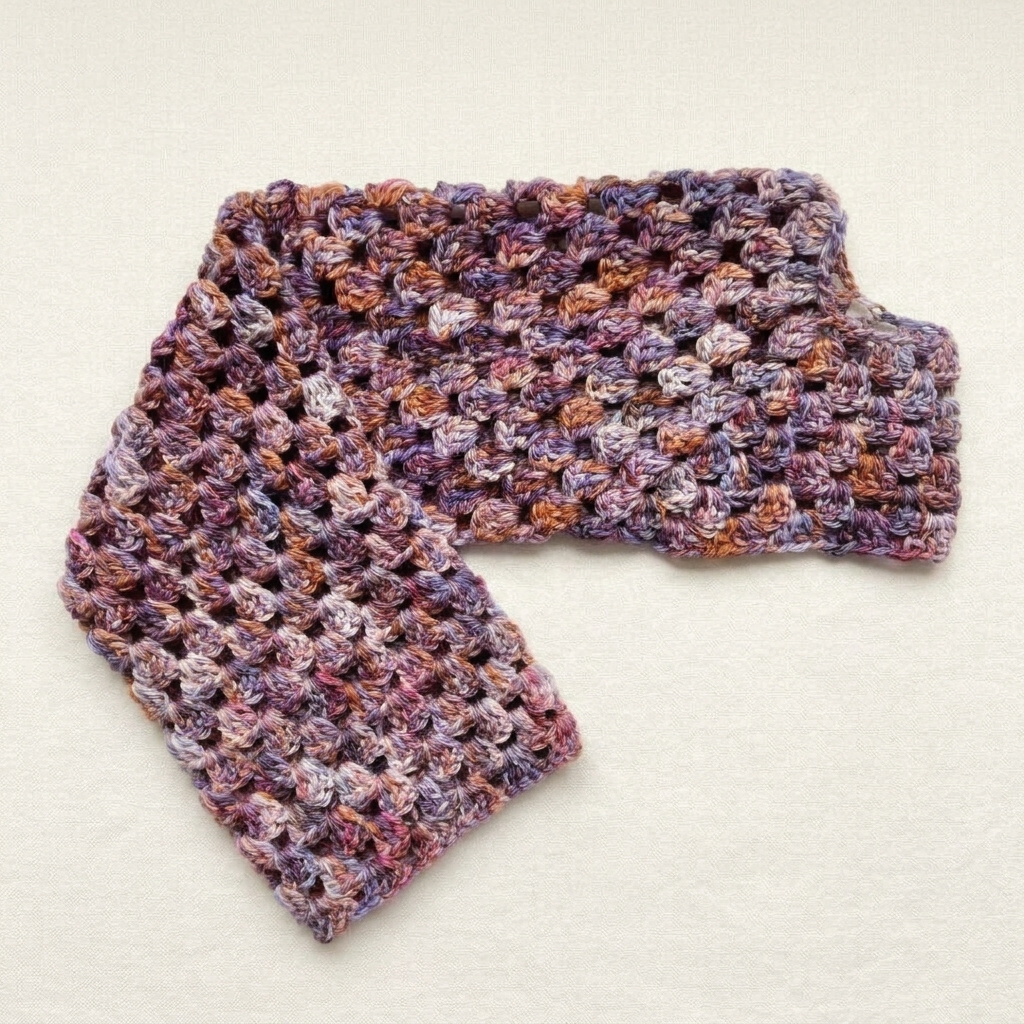
With both armholes established, you will now crochet two identical tube sleeves straight down in turned granny rounds. Because there are no decreases, the sleeves drape into a relaxed, romantic bell cuff over your hands.
- Sleeve Round 1. Attach your yarn into any ch-1 space around either armhole opening (joining near the underarm hides the seam neatly). Ch 2 and work 2 more dc into that same space for your first cluster. *Ch 1, work 1 dc cluster into the next ch space* around the entire armhole ring, placing 1 cluster into the underarm join space if needed to keep spacing even. Finish with ch 1 and sl st into the first stitch (ch 2) of the round.
- Sleeve Round 2. Turn your work, ch 2, and work 2 more dc into that same ch space. *Ch 1, work 1 dc cluster into the next ch space* all the way around the sleeve. Ch 1 and sl st into the first stitch of the round.
- Sleeve Rounds 3 to 32 (Custom Length). Repeat Sleeve Round 2, turning your work at the start of every single round, until you complete 32 rounds total. Feel free to slip your arm inside at Round 25 to customize bracelet-length, wrist-length, or extra-long dramatic sleeves.
- Second Sleeve and Finishing. Fasten off after Round 32, leaving a 6-inch yarn tail. Attach yarn to the opposite armhole and repeat Sleeve Rounds 1 through 32 so both sleeves match identically. Thread every yarn tail onto your darning needle, weave securely back and forth through adjacent cluster bases, and trim flush.
Custom Styling, Yarn Ideas, and Pro Tips.
Choosing different textures completely changes the personality of your finished crochet shrug bolero. For example, brushed alpaca or eyelash yarn creates an ethereal, cloud-like halo for spring weddings and date-night slip dresses. Meanwhile, tonal sage green or variegated plum merino wool pairs effortlessly with ribbed black tanks, denim shorts, or high-waisted linen trousers.
- Tightening Loose Joins. If slip-stitching into the top chain of your beginning ch 2 leaves a noticeable gap, insert your hook into the snug horizontal loop directly underneath the ch 2 instead.
- Optional Neckline Border. If you want a slightly firmer collar frame, attach yarn at the back neck after finishing both sleeves and work one gentle round of single crochet evenly around the neckline.
- Gentle Blocking. Steam-block acrylic blends lightly from two inches away, or wet-block natural wool flat on foam mats so the lacy granny mesh opens up evenly without stretching the sleeves too long.
Frequently Asked Questions.
Does the 72-chain neckline really fit plus sizes?
Yes, it does! At a gauge of 4 clusters per 4 inches with a 6.00 mm hook, 72 chains create a wide, open boat-to-square neckline that rests comfortably across the collarbones. Bust and upper-arm fullness are customized entirely by adding extra raglan rounds before joining the corners under your arms.
Can I use DK (#3) or Bulky (#5) yarn for this crochet shrug bolero?
Absolutely, because the top-down yoke is measured directly against your own shoulders and underarms. However, check your starting chain width first: with thinner DK yarn you may want to add multiples of 6 chains (such as 78 or 84 chains) so the neck opening still slips easily over your head and sits wide on your shoulders.
Why do I need to turn my work after every round?
Working granny clusters continuously in one direction causes the vertical seam to slant diagonally around the torso and sleeves, which can also skew stitch drape. Turning after every slip-stitch join cancels out that natural crochet lean and keeps both sleeves hanging straight.
How can I make tapered cuffs instead of wide bell sleeves?
If you prefer fitted wrists, work two invisible decreases near the underarm every 6th sleeve round by skipping one ch-1 space, or switch down to a 4.50 mm crochet hook for the final 4 rounds to cinch the cuff gently.


0 Comments