

Creating a versatile crochet granny square bag is one of the most rewarding projects you can make. You only need worsted weight cotton yarn and a standard hook. Open lacy clusters often let small items slip through. Instead, this modern carryall is built from thirteen solid moss stitch squares joined on the diagonal. In this complete guide, you will learn how to work every round and seam the thirteen squares with contrasting whipstitching. Finally, you will add sturdy single crochet shoulder straps.
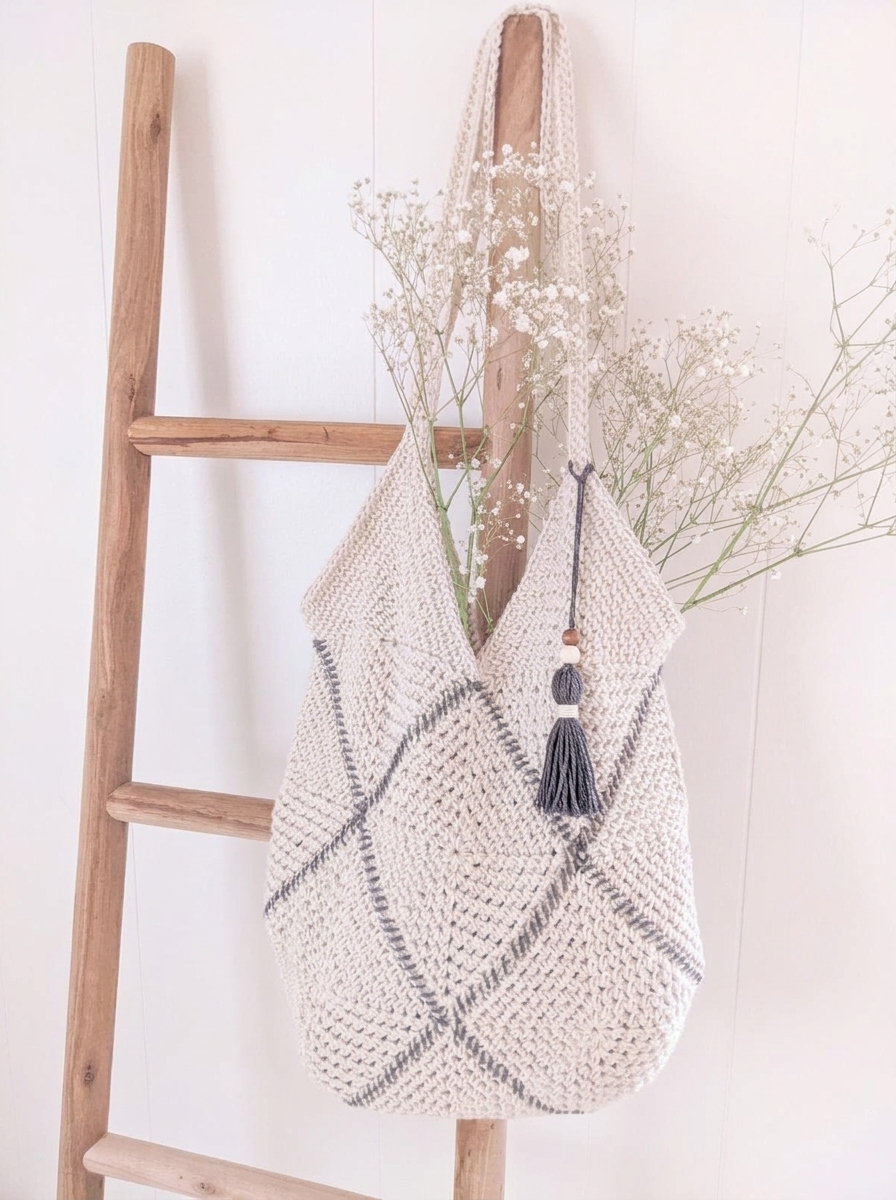
Why You Will Love This Crochet Granny Square Bag.
Many traditional motif bags stretch out of shape the moment you place a wallet, water bottle, or book inside. However, this crochet granny square bag uses the tight, woven texture of the linen stitch, also called the moss stitch. Consequently, it creates a dense, structured fabric that holds its shape without needing a sewn fabric lining.
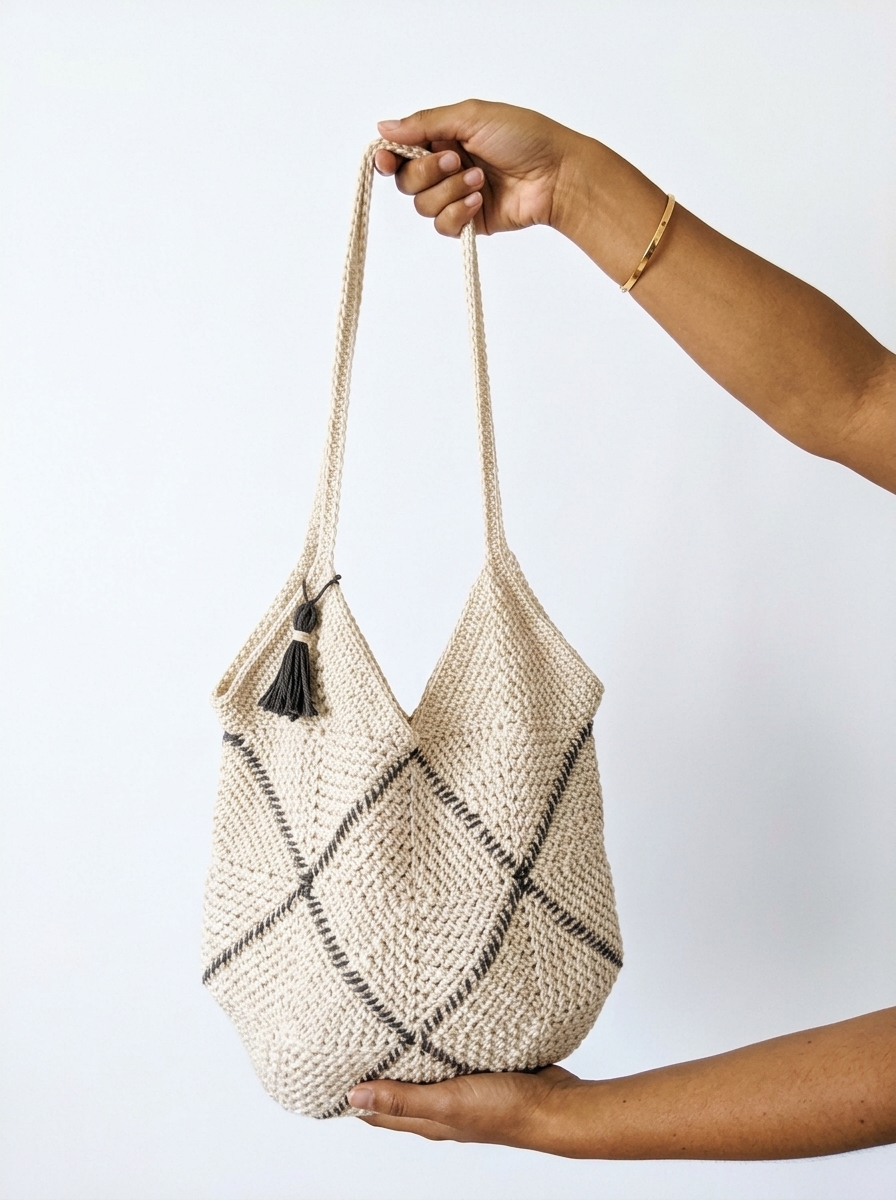
Additionally, the construction method turns each square forty-five degrees on point like a diamond. You highlight the joins with dark charcoal yarn using a simple whipstitch. As a result, the seaming becomes the main geometric design feature of the finished tote. Do you enjoy modern motif projects like our classic granny square tote bag tutorial? You might also love our structured waistcoat stitch crochet crossbody bag pattern, making this thirteen-square carryall your ideal next project.
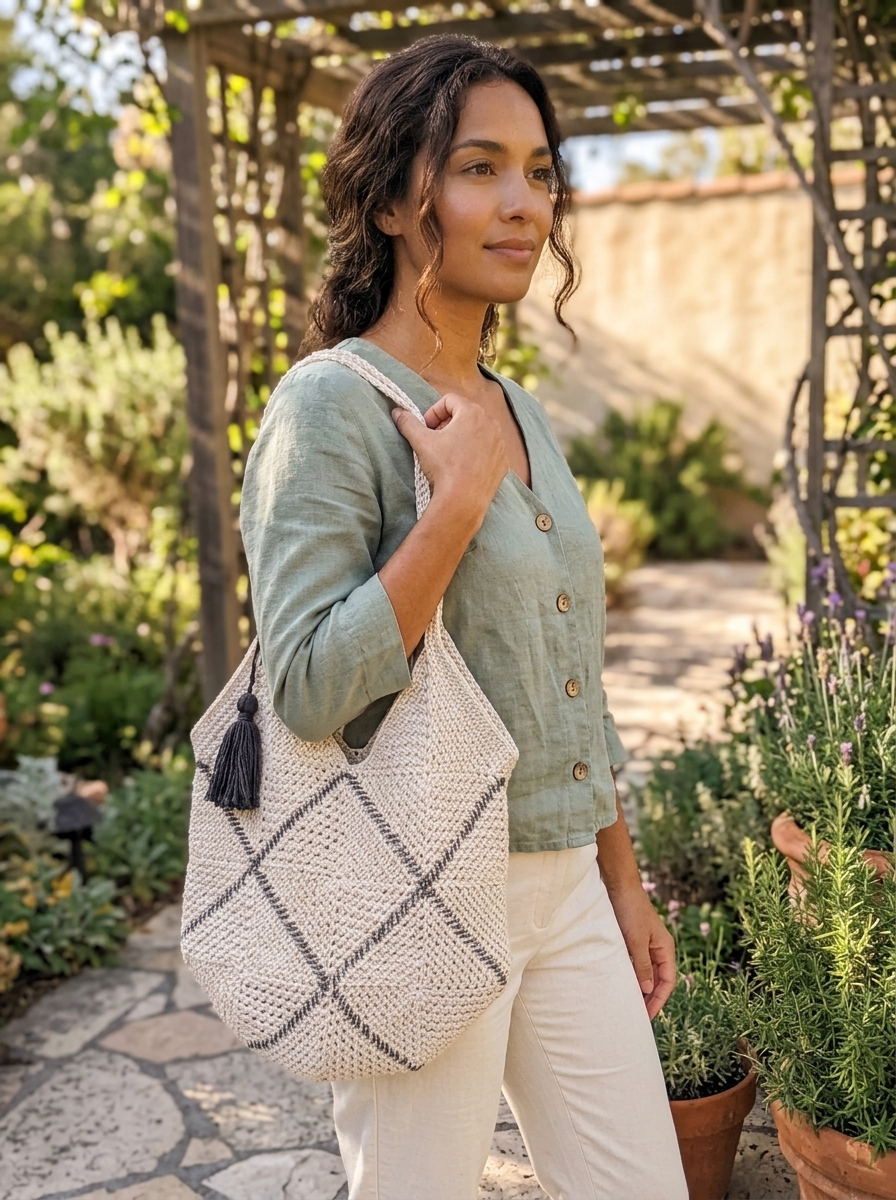
Finished Measurements and Gauge Specifications.
Checking your square size after completing the eighth round guarantees that all thirteen motifs fit together evenly during assembly. Below are the exact dimensions for the individual squares, the assembled body, and the shoulder straps.
| Measurement Area. | Imperial Size. | Metric Equivalent. | Construction Details. |
|---|---|---|---|
| Single Moss Stitch Square Gauge. | 4.75 in x 4.75 in (4 ¾” x 4 ¾”). | 12 cm x 12 cm. | Measured flat after completing Round 8. |
| Finished Bag Body Width. | 12.5 inches wide (12 ½”). | 32 cm wide. | Measured flat across the widest middle point. |
| Finished Bag Body Height. | 10.0 inches tall. | 25.5 cm tall. | Measured from bottom fold to top square peaks. |
| Finished Shoulder Strap Length. | 21.0 inches long. | 53.5 cm long. | Worked over a 75-chain foundation per handle. |
Materials and Tools Needed.
Your crochet granny square bag needs crisp stitch definition and zero sagging. Therefore, select a Category 4 medium worsted weight cotton or cotton-linen blend yarn. Review the Craft Yarn Council yarn weight standards before shopping. Medium weight number 4 plant fibers offer superior strength for everyday bags compared to stretchy acrylic yarns.
- Main Color Yarn (13 Squares and Straps). Three skeins of Hobby Lobby Yarn Bee Cotton Et Lin in the colorway Parchment. This is a Category 4 medium worsted weight cotton-linen blend. Each skein weighs 3.5 oz (100 g) and holds 180 yards (165 meters), totaling 540 yards.
- Contrasting Seam Yarn (Whipstitching and Tassel). One skein of Hobby Lobby Yarn Bee Pima Suprema in the colorway Charcoal. This is a Category 4 medium worsted weight 100% Pima cotton (3.5 oz / 100 g, 180 yards / 165 meters).
- Recommended Yarn Substitutes. Use any worsted weight #4 cotton yarn. Great options include Lion Brand 24/7 Cotton, Lion Brand Pima Cotton, or WeCrochet Dishie Cotton.
- Crochet Hook. Size 5.0 mm (US H-8) ergonomic crochet hook.
- Notions and Supplies. Locking stitch markers, a blunt metal darning or tapestry needle for whipstitching, and sharp yarn scissors.
Stitch Abbreviations (US Crochet Terms).
This pattern is written in standard US crochet terminology. Review these basic abbreviations before starting your first motif.
- ch. Chain.
- ch-sp. Chain space.
- sc. Single crochet.
- ss (or sl st). Slip stitch.
- st / sts. Stitch / stitches.
- * to *. Repeat the instructions between the asterisks as many times as specified.
Important Pattern Notes Before You Begin.
Keep these structural notes in mind while crocheting your squares and seaming your bag.
- Total Square Count. You will crochet 13 identical moss stitch granny squares in your main Parchment color.
- Turning After Every Round. Work each square in joined rounds and turn at the end of every round. This keeps the fabric completely square without twisting. Always bring your working yarn to the back of your work before turning to start the next round.
- Corner Spaces vs Side Spaces. Form every corner by working (1 sc, ch 2, 1 sc, ch 1) into the ch-2 corner space below. Form every side stitch by working (1 sc, ch 1) into each ch-1 space along the four edges.
- Weaving In Ends First. Weave in all yarn tails on your 13 squares before laying them out for assembly. That way, you only have the charcoal whipstitch seams to finish later.
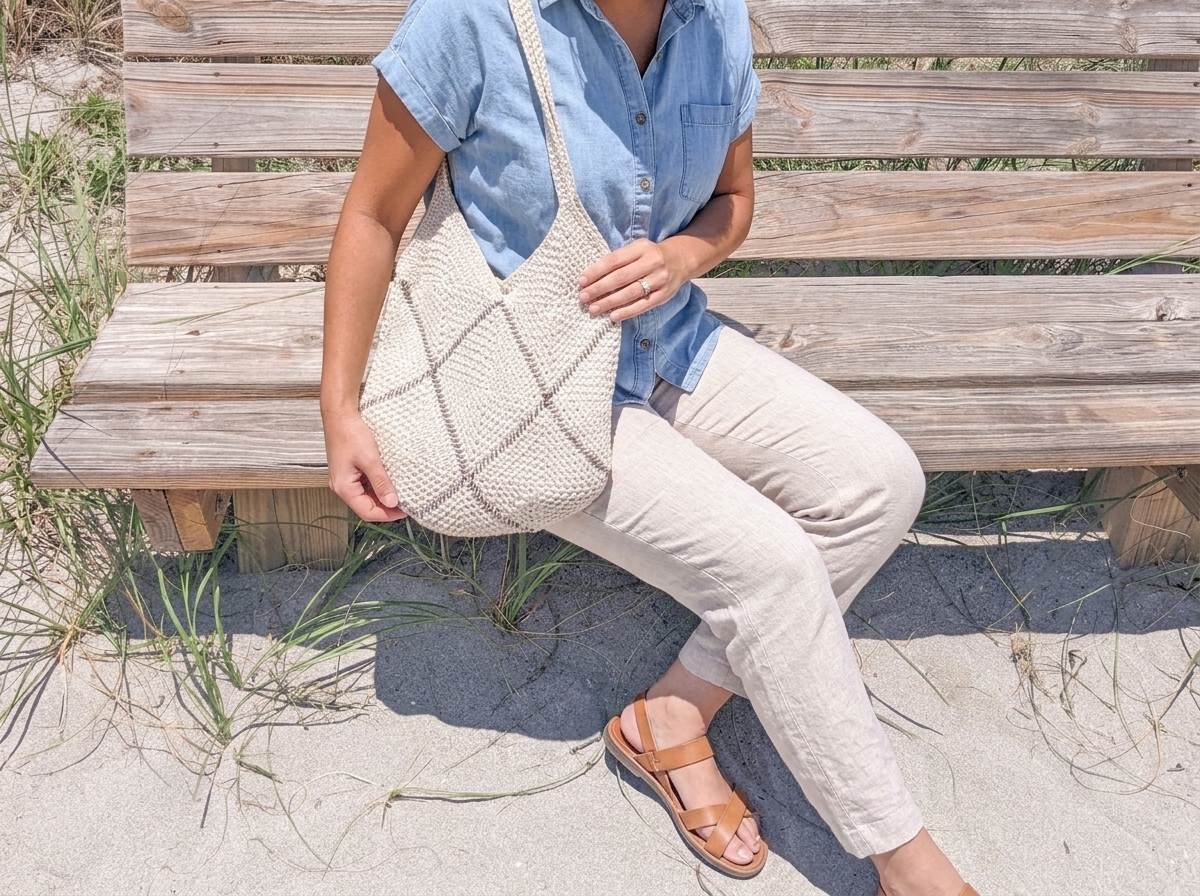
Part 1: Moss Stitch Granny Square Pattern (Make 13).
Grab your 5.0 mm (H-8) crochet hook and your main Parchment yarn. Follow the eight rounds below to create your first square. Repeat the process until you have 13 matching squares.
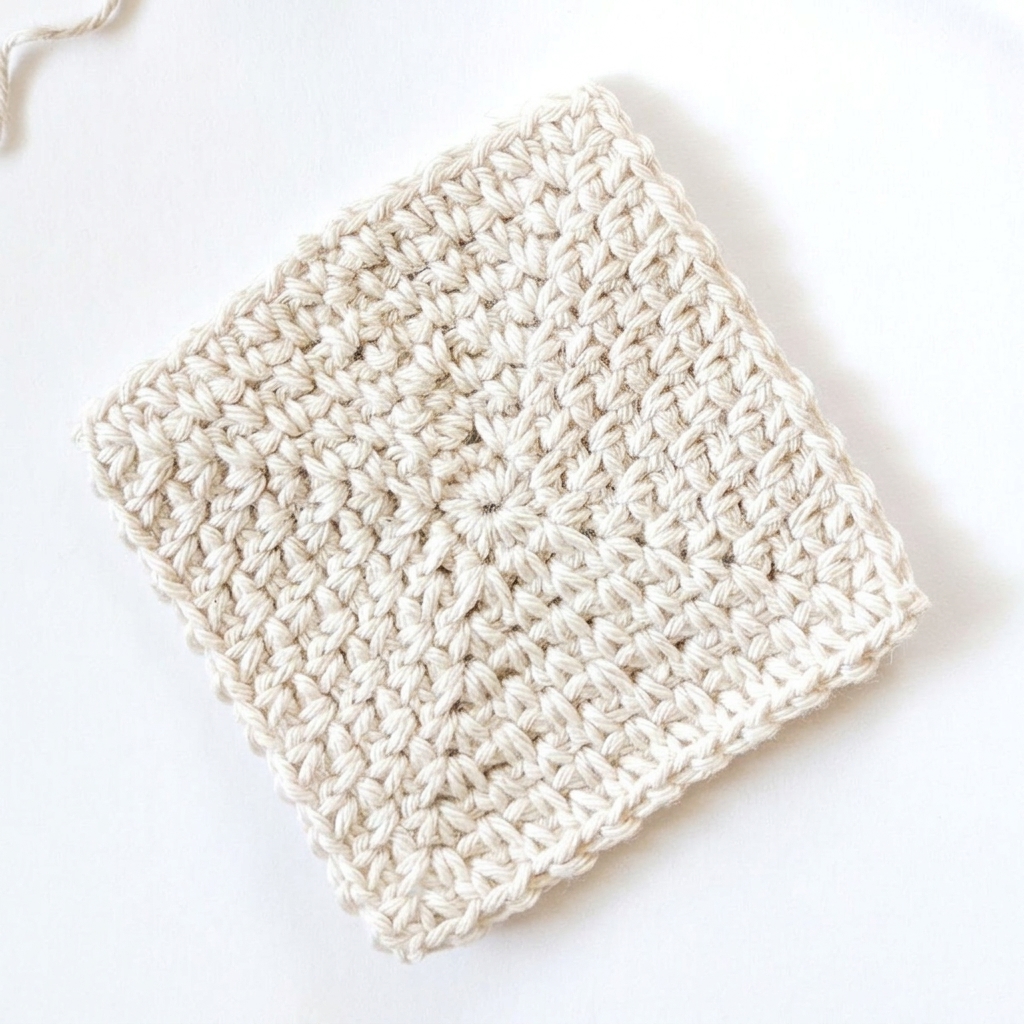
- Round 1. Ch 2. *Work 1 sc in the 2nd ch from hook, ch 2, work another 1 sc in the same ch, ch 1*. Repeat from * to * 3 more times into that same starting chain. You will have 4 corners total (8 sc, four ch-2 corner spaces, and four ch-1 spaces). Join with a ss to the first sc of the round. Turn your work.
- Round 2. Remember to bring your yarn to the back before starting. *Work 1 sc in the ch-1 space, ch 1. Skip the next sc, and work (1 sc, ch 2, 1 sc, ch 1) in the ch-2 corner space*. Repeat from * to * 3 more times around for 4 corners total. Join with a ss to the first sc of the round. Turn your work.
- Round 3. Bring your yarn to the back. Work (1 sc, ch 1) in each ch-1 space along the side. Work (1 sc, ch 2, 1 sc, ch 1) in each ch-2 corner space around all four sides. Join with a ss to the first sc. Turn your work.
- Rounds 4 to 8 (5 Rounds). Repeat Round 3 for five more rounds, turning at the end of every round. Continue working (1 sc, ch 1) in each ch-1 side space and (1 sc, ch 2, 1 sc, ch 1) in each ch-2 corner space. At the end of Round 8, join with a ss to the first sc and fasten off. Each finished square should measure 4.75 inches by 4.75 inches.
Part 2: Step-by-Step 13-Square Bag Assembly.
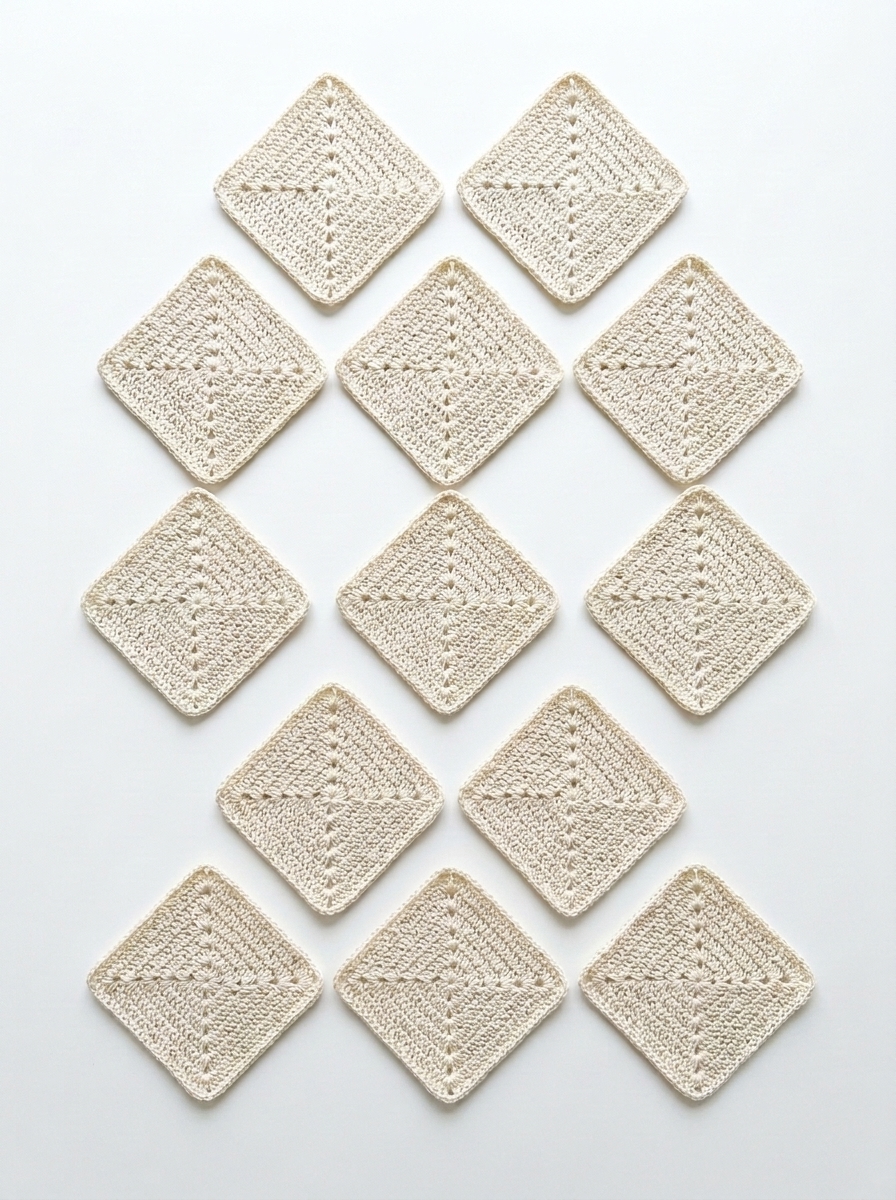
Finish all 13 moss stitch squares and weave in all loose ends first. Next, you are ready to arrange and whipstitch your crochet granny square bag together.
Step 1: Arrange the 13 Squares on Point.
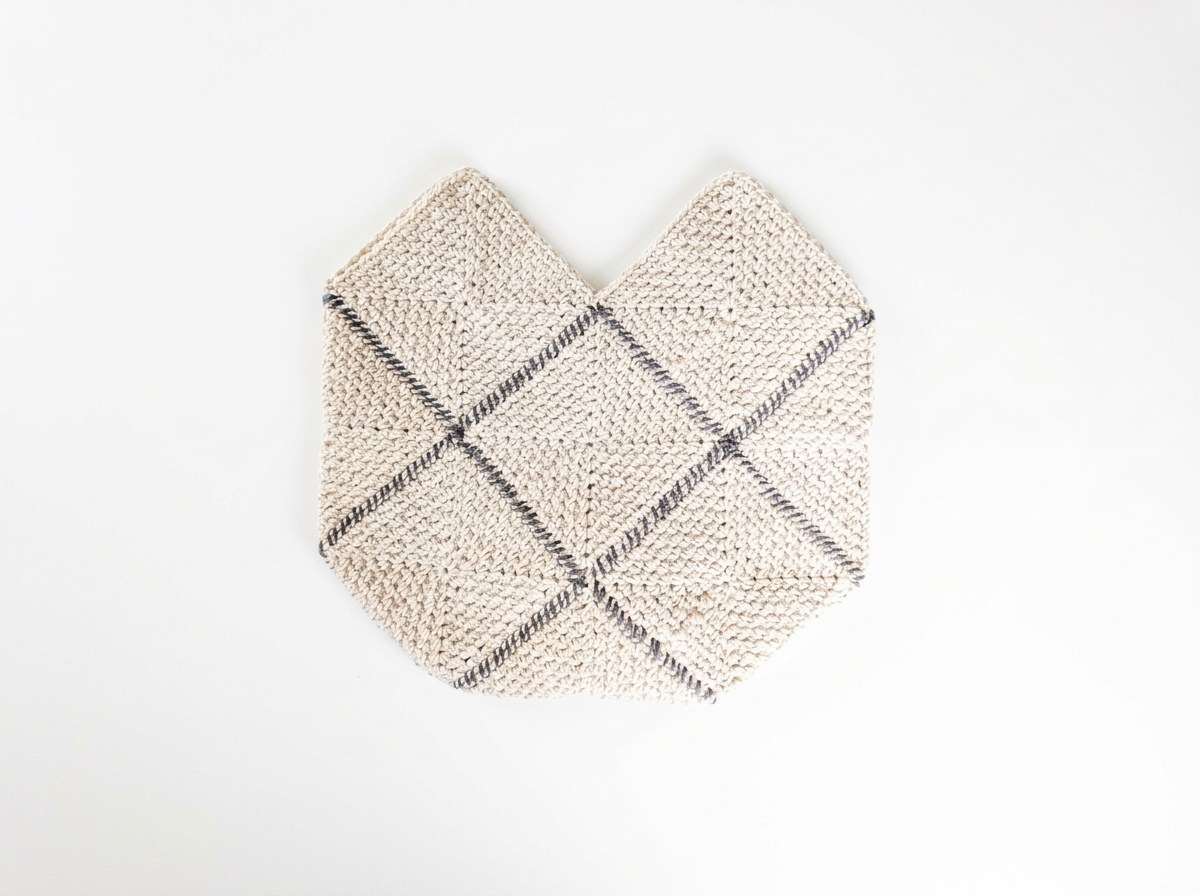
Lay all 13 squares flat on your work surface oriented on point like diamonds. Arrange the upper front section with two top peak squares (Squares 1 and 2). Place one center square nestled between them (Square 3) and two lower squares underneath (Squares 4 and 5). Add two outer side fold squares flanking the left and right edges. Next, place one center bottom fold square directly beneath Squares 4 and 5. Finally, mirror the remaining five back squares (Squares 1 through 5) below the bottom fold square.
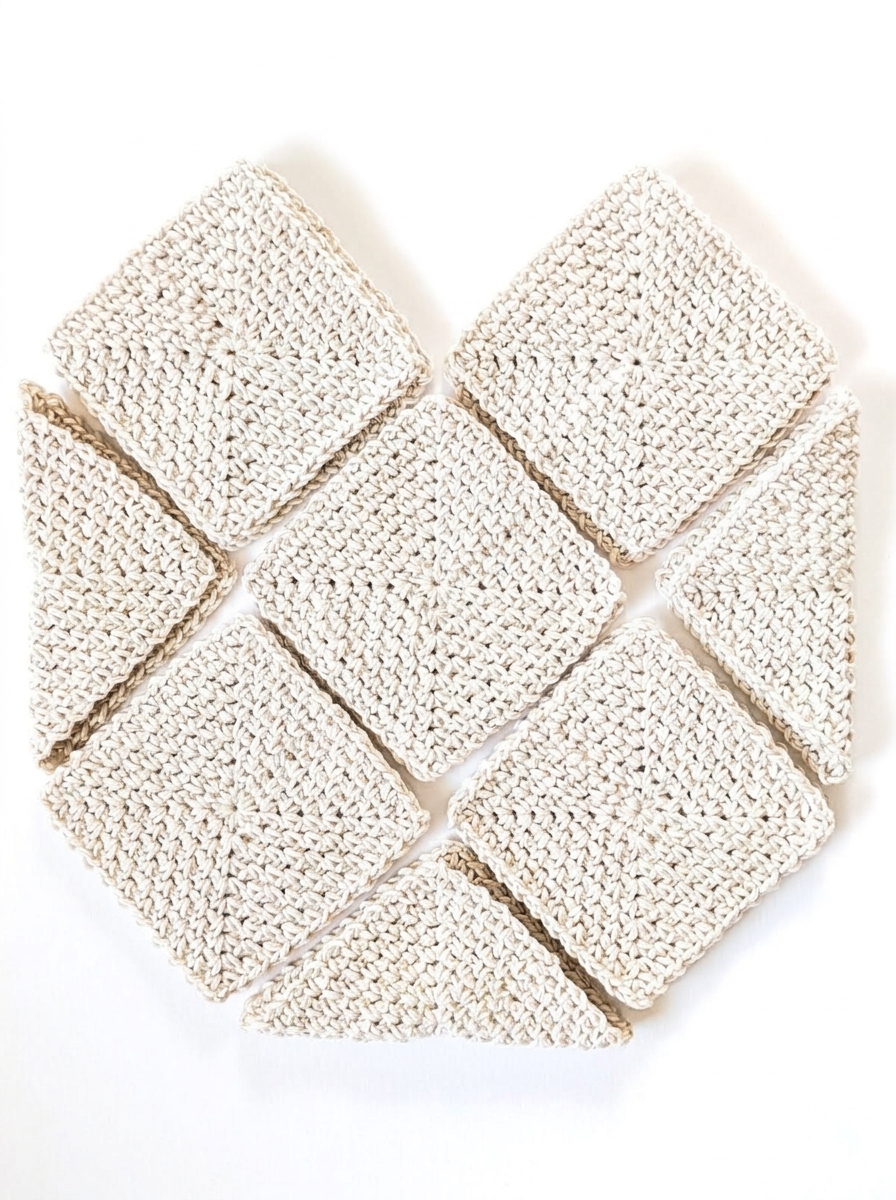
You can easily visualize how the flat layout transforms into a three-dimensional tote. Simply fold the left, right, and bottom edge squares in half into triangles. Those three folded squares form the gusseted sides and bottom base of the bag.
Step 2: Whipstitch the Diagonal Seams with Charcoal Yarn.
Cut a long strand of contrasting Charcoal yarn and thread your darning needle. Start at the bottom of your flat layout and work upward along the continuous diagonal lines. Whipstitch the touching edges of the squares together through the outer loops. Once you finish the diagonal lines running in one direction, repeat along the opposite diagonal lines. All 13 squares will now be joined into one flat panel.
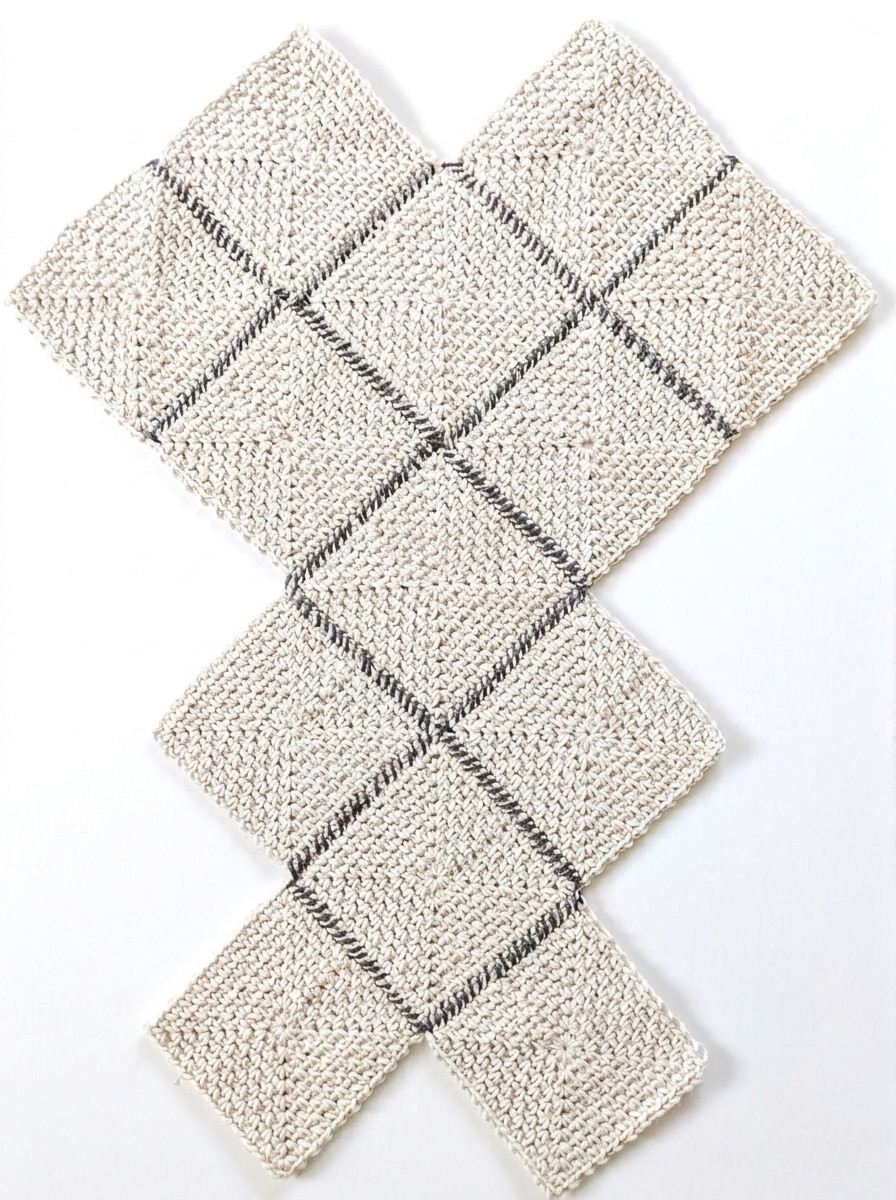
Step 3: Fold the Panel and Seam the Sides.
Fold the joined panel in half across the center bottom square. Make sure the front five squares align directly over the back five squares. Fold the two outer side squares inward along their vertical centerlines. Using your darning needle and Charcoal yarn, whipstitch the remaining open diagonal seams from the bottom corners up to the outer side folds.
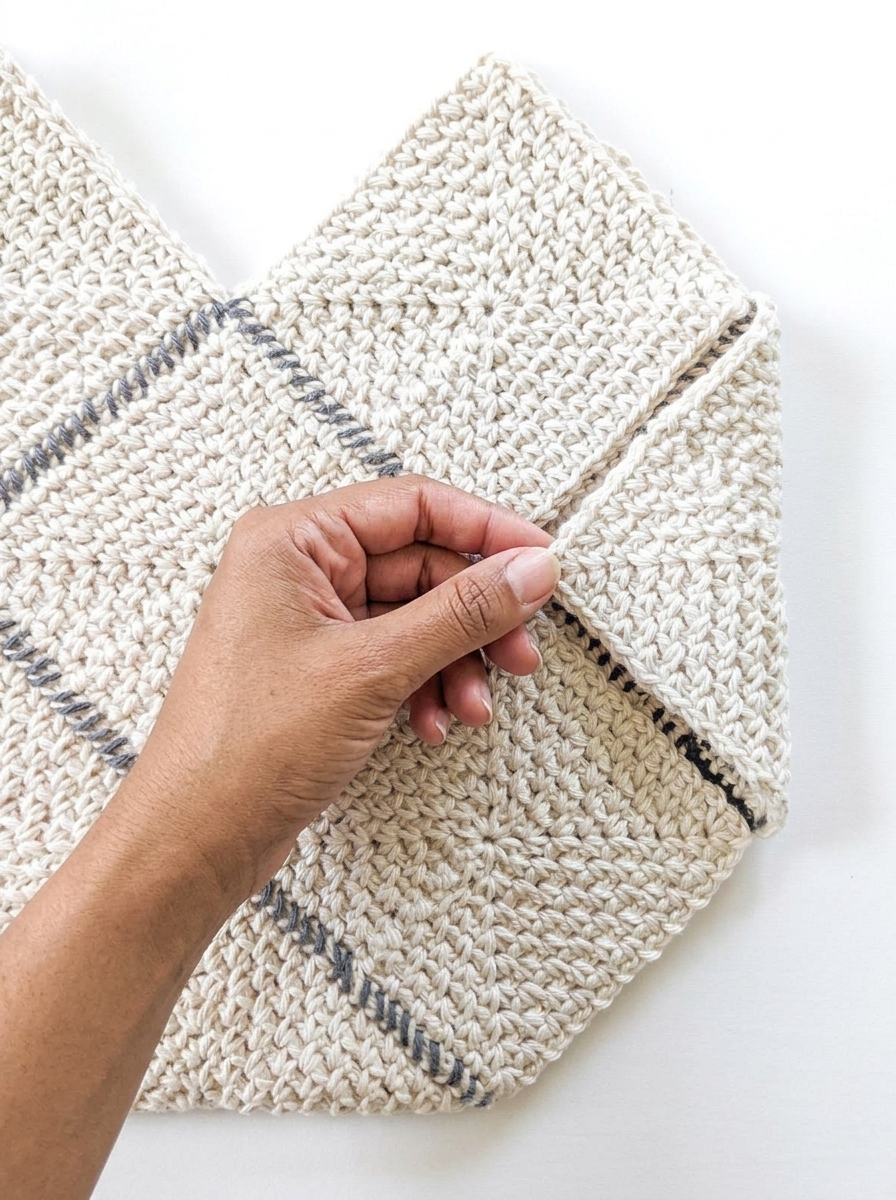
Seam both sides completely and weave in your charcoal yarn tails. Your assembled bag body will now lie flat with two V-shaped peaks on the front and two matching peaks on the back.
Part 3: Crocheting the Top Edging and Shoulder Straps.
In the final stage, you will crochet a neat single crochet border around the top opening. You will also build the two 21-inch shoulder straps directly onto the peaks of the squares.
Step 4 and Step 5: Work the Single Crochet Top Border.
Reattach your main Parchment yarn with your 5.0 mm hook at the right outer corner stitch space. Ch 1 and work 1 sc into that same corner space. Work 1 sc into each stitch and ch-1 space up the diagonal edge. Stop when you reach the ch-2 corner space at the top peak of the first square.
Work 3 sc into the top corner stitch space of the peak. Continue working 1 sc into each stitch and ch-1 space down the inner diagonal slope. Stop when you reach the middle valley where the two squares meet. Work 1 sc directly into the middle valley stitch. Repeat this exact sequence around all four top peaks: 1 sc in each space up the slope, 3 sc in the top corner peak, 1 sc in each space down the slope, and 1 sc in the middle valley.
Step 6: Crochet the 75-Chain Straps and Reinforcing Round.
Do not fasten off at the end of the first border round. Instead, continue working in a continuous round to form the integrated handles.
- Front Handle Foundation. Work 1 sc in each sc stitch up the first slope to the center top stitch of the 1st front peak. Work 1 sc in that top stitch and ch 75. Connect the chain to the center top stitch of the 2nd front peak by working 1 sc into that top stitch. Your first 21-inch strap foundation is now attached.
- Back Handle Foundation. Continue working 1 sc in each sc stitch down the slope and around the side corner. Work up to the center top stitch of the 3rd peak on the back of the bag. Work 1 sc in that top stitch and ch 75. Connect the chain to the center top stitch of the 4th peak with 1 sc. Continue working 1 sc in each stitch back to the beginning of the round.
- Strap Reinforcement Round. Work 1 more complete round of 1 sc into every stitch around the bag opening. Work 1 sc into each of the 75 chains across both shoulder straps as well. Join with a ss to the first stitch at the end of the round. Fasten off and weave in all remaining ends.
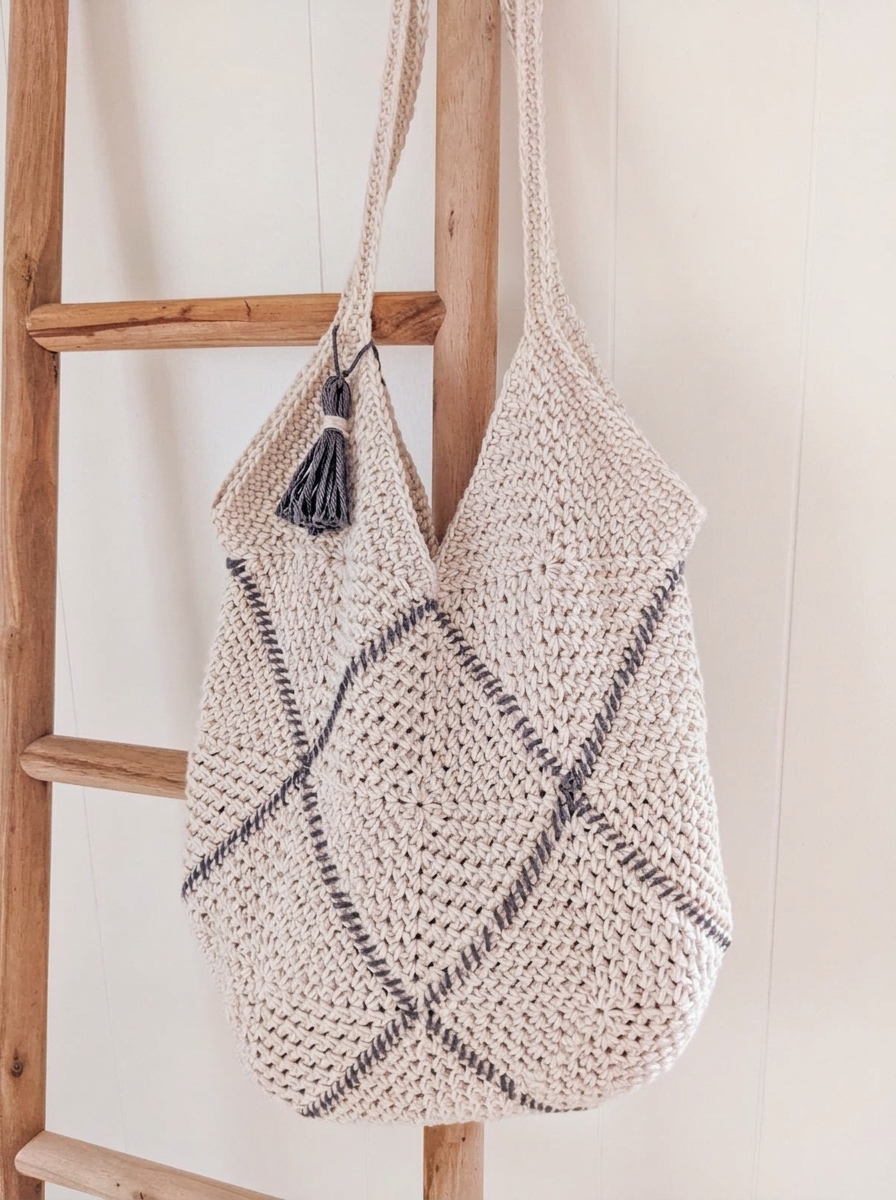
Customizing and Caring for Your Finished Tote.
Do you prefer wider, heavier handles for carrying groceries or books? Simply work two or three additional rounds of single crochet around the top edging and straps before fastening off. You can also wrap leftover Charcoal cotton yarn around a four-inch piece of cardboard twenty times. Tie off the top and attach your handmade tassel to the base of one strap. To keep your cotton crochet granny square bag looking fresh, hand wash it in cool water with mild soap. Lay it flat on a towel to air dry completely.


0 Comments