

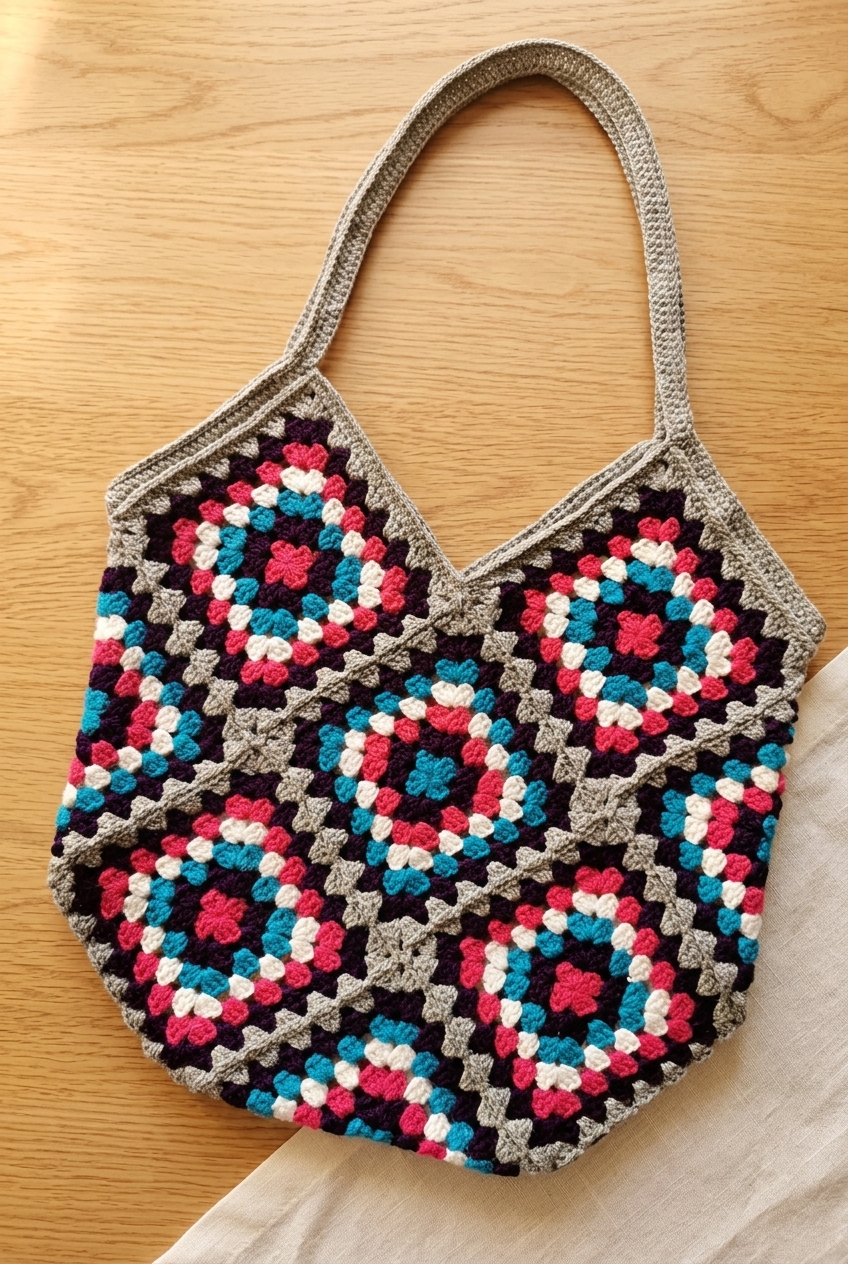
Crocheting a granny square tote bag is one of the easiest and most rewarding projects you can make. Whether you have leftover skeins or fresh cotton yarn, this free crochet pattern walks you through every step. By combining 13 classic granny squares with a clever folded layout, you create a sturdy, stylish tote bag. Furthermore, this handmade bag is both trendy and practical for everyday use.
Additionally, making a granny square tote bag gives you great practice with basic stitches and color changes. Once you finish your bag, you can use it as a daily market tote or a beach bag. Moreover, it works wonderfully as a work-in-progress (WIP) project bag or a basket for storing leftover yarn. Because the design is modular, you can easily customize the colors to match any season.
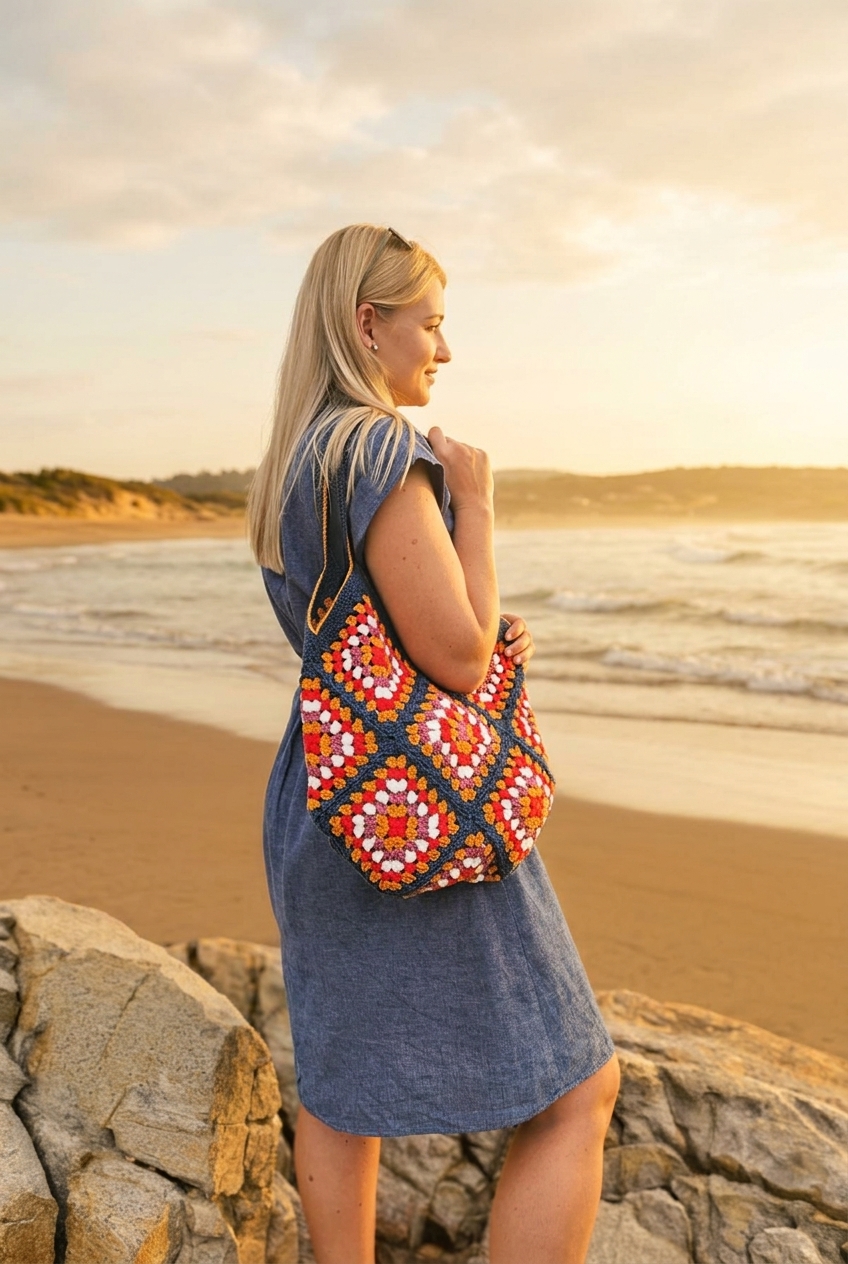
Why You Will Love This Granny Square Tote Bag Crochet Pattern.
Before we dive into the instructions for this granny square tote bag, let us explore why crocheters love it. First, this project is an ideal stash buster for leftover yarn balls. You can crochet individual squares whenever you have spare time and pack them away. Later, once you finish all 13 pieces, you can join them into a complete tote.
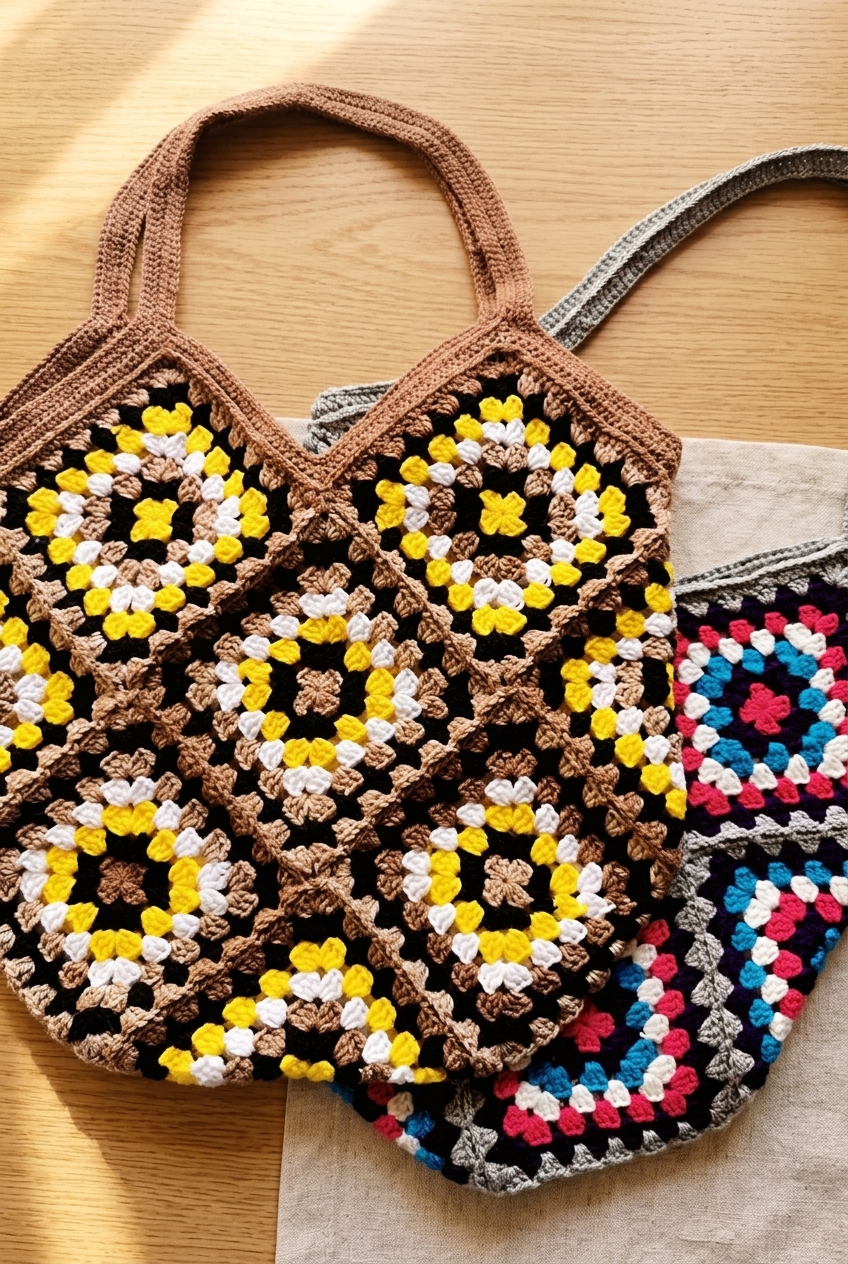
Second, this pattern relies on the timeless basic granny square, making it super approachable and versatile. For instance, you can crochet each round in a new color for a vibrant boho look. Alternatively, you can work every square in a solid shade for a modern minimalist style. In addition, you can adapt this easy crochet pattern to any yarn weight and hook size.
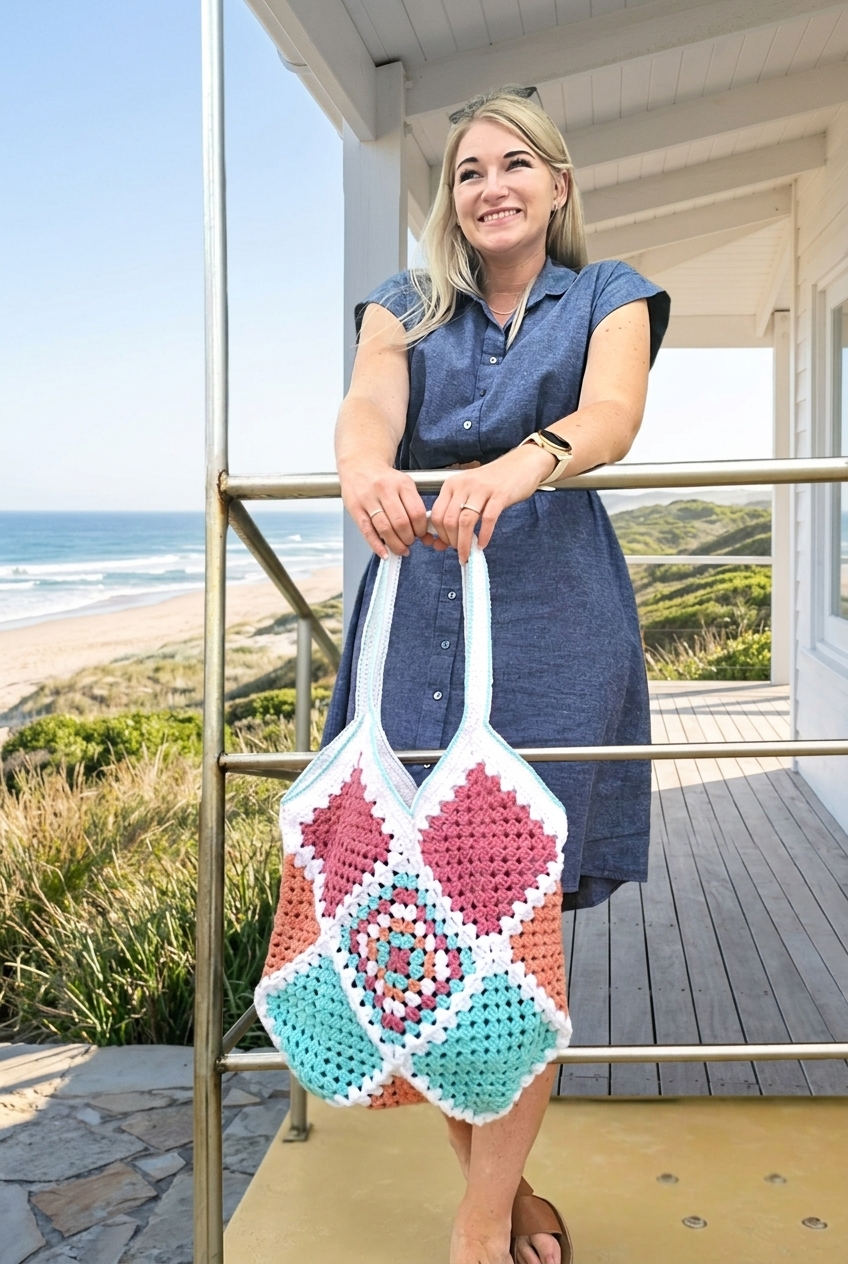
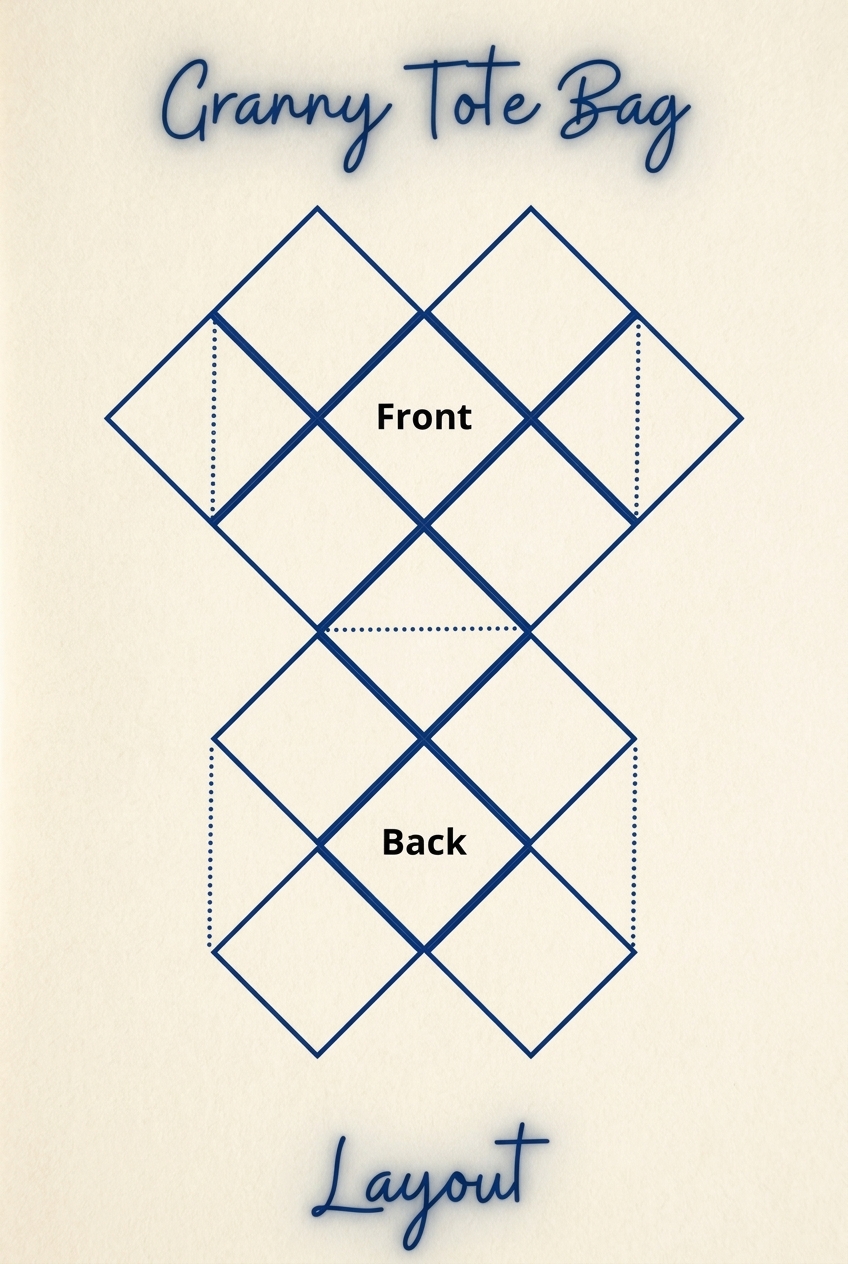
Please note that this classic 13-square folded layout is a traditional design shared across the crochet community. Specifically, it uses clever geometry to form the bag body. Folding the outer squares along the sides and bottom creates a roomy tote without complicated shaping.
If you enjoy relaxing crochet projects like this one, explore our other free tutorials too. Check out our simple crochet shoulder bag free pattern and our cozy puff stitch crochet blanket tutorial. You can also try our adorable free panda amigurumi crochet pattern.
Skill Level and Stitches Required.
This granny square tote bag pattern is rated Easy and is completely beginner-friendly. To complete this bag with confidence, you only need five foundational crochet skills.
- Reading a basic written crochet pattern in standard US terms.
- Working the classic Single Crochet (sc) stitch cleanly.
- Making the Double Crochet (dc) stitch with even tension.
- Crocheting a traditional Basic Granny Square in the round.
- Completing a Single Crochet 3 Together (sc3tog) decrease in the bag valleys.
Frequently Asked Questions About the Granny Square Tote Bag.
Can I Adjust the Size of My Granny Square Tote Bag?
Yes, you can easily customize the size of your bag! The finished dimensions depend directly on the yarn weight and crochet hook you choose. Therefore, if you want a larger beach tote, switch to a #4 worsted or #5 bulky yarn. Simply pair that thicker yarn with its corresponding crochet hook size. Conversely, to size down, use a #2 lace or sport weight yarn with a smaller hook.
However, for the classic everyday dimensions shown here, a #3 Light DK weight 100% cotton yarn works best. The featured sample uses Kismet Yarn Raeesah 100% Cotton yarn for crisp stitch definition. Furthermore, you can also make this bag using acrylic yarn if you prefer.
If you use anything other than cotton yarn, you should block the bag first. After blocking, line the interior of the bag with woven fabric as well. Blocking evens out your stitch tension, while a lining prevents acrylic yarn from stretching.
If you do not have scrap yarn laying around, several popular yarns work wonderfully. For example, you can use Lion Brand Comfy Cotton Blend Yarn, which is a soft cotton blend. Another great choice is Patons Grace Yarn, which is a 100% mercerized cotton yarn. Finally, Red Heart Super Saver 100% Acrylic also works well if you want an acrylic option.
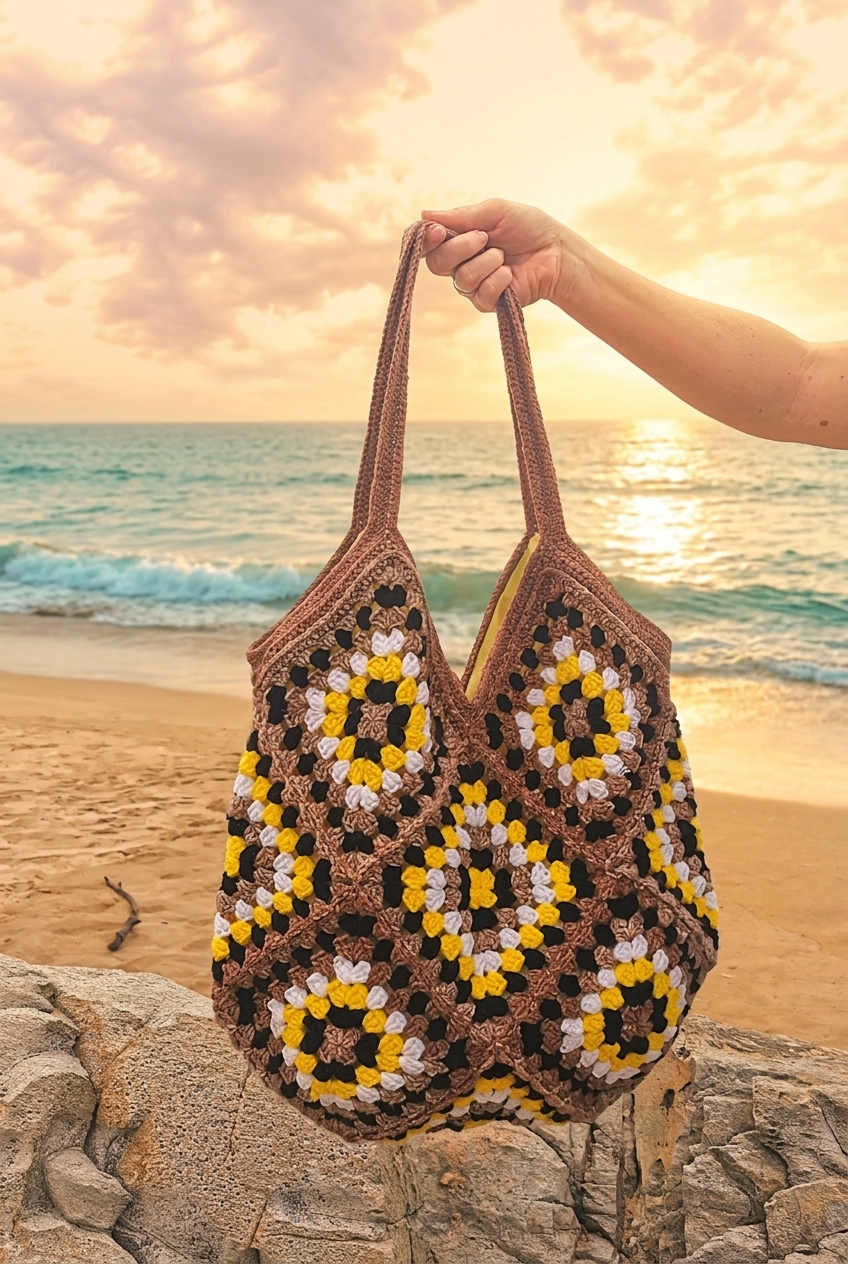
Should I Line My Granny Square Tote Bag with Fabric?
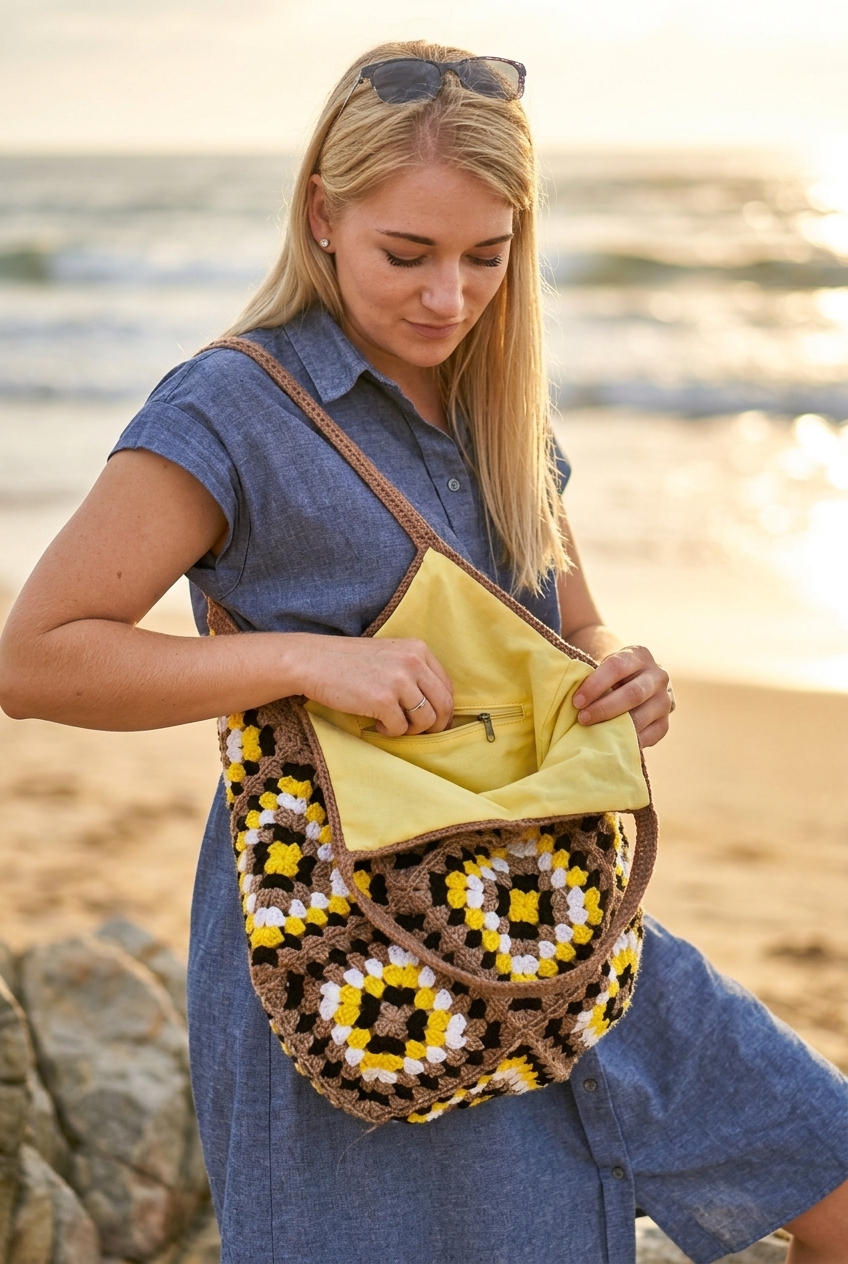
Lining your granny square tote bag with cotton fabric is optional, yet it is highly recommended. First, a fabric lining helps the tote keep its shape when filled with heavy belongings. Second, a lining stops keys, pens, or lip balm from poking through the granny square spaces.
You can sew the lining with a sewing machine or stitch it by hand with a needle. Simply trace your finished bag onto folded cotton canvas and add a 1.25 cm seam allowance. Next, sew the side seams, fold the top hem down, and whipstitch it inside the top border.
Tools and Materials Needed.
Gather all of your yarn and crochet supplies before you start making your squares. Having your stitch markers and tapestry needle nearby makes assembly smooth and enjoyable.
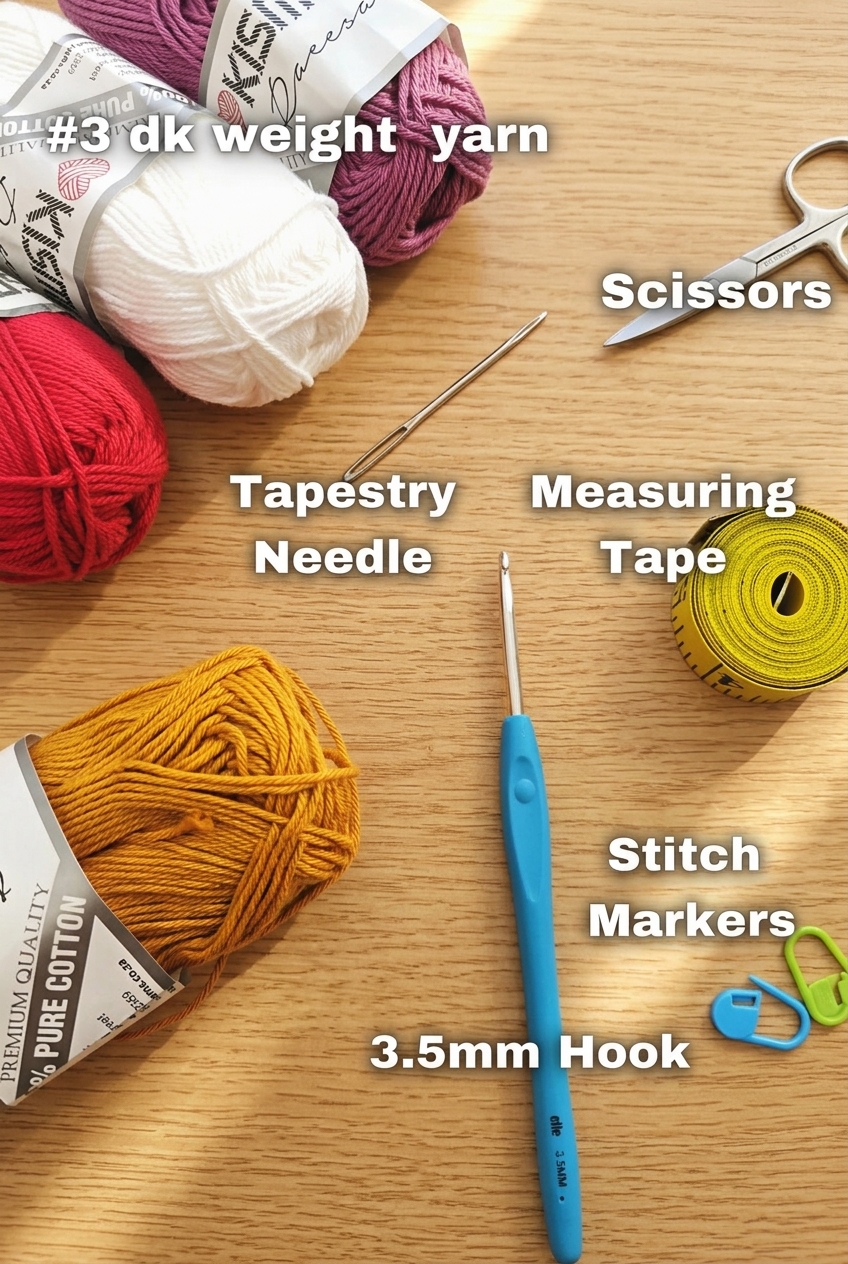
- Contrast Colors (4 Colors): 50g / 1.7oz (100m / 109yd) of #3 Light / DK Weight 100% Cotton yarn in each of 4 colors. Use these four shades if you change color every round.
- Main Color Yarn: 100g / 3.5oz (200m / 218yd) in the same #3 DK 100% Cotton yarn for the main bag color.
- Recommended Yarns: Kismet Yarn Raeesah 100% Cotton, Lion Brand Comfy Cotton Blend, Patons Grace 100% Cotton, or Red Heart Super Saver 100% Acrylic.
- Crochet Hook: Size 3.5 mm Hook (US E/4).
- Measuring Tape: Needed for checking your 12 cm x 12 cm square gauge.
- Stitch Markers: Helpful for marking the corner peak stitches along the top border.
- Tapestry Needle: Used for weaving in yarn tails securely after every round.
- Scissors: Sharp yarn scissors for trimming color changes cleanly.
Gauge and Finished Size Measurements.
Obtaining the exact gauge ensures that your finished granny square tote bag matches the pattern measurements. Therefore, crochet one test square in a single color first to verify your tension.
- Pattern Terminology: All instructions are written in standard US Crochet Terms.
- Square Gauge: 1 x Granny Square with 6 rounds measures 12 cm x 12 cm (4.7″ x 4.7″).
- Too Big Adjustment: If your square is too big, go down a hook size until you reach the gauge.
- Too Small Adjustment: Conversely, if your square is too small, go up a hook size to match the gauge.
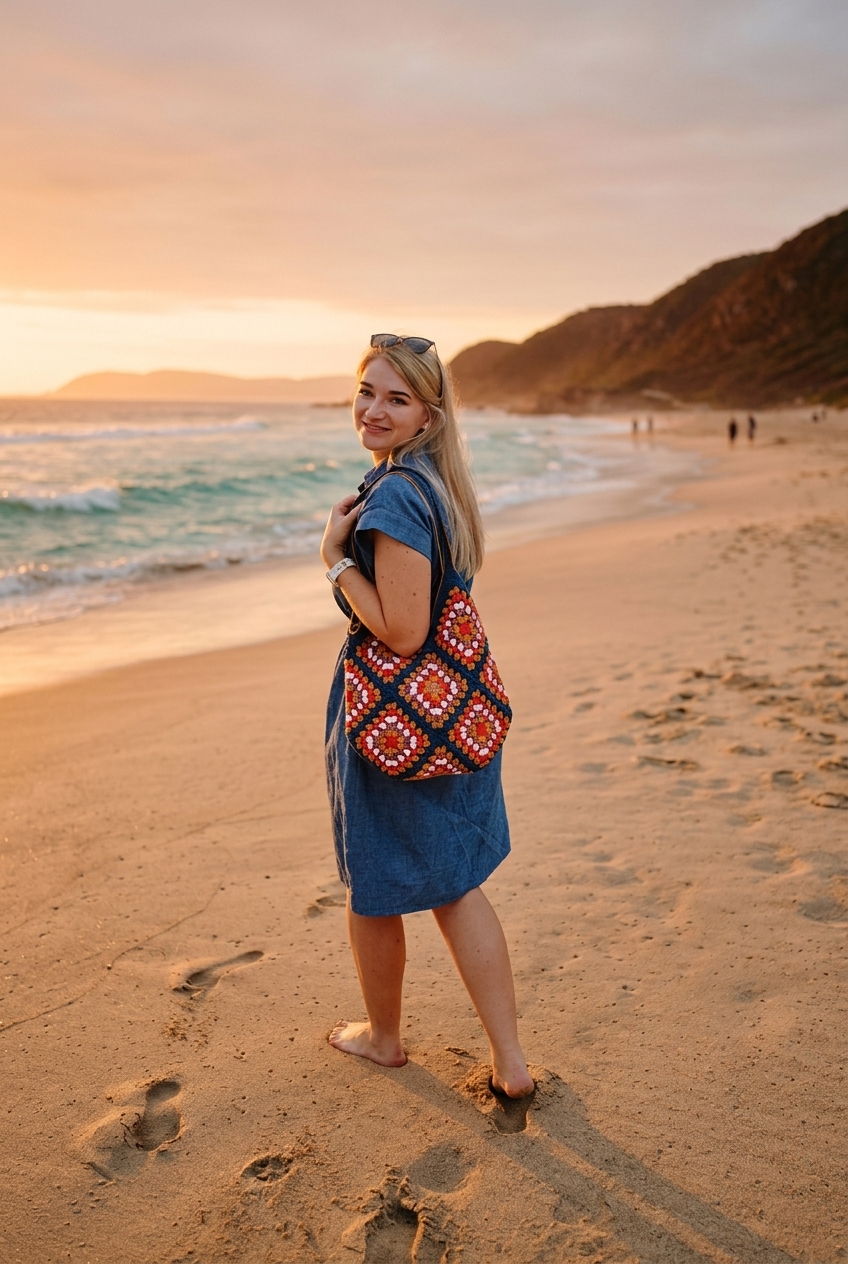
- Finished Size (Width x Length): The completed bag measures 39 cm x 40 cm (15″ x 15.7″).
Crochet Abbreviations (US Terms) and Special Stitches.
Review these standard US crochet abbreviations and special stitch notes before beginning Round 1.
- Ch: Chain.
- Ch-Spce / Ch-sp: Chain Space.
- Dc: Double Crochet.
- Sc: Single Crochet.
- Nxt: Next.
- Sk: Skip the stitch.
- Sl st: Slip Stitch.
- Sc3tog: Single crochet 3 stitches together.
- St(s): Stitch(es).
- Rep: Repeat.
- FO: Finish off.
How to Sc3tog (Single Crochet 3 Together): Insert your hook into the next stitch or corner space, yarn over, and pull up a loop. Repeat that action in the next two stitches or spaces so you work across three spaces total. You now have four loops sitting on your crochet hook. Finally, yarn over and pull through all four loops on your hook at once.
Important Pattern Notes Before You Begin.
Keep these helpful construction notes in mind while making your granny square tote bag.
- Color Choices: This bag uses 13 Basic Granny Squares. You can change colors every round as shown, or crochet solid-color squares instead.
- Complete Squares First: Finish crocheting all 13 six-round squares before attaching them together.
- Corner Tip: Change colors in a different corner on every round. Otherwise, starting in the same corner repeatedly will stretch the corner spaces.
- Custom Straps: You can make the shoulder straps as long as you like. Just leave enough space in the middle and match the number of side rows.
- Acrylic Care: If you use acrylic yarn, block the finished bag before adding a fabric lining.
Granny Square Tote Bag Free Crochet Pattern Instructions.
Step 1: Crochet 13 Basic Granny Squares (Rounds 1 to 6).
Make 13 squares in total, changing colors at the end of every round. Begin Round 1 inside a Magic Ring. Alternatively, chain 4, slip stitch to the first chain, and work inside that center ring.
- Rnd 1: Ch 3 (counts as dc), then work 2 dc into the ring. Next, work *ch 2, 3 dc into the ring, and rep from * two more times (4 clusters of 3 dc). Ch 2, and sl st in the top of the ch 3. Finally, sl st in the nxt 2 dc and the ch-spce, FO, and change colors. (12 dc).
- Rnd 2: Attach new yarn in a corner ch-spce. Ch 3 (counts as dc), and work (2 dc, ch 2, 3 dc) in the same sp. Next, *sk 3 dc, and work (3 dc, ch 2, 3 dc) into the next corner sp. Rep from * two more times around the square. Then sk 3 dc and sl st in the top of the ch 3. Sl st in the nxt 2 dc and the ch-spce, FO, and change colors. (24 dc).
- Rnd 3: Join new yarn in a corner ch-spce. Ch 3 (counts as dc), and work (2 dc, ch 2, 3 dc) in the same sp. Next, *sk 3 dc, work 3 dc in the next ch-sp, and sk 3 dc. Work (3 dc, ch 2, 3 dc) into the next corner sp, and rep from * three more times. At the end, sl st in the top of the ch 3. Sl st in the nxt 2 dc and the ch-spce, FO, and change colors. (36 dc).
- Rnd 4: Attach new yarn in a corner ch-spce. Ch 3 (counts as dc), and work (2 dc, ch 2, 3 dc) in the same sp. Next, *sk 3 dc, work 3 dc in the next ch-sp, sk 3 dc, and work 3 dc in the next sp. Then sk 3 dc, work (3 dc, ch 2, 3 dc) into the corner sp, and rep from * three more times. At the end, sl st in the top of the ch 3. Sl st in the nxt 2 dc and the ch-spce, FO, and change colors. (48 dc).
- Rnd 5: Join new yarn in a corner ch-spce. Ch 3 (counts as dc), and work (2 dc, ch 2, 3 dc) in the same sp. Next, *(sk 3 dc, 3 dc in next ch-sp) x 3, sk 3 dc, and work (3 dc, ch 2, 3 dc) into the corner sp. Rep from * three more times around. At the end, sl st in the top of the ch 3. Sl st in the nxt 2 dc and the ch-spce, FO, and change colors. (60 dc).
- Rnd 6: Attach the 6th color in a corner ch-spce. Ch 3 (counts as dc), and work (2 dc, ch 2, 3 dc) in the same sp. Next, *(sk 3 dc, 3 dc in next ch-sp) x 4, sk 3 dc, and work (3 dc, ch 2, 3 dc) into the corner sp. Rep from * three more times around. At the end, sl st in the top of the ch 3. Finally, sl st in the nxt 2 dc and the ch-spce, and FO. (72 dc).
Once all 13 squares are complete, weave in all loose ends neatly. Afterward, you are ready to connect the granny squares into a tote.
Step 2: Connecting the 13 Granny Squares (Join-As-You-Go Method).
We connect the motifs for this granny square tote bag using the Join-As-You-Go (JAYG) method during a 7th round. However, if you prefer to sew your squares together, crochet a 7th round in the main color on all 13 squares first. Then whipstitch or seam the squares together following the layout chart.
Before you start joining, lay your 13 squares out flat as shown below. After you arrange the squares in numbered order, you can begin joining them.
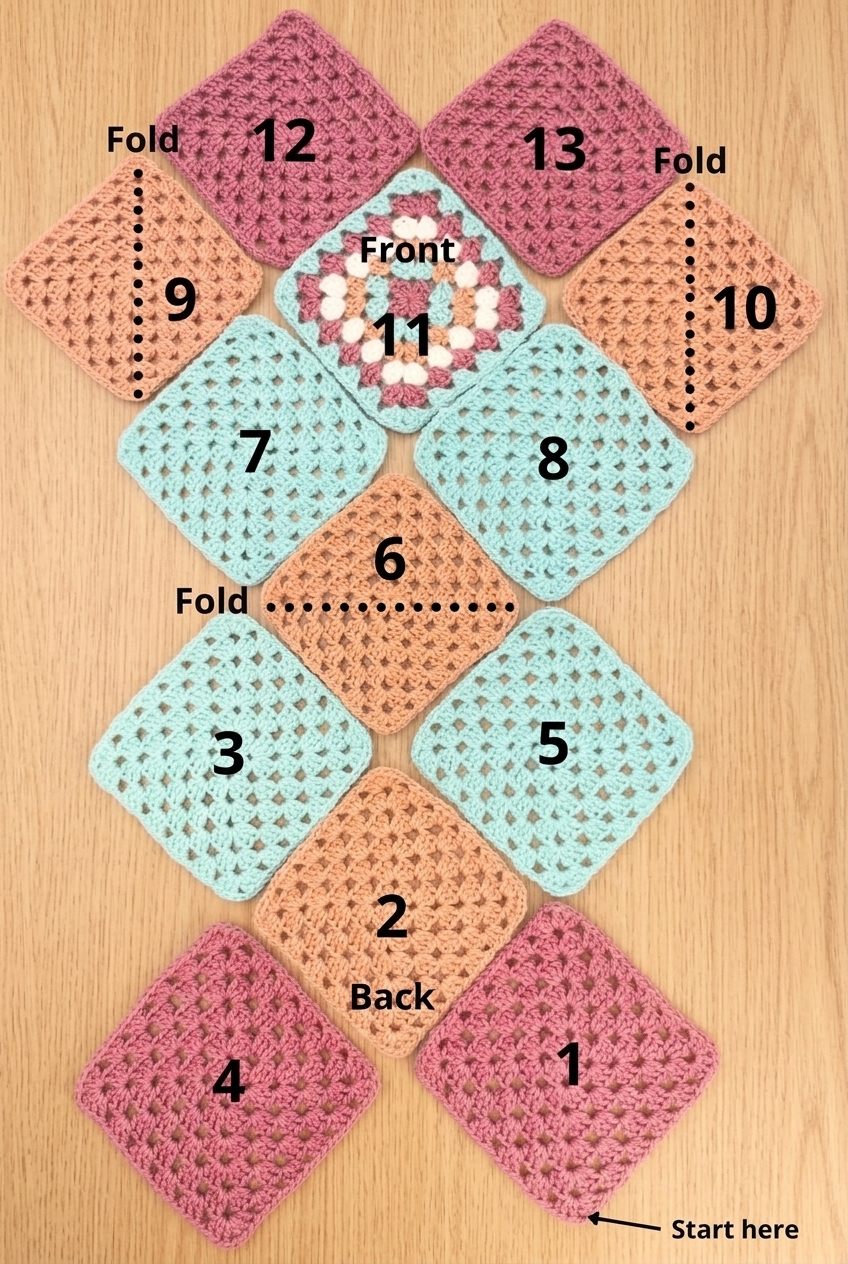
How to Attach Square 1 to Square 2.
Start in the bottom right corner with Square 1 and follow these steps to join Square 2.
- Square 1 Base Round: Connect your main color yarn to Square 1 and crochet a complete 7th round around the square. Finish off.
- Start Square 2: Connect your main color to a corner of Square 2. Ch 3 (counts as 1 dc), work 2 dc in the same space, and ch 1.
- First Corner Join: Place Square 1 and Square 2 wrong sides together. Next, slip stitch into the matching corner space of Square 1.
- Side Seam Start: *Work 3 dc in the next ch-sp of Square 2, and ch 1.
- Connect Adjacent Spaces: Slip stitch into the next ch-sp of Square 1 (located next to the corner-sp). Now jump back to Square 2, work 3 dc into the next ch-sp, and ch 1.
- Repeat Along Edge: Repeat from * until you reach the next corner-sp of Square 2.
- Second Corner Join: Work 3 dc in the corner-sp of Square 2, and ch 1. Next, slip stitch into the corner space of Square 1.
- Complete Corner: Return to Square 2, work 3 dc in the same corner-sp of Square 2, and ch 1.
- Finish Square 2: Continue to crochet normally around the remaining unjoined sides of Square 2. At the end, finish off and weave in your ends.
Joining the Back Panel (Squares 1 to 6).
Attach Squares 1 through 6 in order as pictured below, building the back panel first.
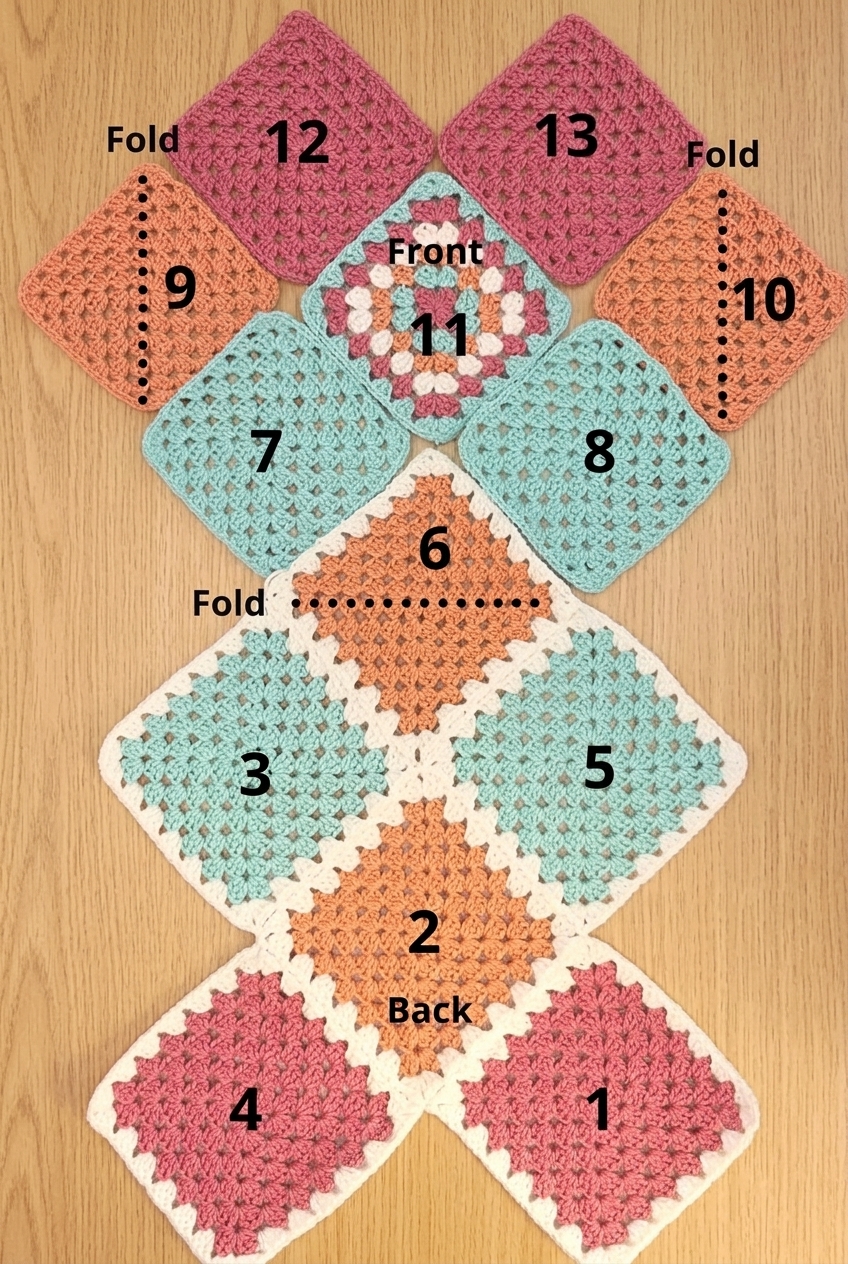
4-Square Corner Tip: When you reach a point where four squares meet, do not chain after making the first 3 dc in the corner. Instead, slip stitch into each of the opposite corners that you need to connect to. Then continue crocheting normally with the next 3 dc in that same corner space.
Folding and Joining Squares 7 to 13.
Next, turn the joined back panel over so the wrong side faces toward you. Fold Square 6 upward and arrange the remaining 7 squares on top as pictured below.
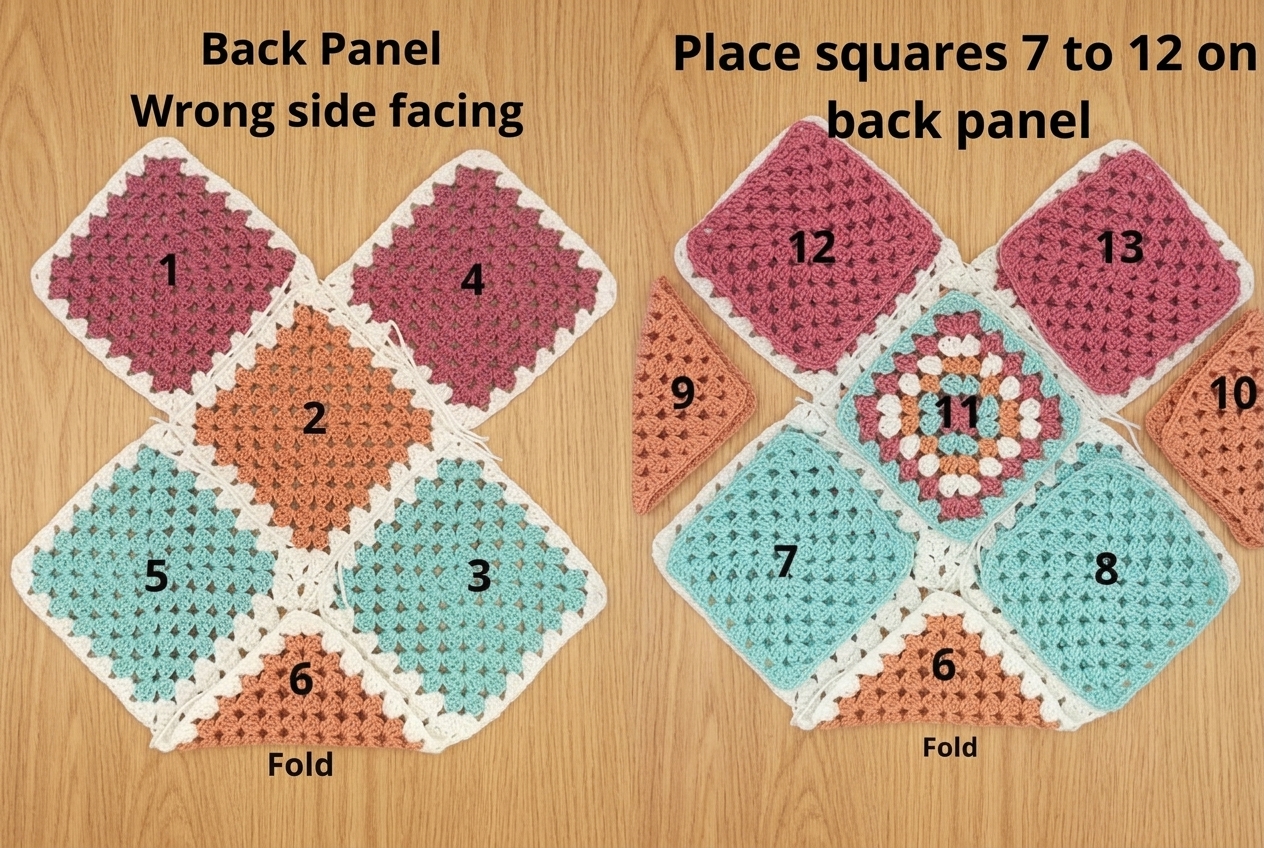
- Bottom & Lower Front: Start by joining Square 6 to Square 7, and then join Square 6 to Square 8.
- Side Gusset Squares: Next, attach Squares 9 and 10 so they connect to both the back and front panels.
- Upper Front Panel: Finally, attach Squares 11, 12, and 13 to finish the front of your granny square tote bag.
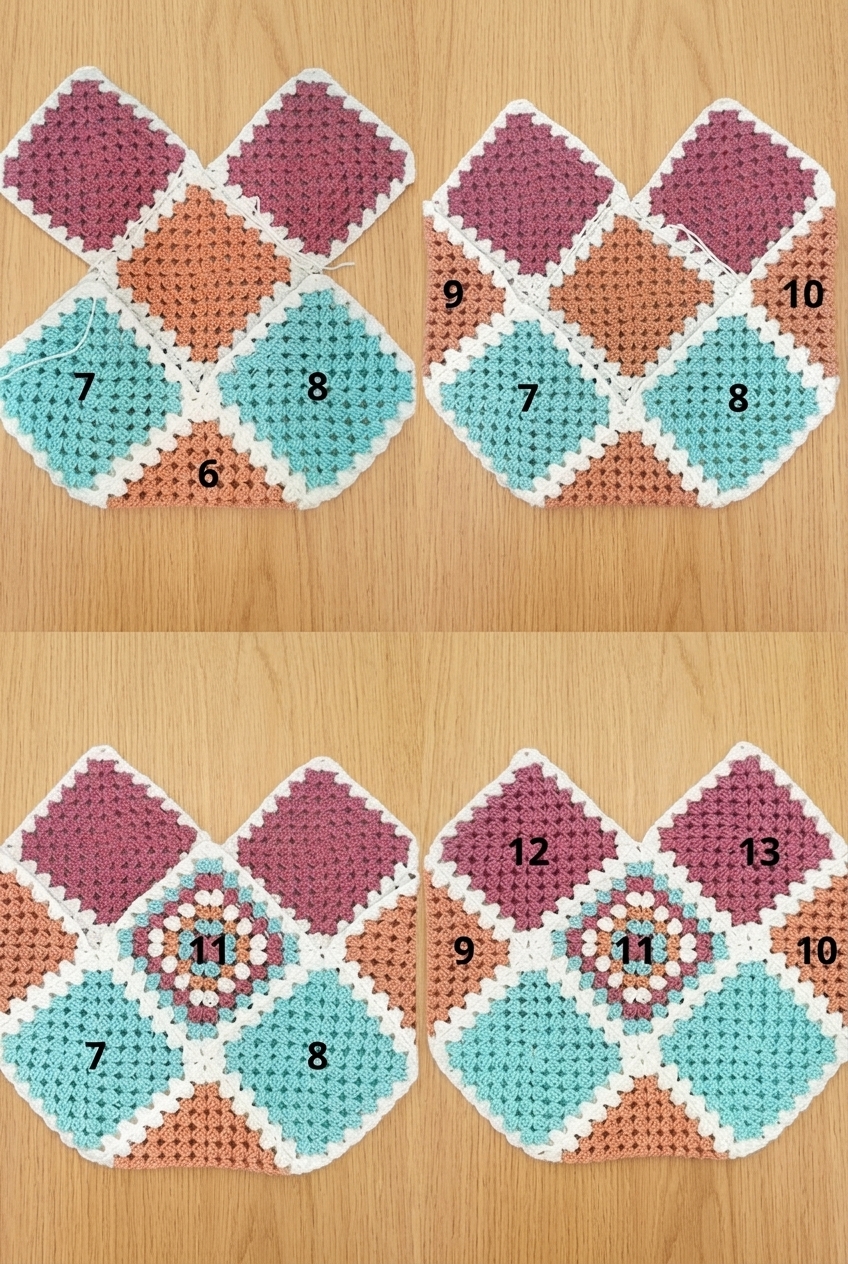
After connecting all 13 squares, weave in all loose ends securely. Then continue to the sides and top border of the bag.
Step 3: Crocheting the Sides and Upper Border of the Bag.
You will now work in the round and crochet a single crochet border around the entire top opening. Notice the high corners (Peaks) and the lower dips between squares (Valleys) shown below.
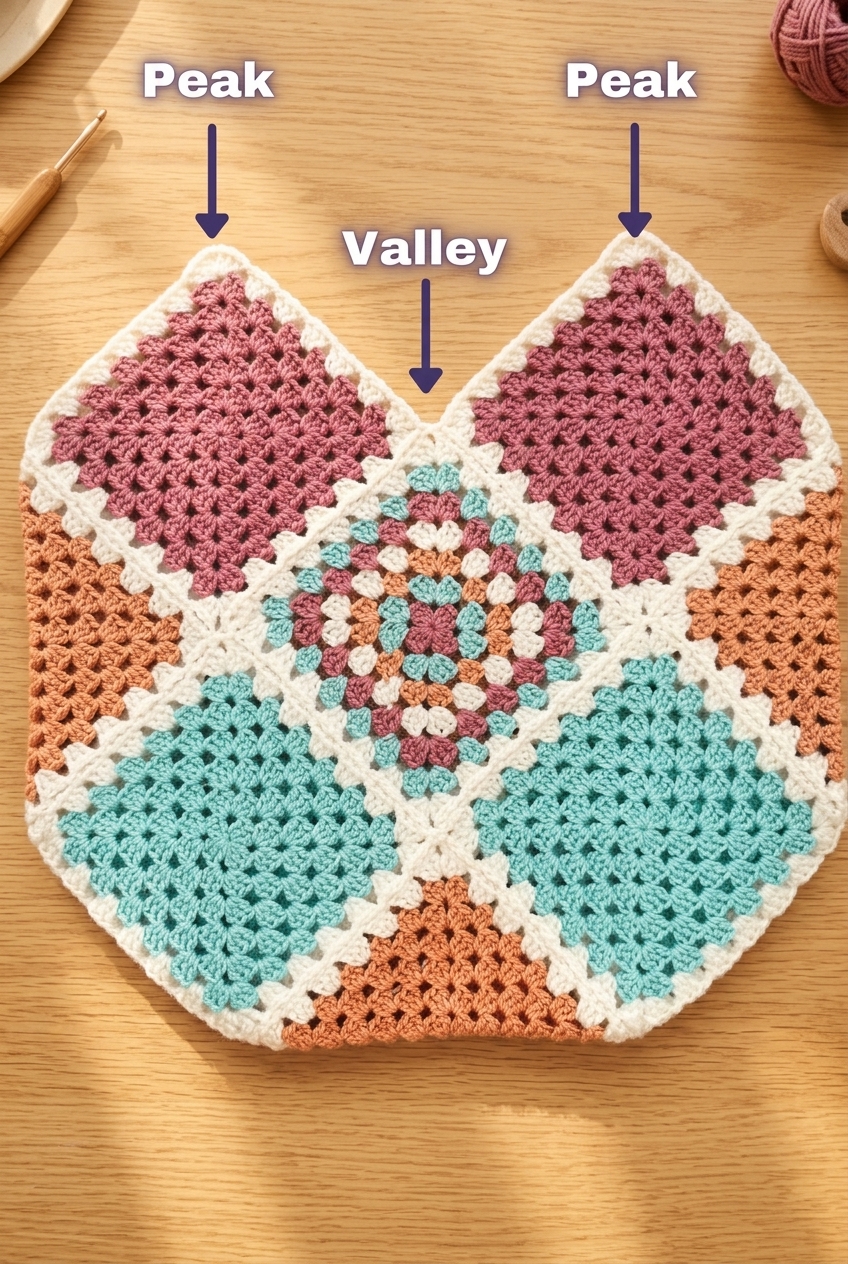
- Start at Top Right Peak: With the front side facing you, connect your main color to the top right corner (peak) in the ch2-spce.
- Work Peak & Slope: Ch 1, and work *3 sc into the same corner space. Mark the second sc with a stitch marker right away. Next, work 1 sc in each of the next 3 stitches and 1 sc in each ch-sp down to the valley.
- Work Valley Decrease: Work a sc3tog across the next 3 corner spaces in the valley. Afterward, continue working 1 sc in each stitch up the slope until you reach the next peak corner.
- Complete the Round: Repeat from * all the way around until you reach the beginning of the round. Finally, slip stitch into the 1st sc of the round.
Crocheting the Right Side Rows.
With the front side facing you, you will now crochet back and forth in rows on the right side of the bag.
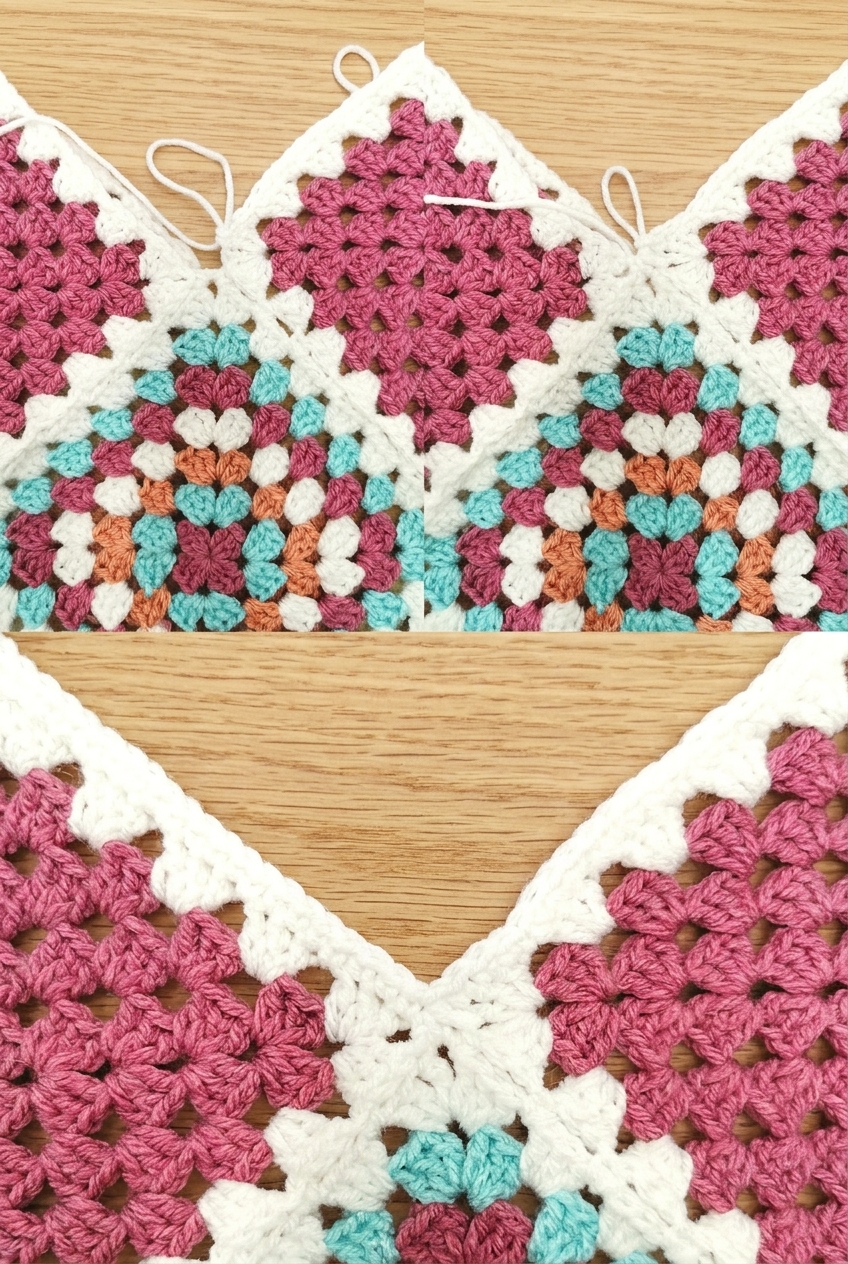
- Row 1 (Right Side): Working directly from the previous round, *sc into the first stitch, ch 1, and turn to work in rows. Next, work 1 sc into each stitch until you reach the middle valley of the side. Work a sc3tog in the middle of the squares, and continue to sc up the row to the stitch marker. Work 1 sc into the marked stitch, ch 1, and turn your work.
- Row 2 (Right Side): Repeat from * once more until you have 2 turned rows of sc. That gives you 3 rows total on the right side, including the initial round of sc around the bag.
- Fasten Off Right Side: Finish off the yarn on the right side.
Crocheting the Left Side Rows.
Keep the front side facing you so you can now crochet matching rows on the left side of the bag.
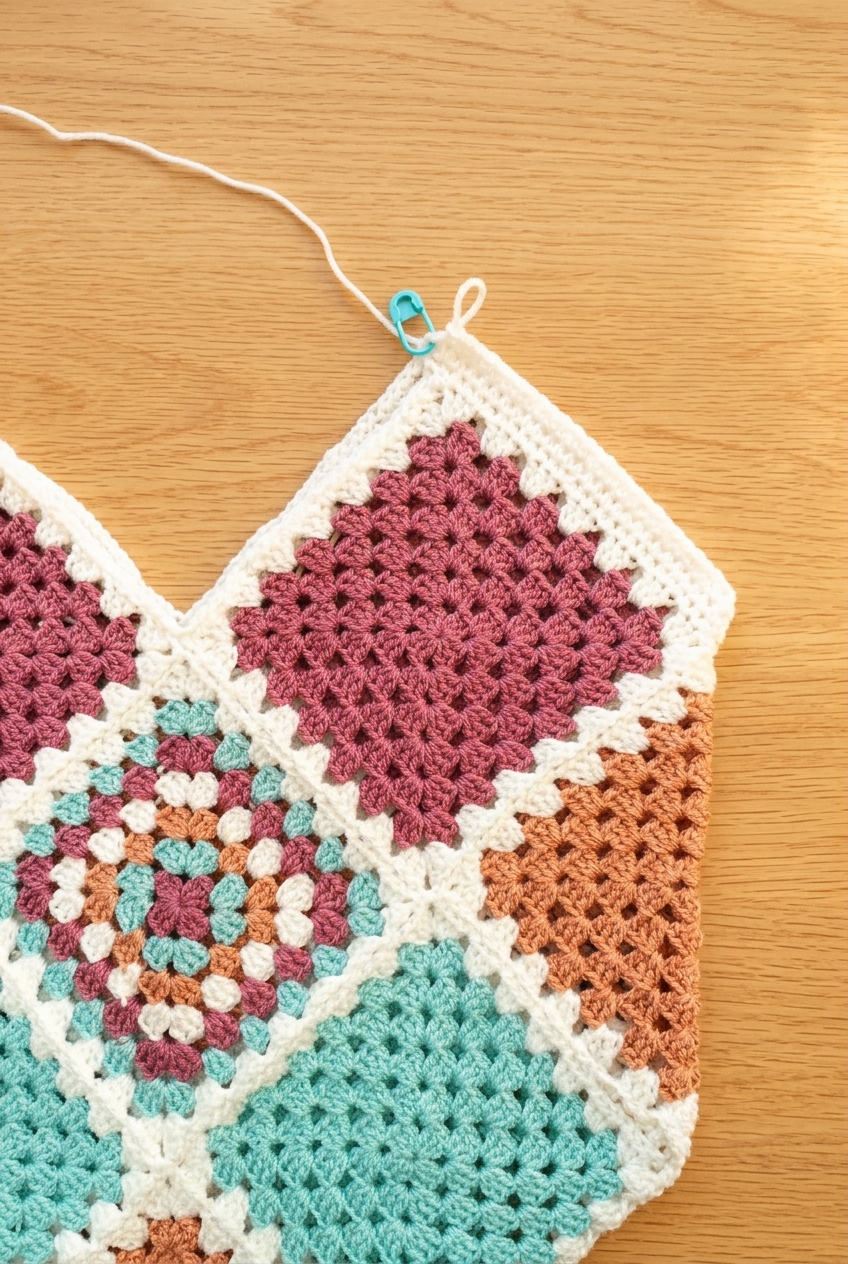
- Join at Left Peak: With your bag lying front side up, connect the main color yarn to the left corner where you placed your stitch marker.
- Work 2 Turned Rows: Crochet in turned rows with a sc3tog in the middle valley, just as you did on the right side. Stop once you have 3 rows total on the left side, including the first base round of sc.
- Keep Loop Active: DO NOT FINISH OFF at the end of the third row.
Step 4: Crocheting the Shoulder Straps.
You are now working from the top peak on the back panel of your granny square tote bag. Follow these steps to create and reinforce both shoulder straps.
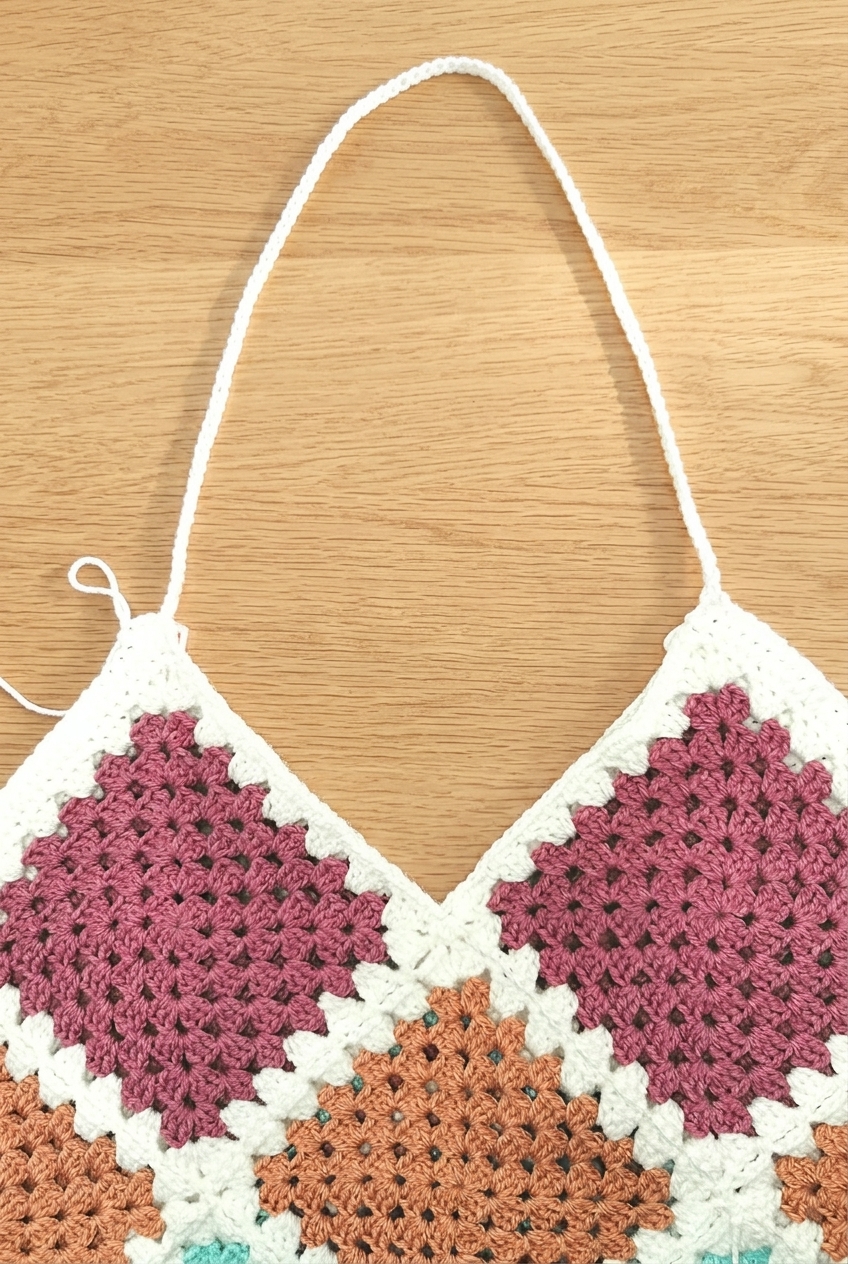
- First Strap Chain (Back): Chain 120 (Ch 120) for the back handle.
- Attach Back Strap: Connect the chain with a slip stitch to the top peak of the square next to the one holding the chain. Next, work 1 sc in each stitch across, and work a sc3tog in the middle valley of the bag. Continue working 1 sc across until you reach the top corner peak of the front square.
- Second Strap Chain (Front): You are now on the front square of your bag. Work Ch 120 and connect with a slip stitch to the top peak of the next front square, just as you did in step 1.
- Work Across to First Chain: Work 1 sc in each stitch across, and work a sc3tog in the middle valley of the bag. Then work 1 sc across until you reach the base of the first chain you made.
- Single Crochet Along Both Straps: Now work 1 sc in each ch (working in 1 loop only) across the first strap. When you reach the end of the chain, continue to sc across the bag (with a sc3tog in the middle valley) as before until you reach the second chain. Repeat the exact same process across the second chain and side as you did on the first one.
- Finish the Tote Bag: At the end of the round, slip stitch into the 1st sc of the round and finish off.
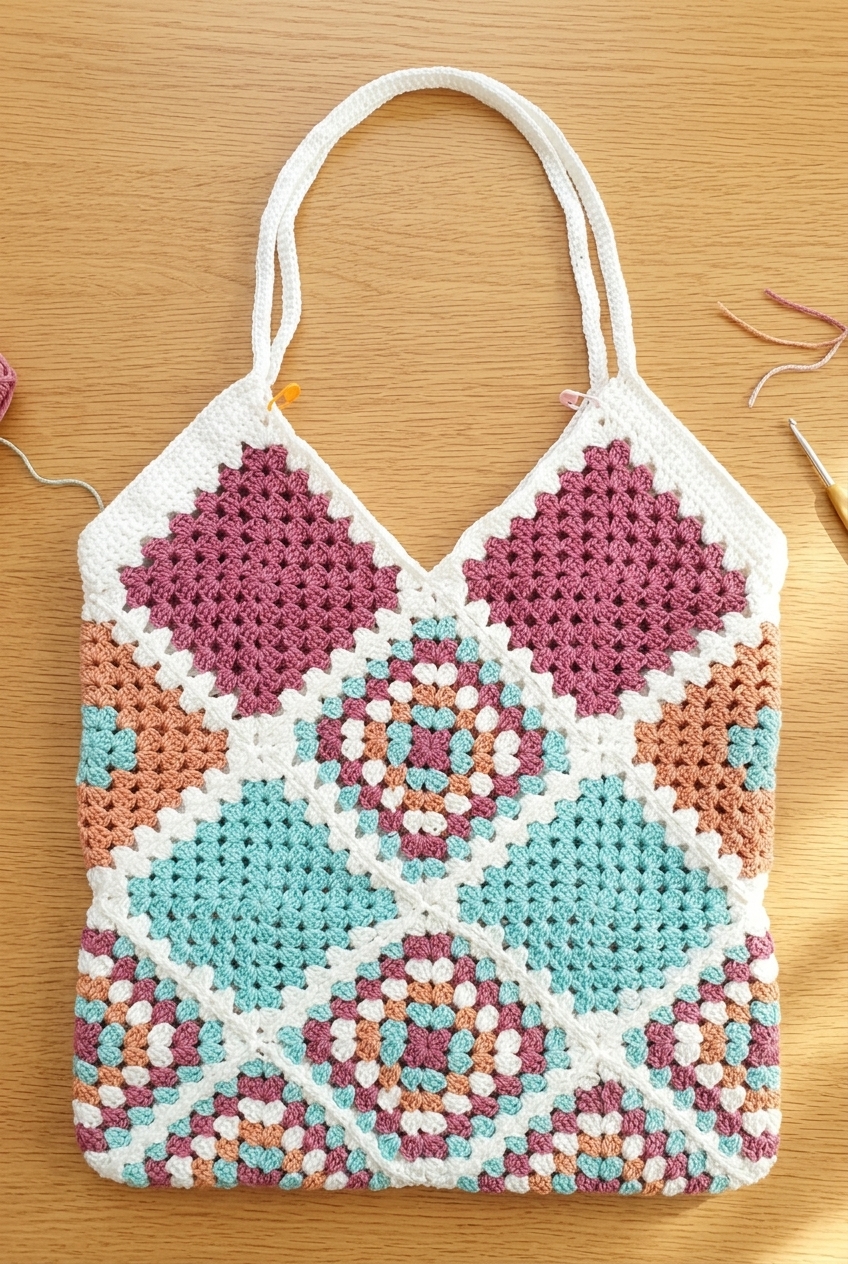
Finally, weave in all remaining yarn ends with your tapestry needle. Your handmade granny square tote bag is now complete and ready to enjoy!


0 Comments