

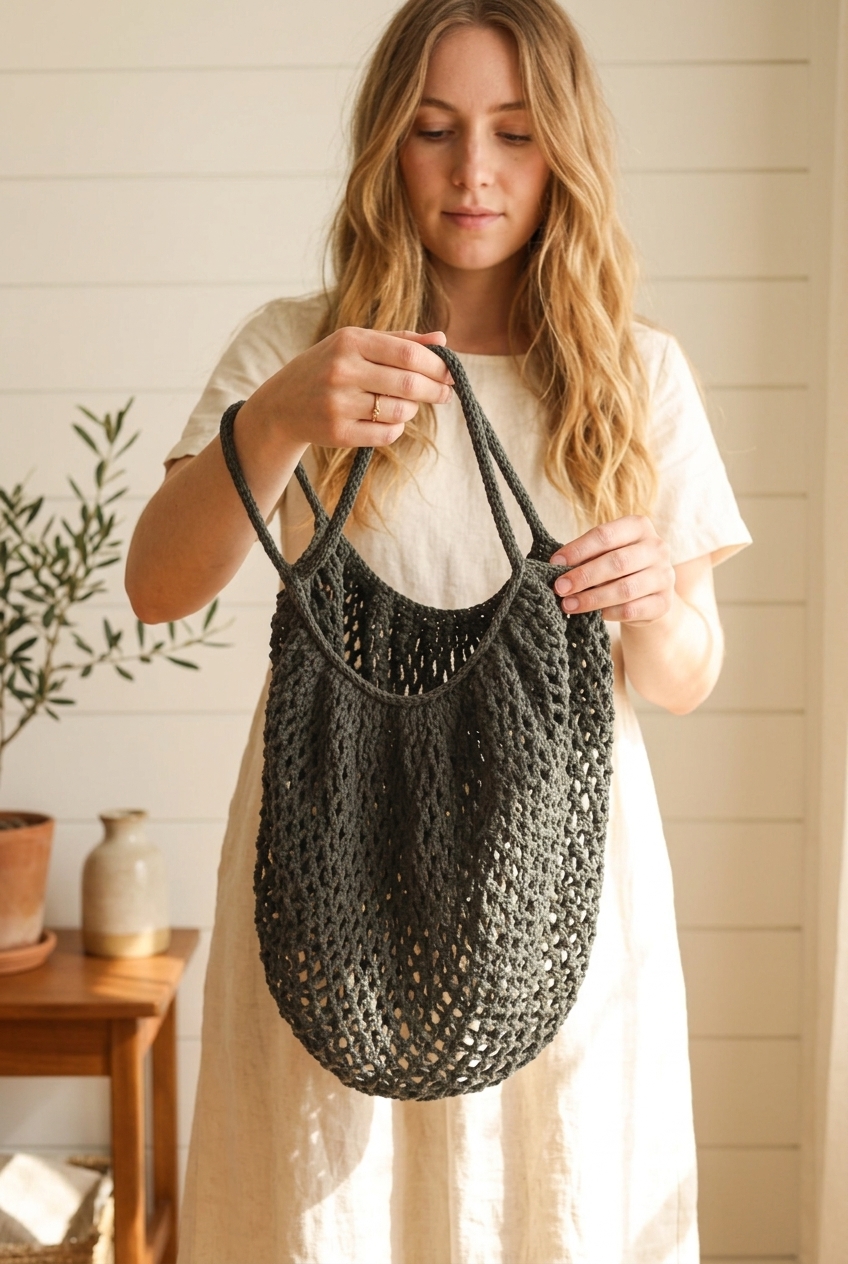
Creating a handmade mesh market crochet bag is a practical and relaxing project for your collection. This spacious tote stretches to hold everything you need for the farmers market, park, or beach. Furthermore, the entire design relies on just two basic stitches: chains and slip stitches. As a result, you can enjoy a rhythmic and meditative craft session from start to finish.
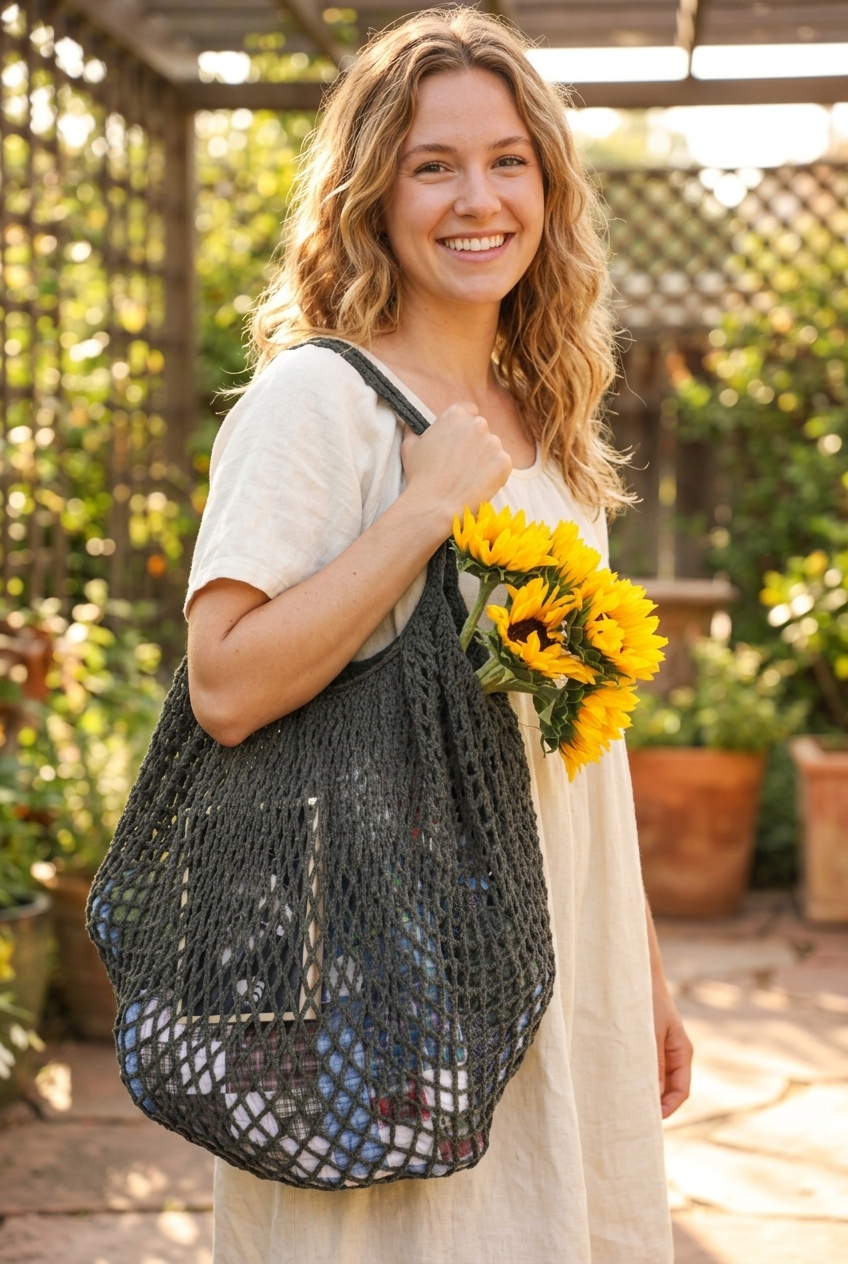
In addition, this free pattern uses a clever construction technique that eliminates complex seaming. First, you crochet a sturdy slip-stitched rectangle for the base tab. Next, you work flat rows of airy chain-five mesh across the body. Afterward, you cinch the opposite end with a matching slip-stitched tab. Finally, you crochet along the side edges to gather the mesh and form rolled handles in the round.
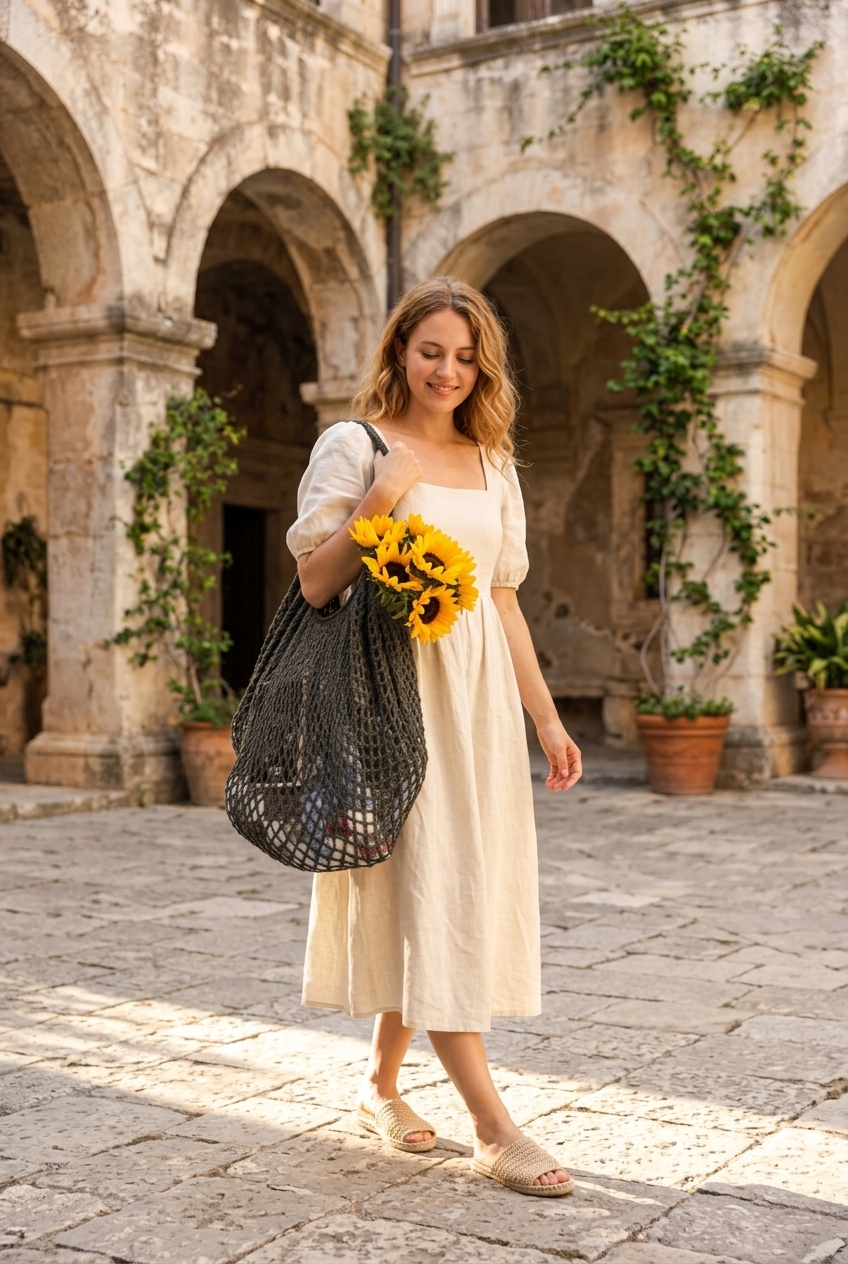
If you love making everyday bags, you will also enjoy our granny square tote bag. You can also try our simple crochet shoulder bag pattern for a structured daily carry. Meanwhile, let us explore why this expandable market tote works so well and gather your exact supplies.
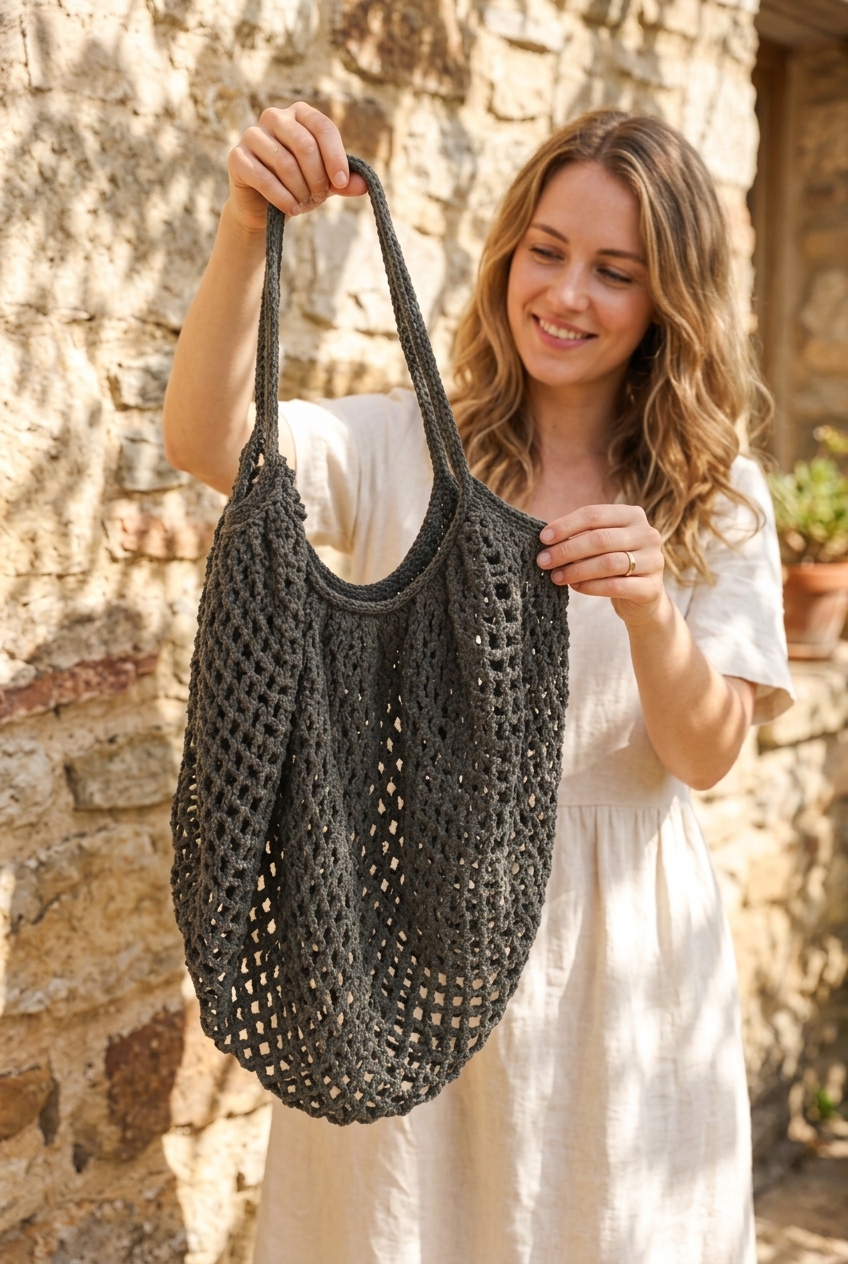
Why You Will Love This Mesh Market Crochet Bag Pattern.
First of all, this mesh market crochet bag is remarkably lightweight and foldable. Even so, it expands to an impressive volume when filled with bulky items. Because the body uses chain-five arches anchored with slip stitches, the fabric drapes gracefully. Moreover, the rolled handles are worked in the front loops only. Consequently, the straps curl naturally into a cushioned cord that feels gentle on your shoulder.
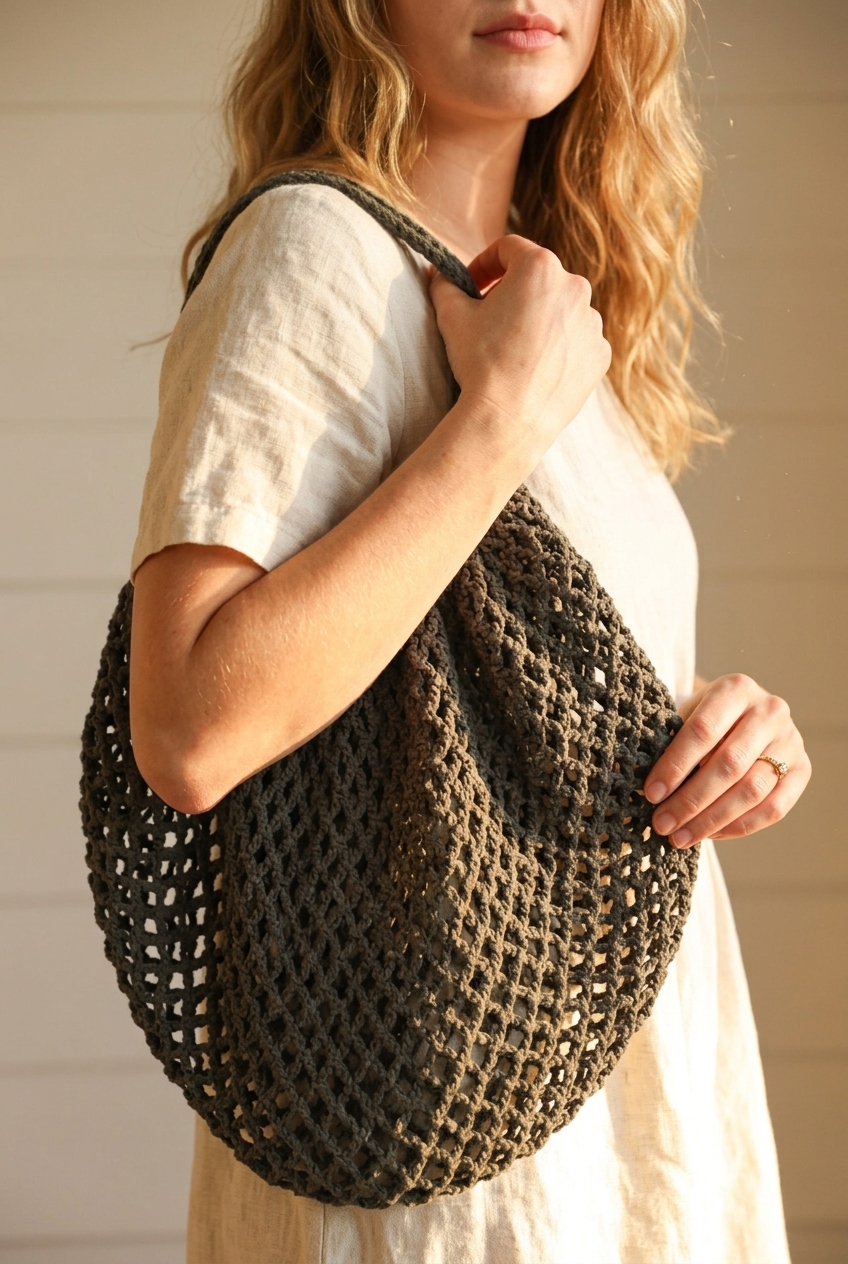
Additionally, you can easily customize the length of the mesh body depending on what you carry. Below, you will find the full-size pattern along with an exact formula for a shorter produce version.
Exact Materials and Tools Needed.
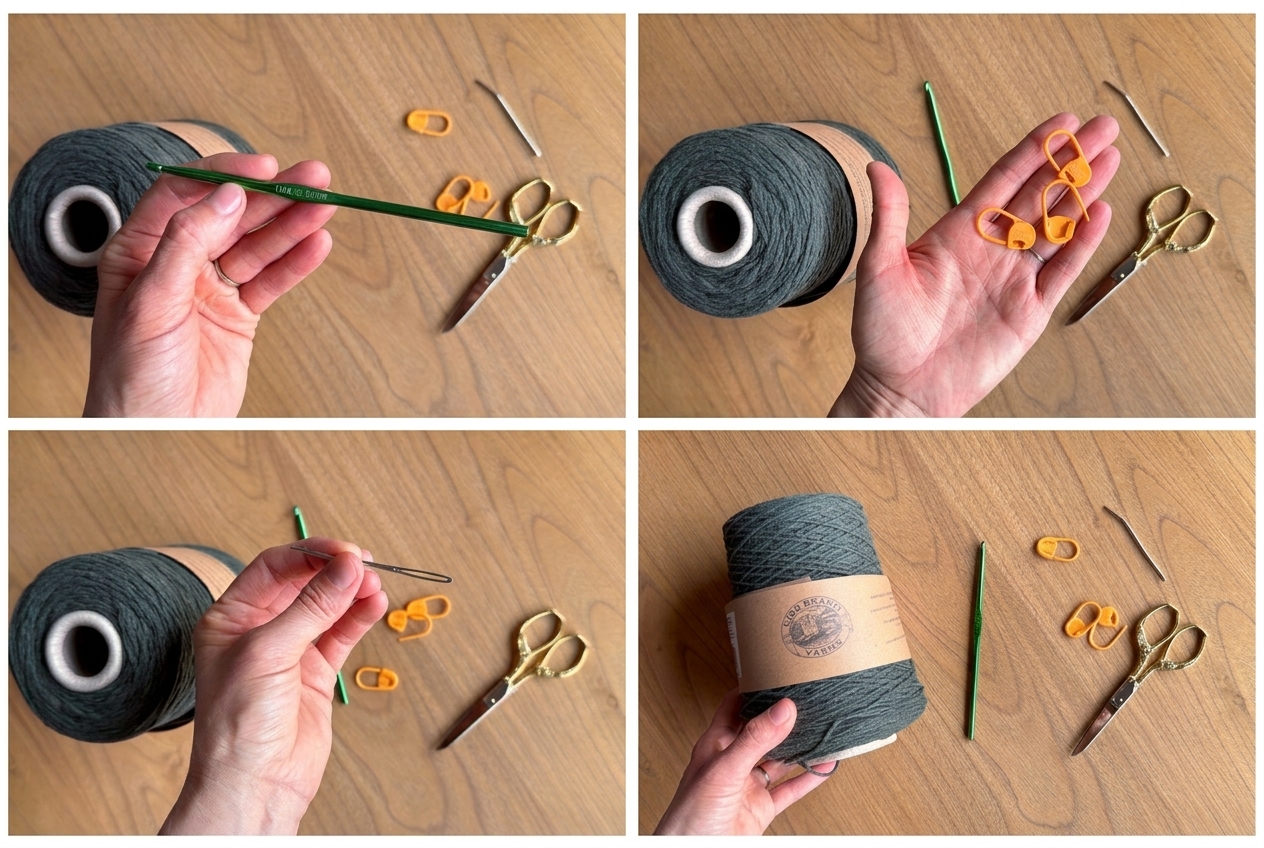
Before starting your mesh market crochet bag, gather the exact yarn weight, yardage, and hook size listed below. Choosing the right cotton fiber ensures that your finished tote remains strong over years of use.
- Yarn: 525 yards (480 m) or 320 grams (11.3 oz) of #4 Medium Worsted Weight Cotton Yarn. The sample uses Lion Brand RE-UP Recycled Cotton/Polyester Yarn. For the best results, choose a non-shiny or mercerized, stiffer cotton yarn for a sturdier, more substantial bag. Note that cotton yarn can split easily on the hook at first. However, managing the plies becomes much easier after the first few rows.
- Crochet Hook: 5.00 mm (US H-8) crochet hook.
- Notions: Stitch markers (optional, or contrasting scrap yarn or ribbon to count mesh rows on the side). You will also need a large-eye yarn needle and sharp scissors.
Finished Size, Gauge, and Stitch Abbreviations.
Checking your gauge on the initial five-row rectangle is very important because slip stitches can get tight. Consequently, taking a quick measurement after Row 5 will save time and guarantee comfortable stitching.
Finished Bag Measurements.
- Finished Size: Approximately 29 inches (73.5 cm) tall (including handles) by 18 inches (45.7 cm) wide unfilled. Measure the bag while laying flat and gathered at the handles. Naturally, the bag stretches and expands further when filled and in use.
Exact Pattern Gauge.
- Mesh Portion Gauge: 4 x 4 inches (10 x 10 cm) equals 9 rows (slip stitched points) by 8 slip stitch points. Note that the chains are not counted in this measurement.
- Starting Slip Stitch Rectangle Gauge (27 stitches x 5 rows): 0.75 inches (1.9 cm) tall by about 8 inches (20.3 cm) long. If your rectangle is noticeably larger, go down a hook size. Conversely, if your stitches feel too tight for your hook, relax your tension and go up a hook size.
Stitch Abbreviations (US Crochet Terms).
- ch: Chain.
- sl st: Slip stitch.
- flo: Front loops only.
Step-by-Step Main Bag Crochet Instructions.
Now we are ready to crochet the main body of the mesh market crochet bag. Keep your slip stitch tension relaxed throughout the project so your hook glides smoothly into every loop.
Crocheting the Starting Slip Stitch Rectangle (Rows 1 to 5).
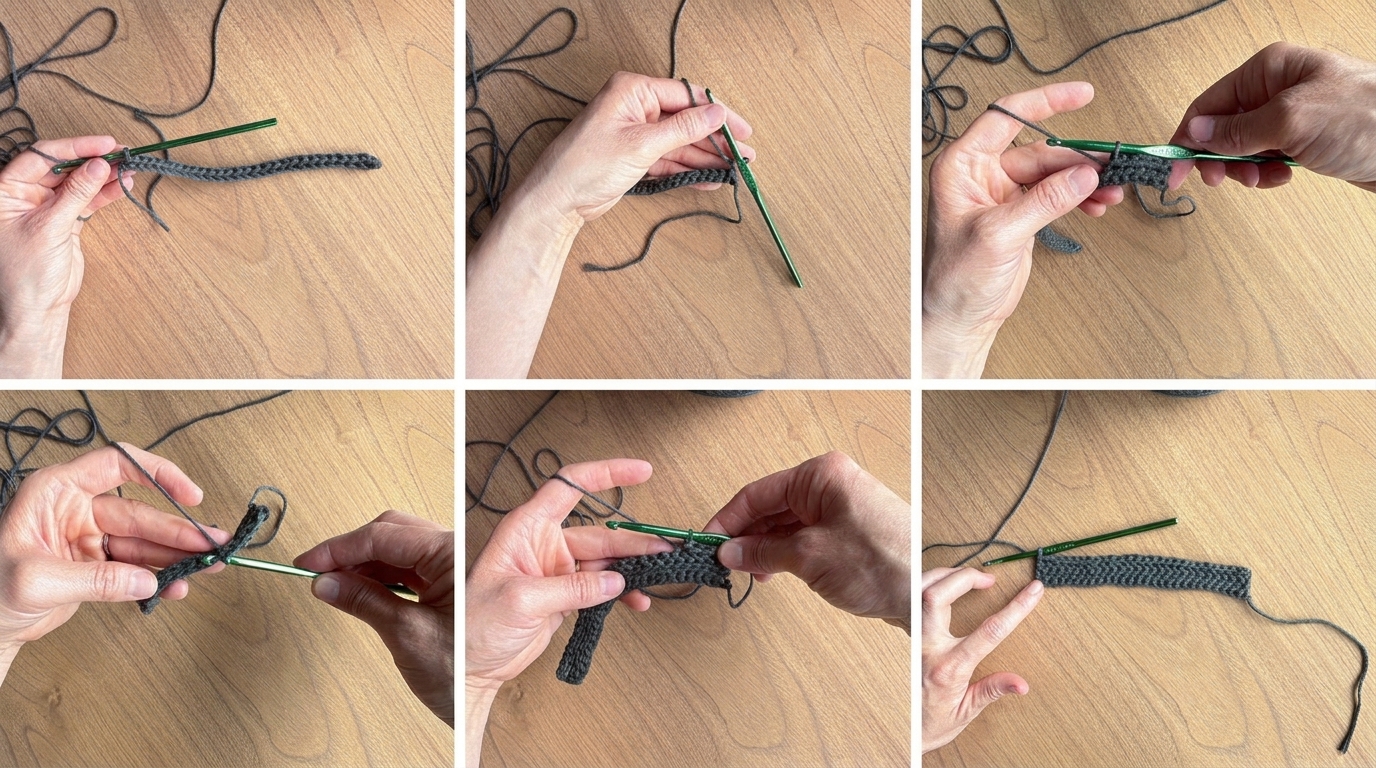
First, leave a 4-inch starting tail and make a slip knot on your 5.00 mm hook.
- Foundation Chain: Ch 28.
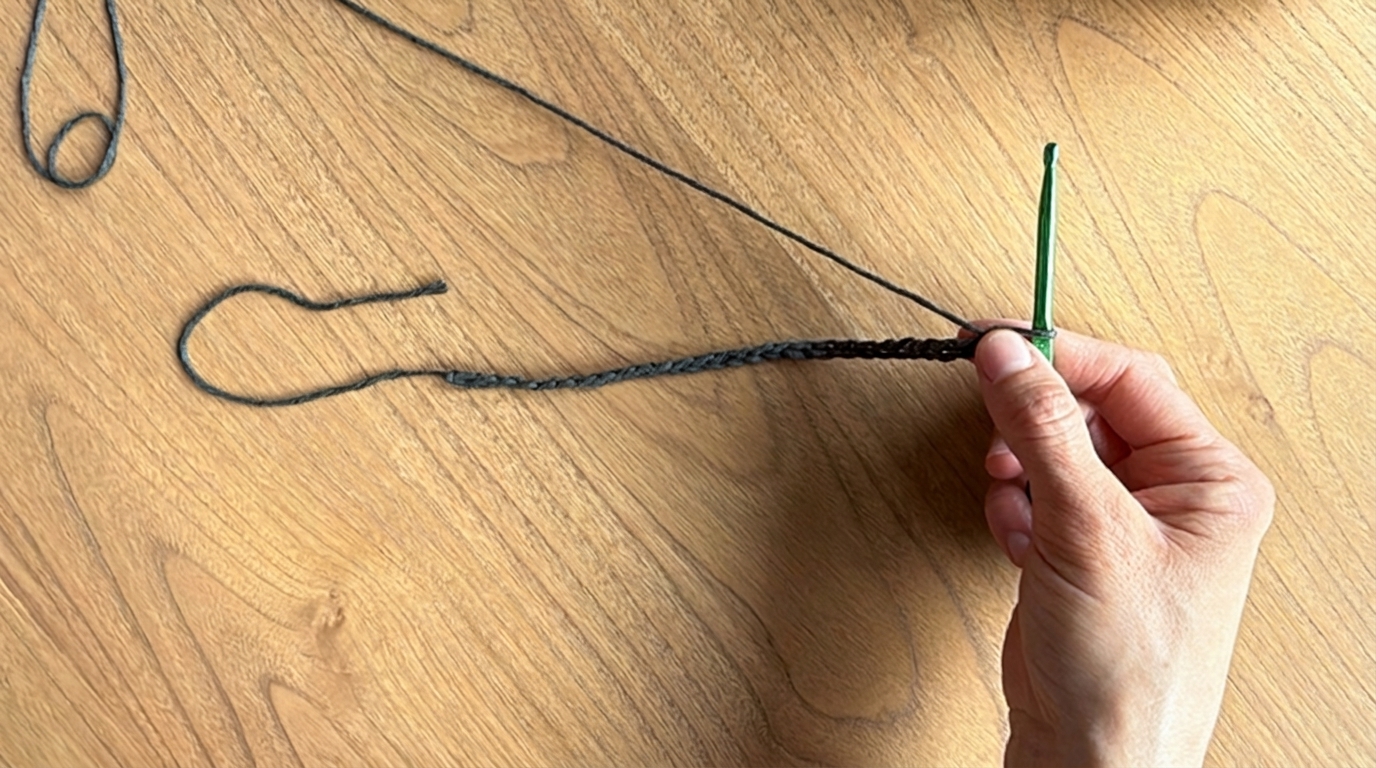
- Row 1: Turn your work and sl st into the second ch from the hook. Continue working 1 sl st into each ch across the row. Your total stitch count is 27 stitches.
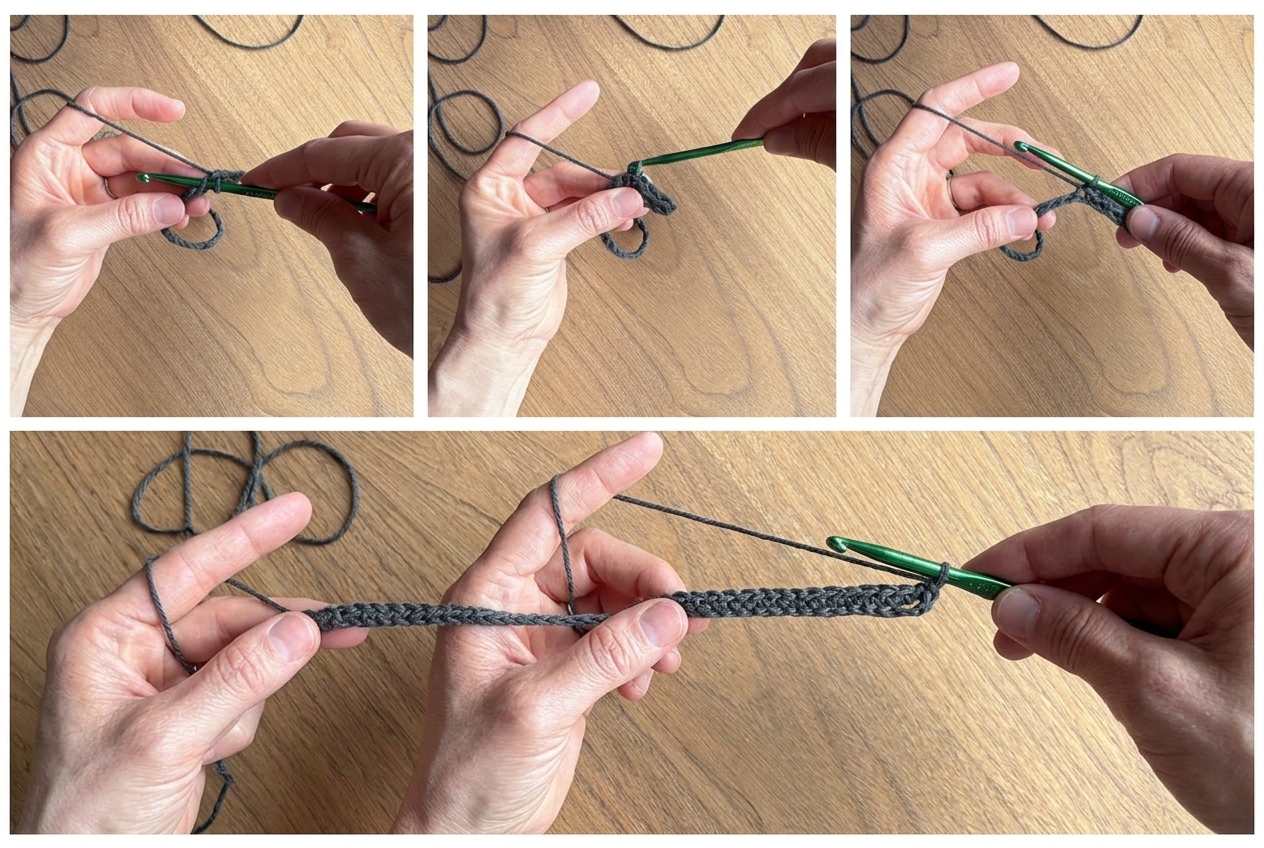
- Row 2: Turn, ch 1. Work 1 sl st into the front loops only (flo) in each stitch across. (27 stitches).
- Rows 3 – 5: Repeat Row 2. Working in the front loops only creates subtle horizontal ridges and gives the 5-row starting rectangle extra stability. Check that this strip measures 0.75 inches (1.9 cm) tall by about 8 inches (20.3 cm) long.
Beginning the Mesh Portion (Rows 6 to 87).
Once your 5-row base tab is complete, you will transition directly into the open chain-five mesh pattern. Therefore, each stitch across the rectangle becomes an anchor point for a chain arch.
- Row 6: Turn, ch 5. Work 1 sl st into the first stitch. Next, *ch 5, sl st into the next stitch.* Repeat from * to * 25 more times across the row. You will have 26 ch-5 spaces across all 27 stitches.
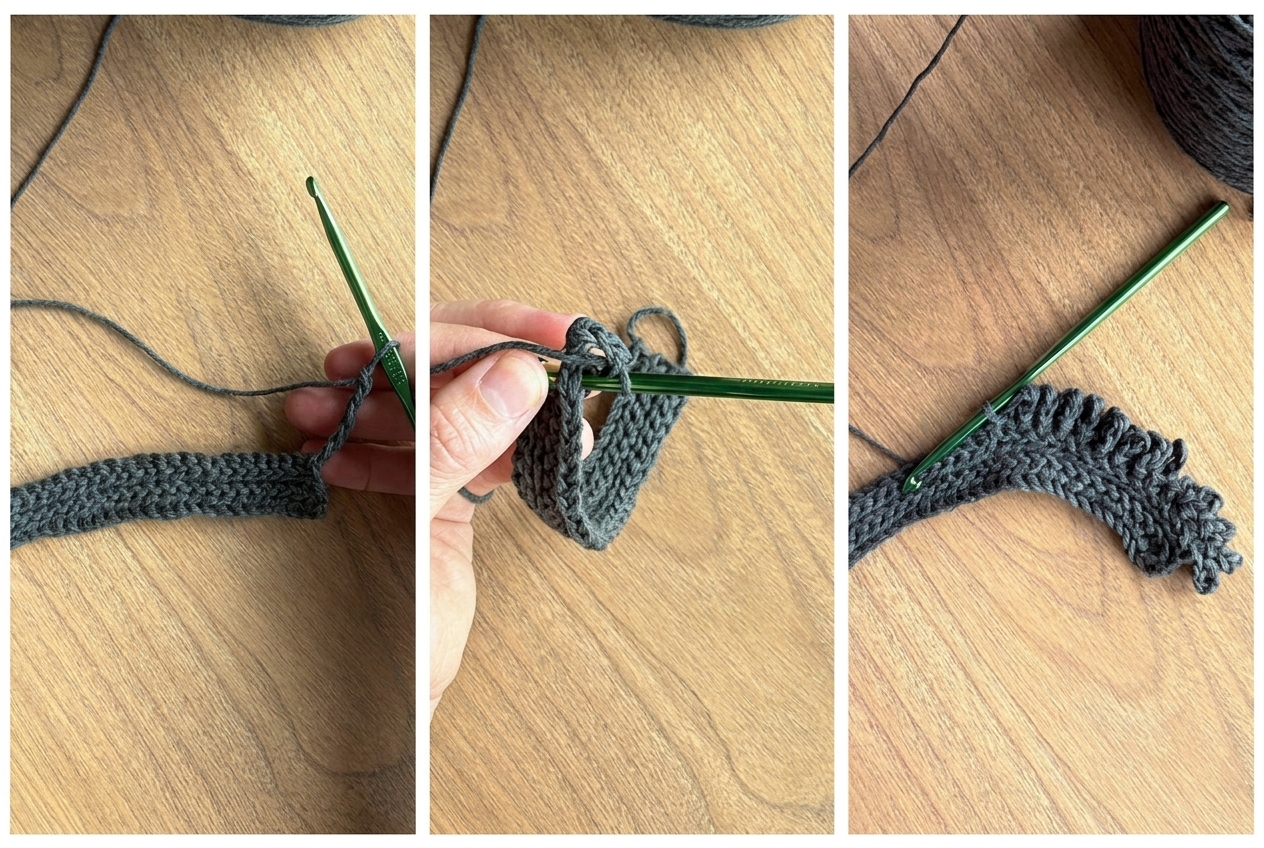
- Row 7: Turn, ch 5, and work 1 sl st into the first ch space. Insert your hook right into the open loop space rather than into a specific chain stitch. Next, *ch 5, sl st into the next ch space.* Repeat from * to * 25 times across.
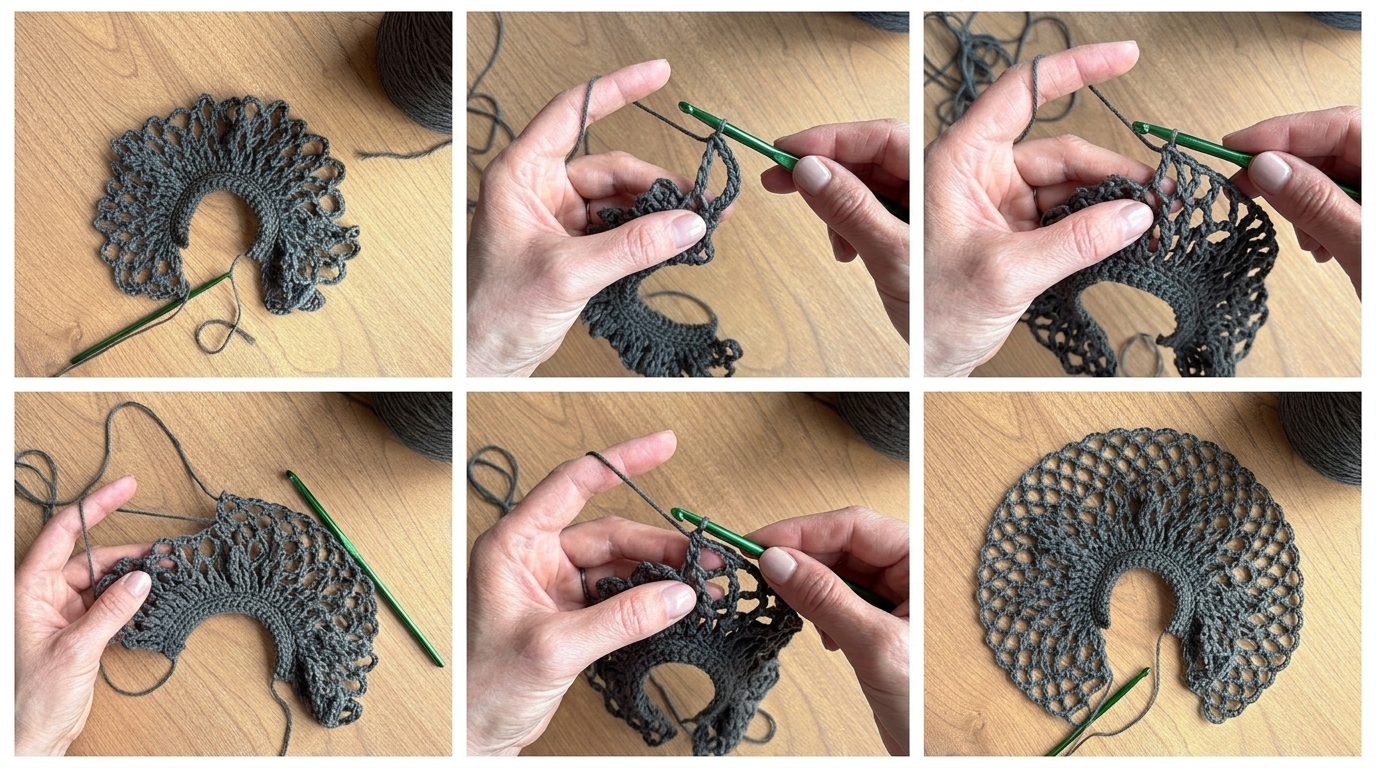
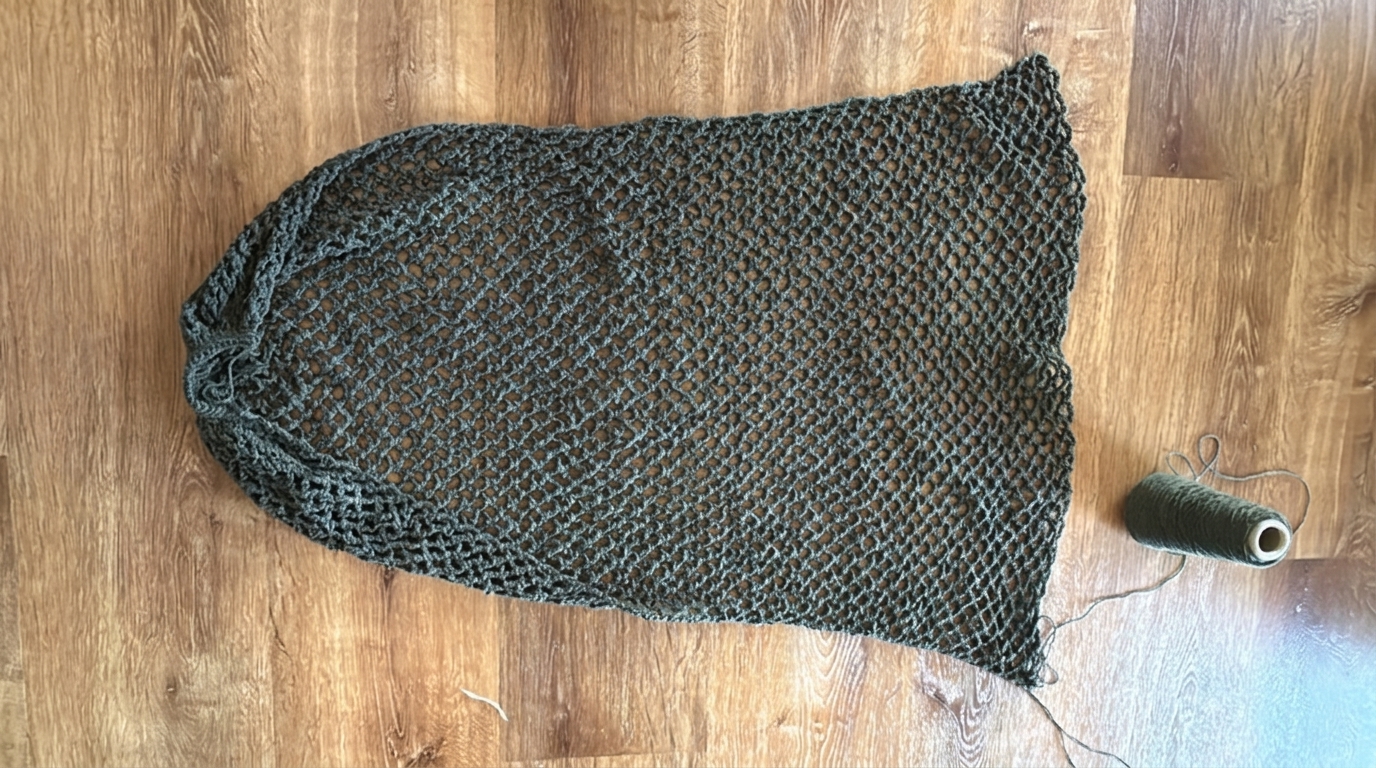
- Rows 8 – 87: Repeat Row 7 for a total of 82 mesh rows. As your fabric grows, the mesh will widen and form a diamond trellis pattern.
How to Count Your Mesh Rows Easily.
Counting 82 rows of stretchy mesh can feel tricky if you lose your place. Fortunately, there is a simple trick using the side edges of your work. Start on the side that has your initial starting yarn tail. Along that edge, count each outer chain space as 2 rows. Furthermore, place a stitch marker or scrap yarn every 10 or 20 rows to track your progress easily.
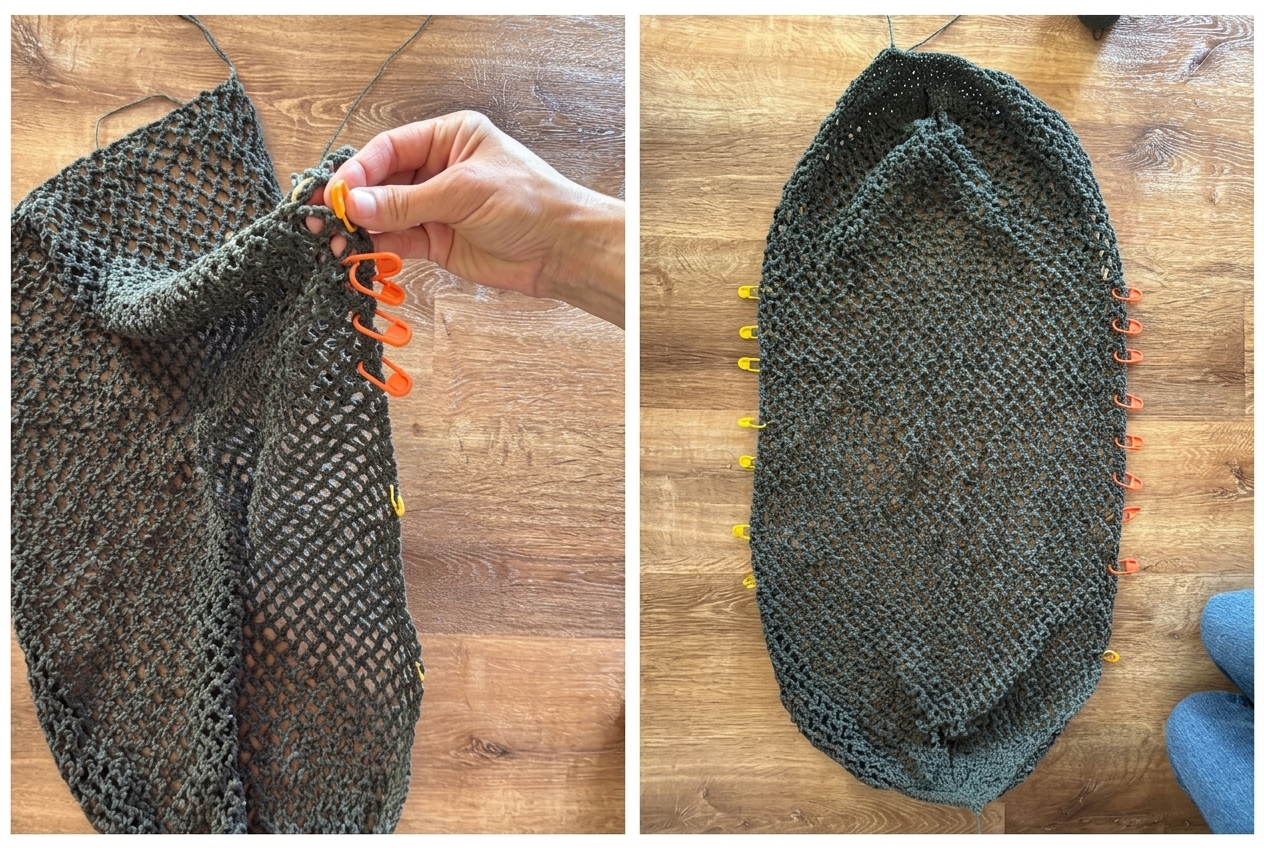
Ending the Mesh Portion and Cinching the Second End (Rows 88 to 92).
After completing Row 87, you will gather the wide mesh back down into a 27-stitch rectangle. This second short tab mirrors the beginning of the bag.
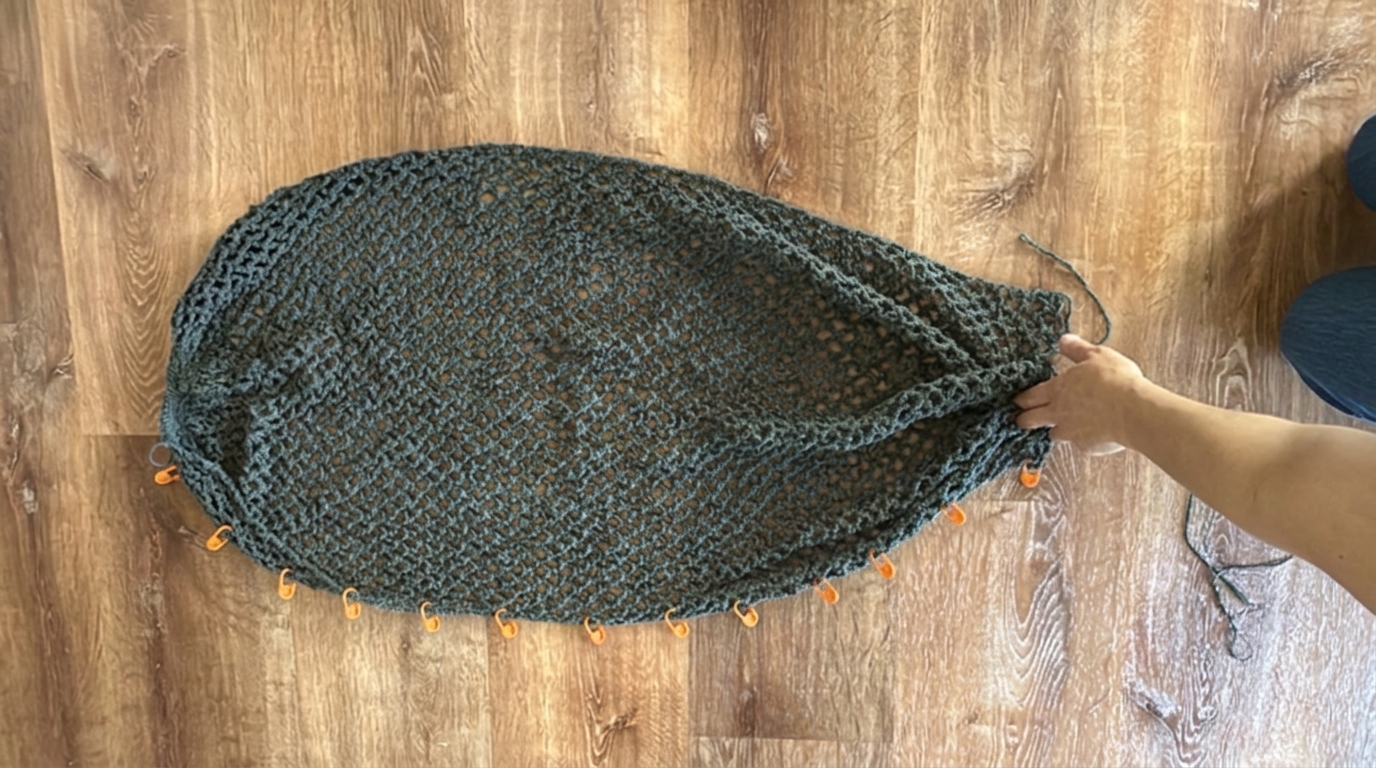
- Row 88: Turn, ch 1. Work 1 sl st into each ch space across the row. Do not add any chains between your slip stitches. This step cinches the wide mesh back to a total stitch count of 27 stitches.
- Row 89: Turn, ch 1, and work 1 sl st in the front loops only (flo) into each stitch across. (27 stitches).
- Rows 90 – 92: Repeat Row 89. You now have a matching 5-row slip-stitched rectangle on the second end. Do not fasten off after Row 92.
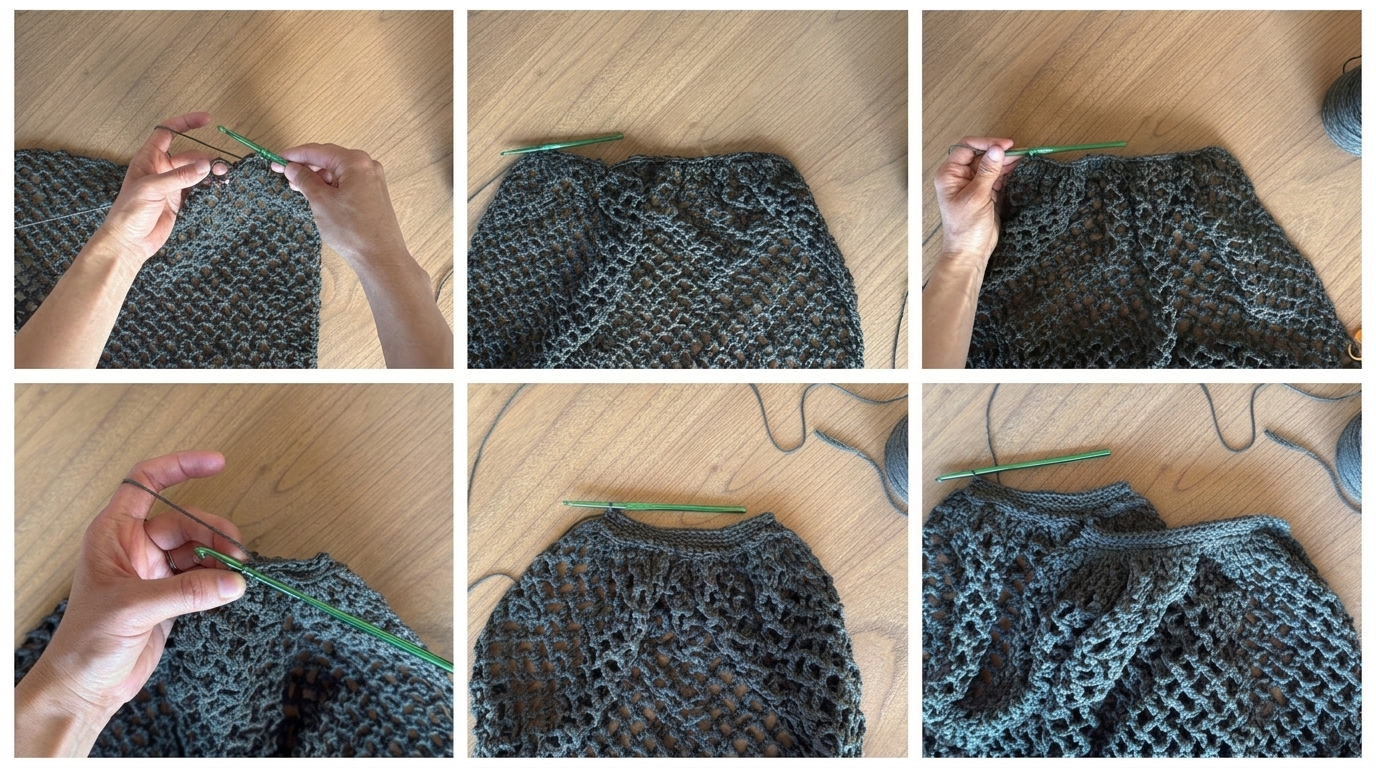
Crocheting the Rolled Handles (Handles 1 and 2).
Instead of sewing separate straps, rotate your piece to work along the long side edge of the mesh rows. Consequently, this step gathers the sides of the mesh market crochet bag and builds the handle in one loop.
Handle 1 Instructions (Rounds 1 to 5).
First, turn your work after Row 92 so you can crochet down the long side edge.
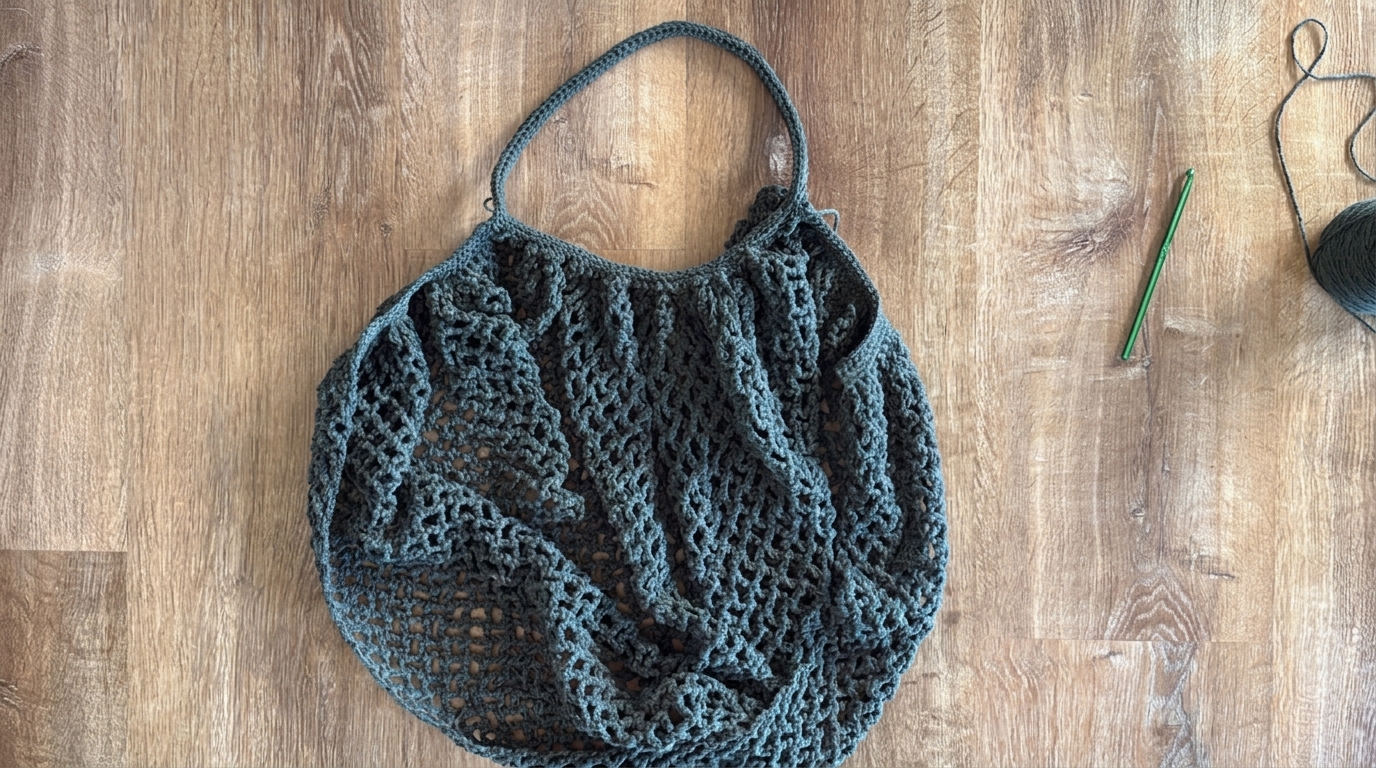
- Round 1: Ch 1. Work 2 sl st evenly into the side of the first slip-stitched rectangle. Keep these stitches neat, straight, and slightly loose. Next, work 1 sl st into each side ch space along the mesh edge. Make sure you do not work into any of the slip stitches. When you reach the opposite slip-stitched rectangle, work 2 sl st into its side edge. Then, ch 75 for the strap. You may add extra chains for a longer handle if you have spare yarn, but do not remove chains. Finally, bring the 75-chain loop back to the first rectangle and sl st into the starting ch 1.
- Round 2: Continue in the round without chaining 1. Work 1 sl st in the front loops only (flo) into each sl st and chain around. Use a stitch marker to mark the beginning of the round if desired.
- Rounds 3 – 5: Repeat Round 2, working 1 sl st in flo around the entire loop. Working in the round in flo causes the stitches to curl inward into a sturdy handle. After finishing Round 5, tie off and leave a 6-inch yarn tail.
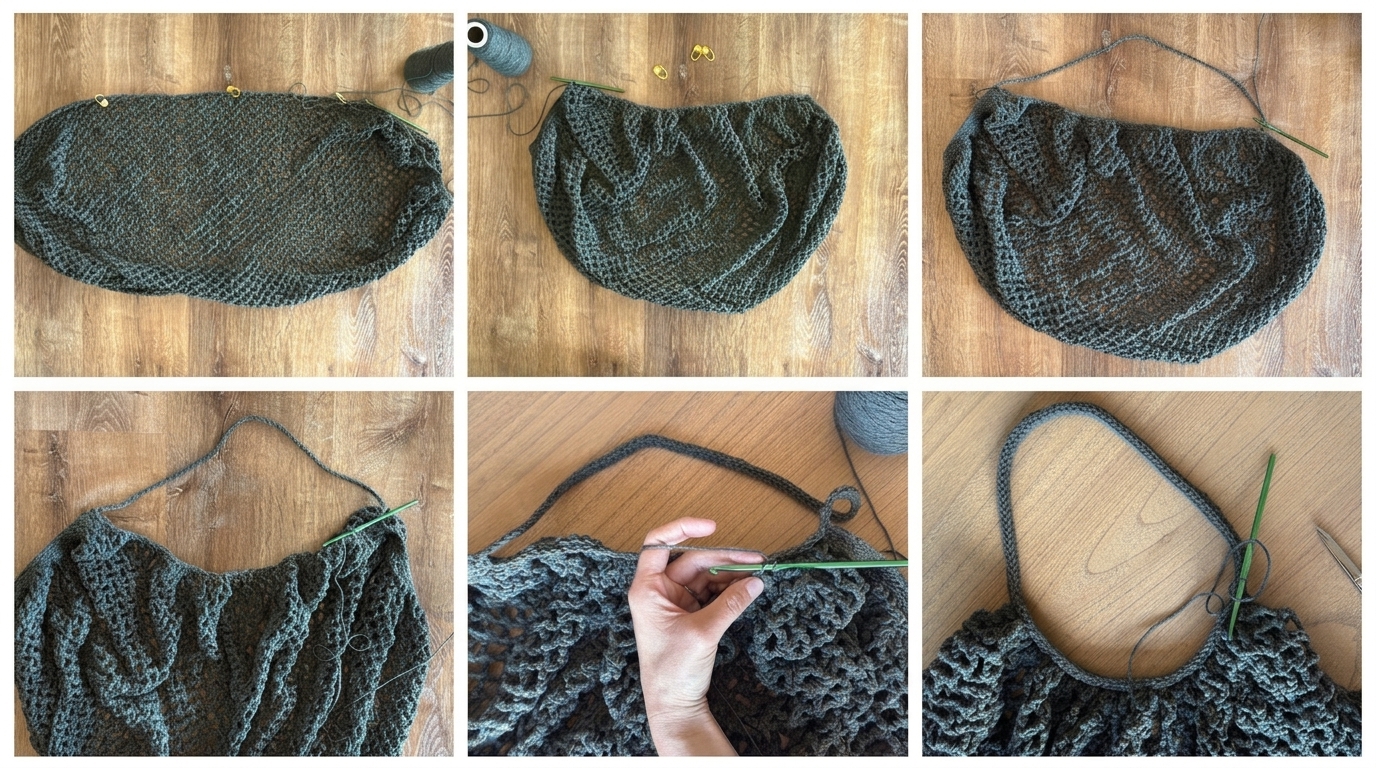
Once Handle 1 is complete, lay your bag flat to check the gathered edge and curled strap.
Handle 2 Instructions and Finishing.
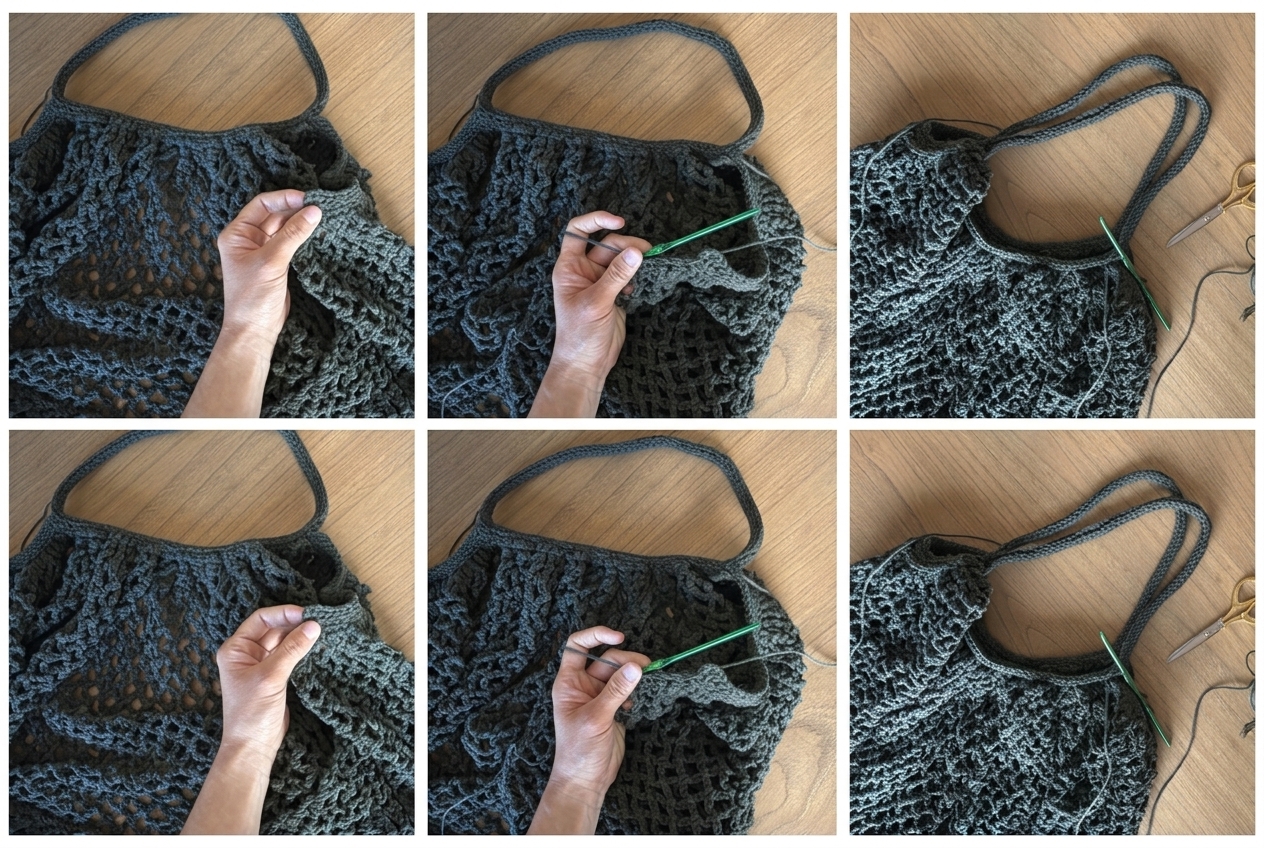
Now you will repeat the exact same process on the opposite untouched side of the bag. However, make sure you do not flip the bag over before attaching your yarn. Keeping the same side facing up ensures that both handles curl outward and mirror each other.
- Attach Yarn: Insert your hook into one of the slip-stitched rectangles on the unworked side edge. Attach your yarn with a sl st.
- Rounds 1 – 5: Repeat Rounds 1 through 5 the exact same way as Handle 1. Specifically, work 2 sl st into the rectangle side, 1 sl st into each side ch space, and 2 sl st into the second rectangle. Next, ch 75, join, and work 4 more rounds of sl st in flo. Fasten off after Round 5 with a 6-inch tail.
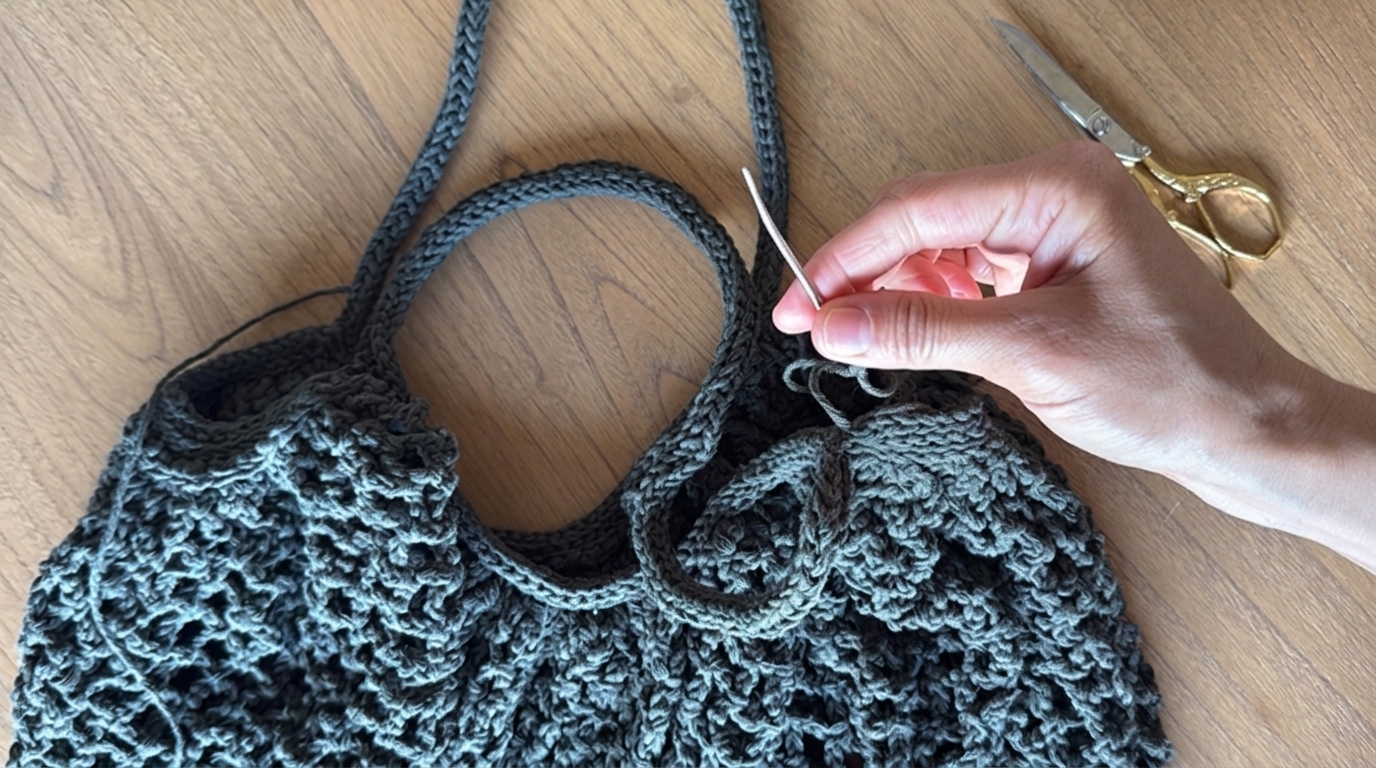
- Weave in Ends: Thread each yarn tail onto your large-eye yarn needle. Weave the tails securely back and forth through the dense slip-stitched rectangles and trim the excess yarn.
How to Adjust the Bag Size for Heavy Produce.
Because crochet mesh is naturally elastic, the full-size mesh market crochet bag stretches vertically under heavy loads. In fact, the bag easily holds 5 pounds of grapefruit without breaking a sweat, as shown below. However, heavy fruits and vegetables can make a full-length bag hang low near your ankles.
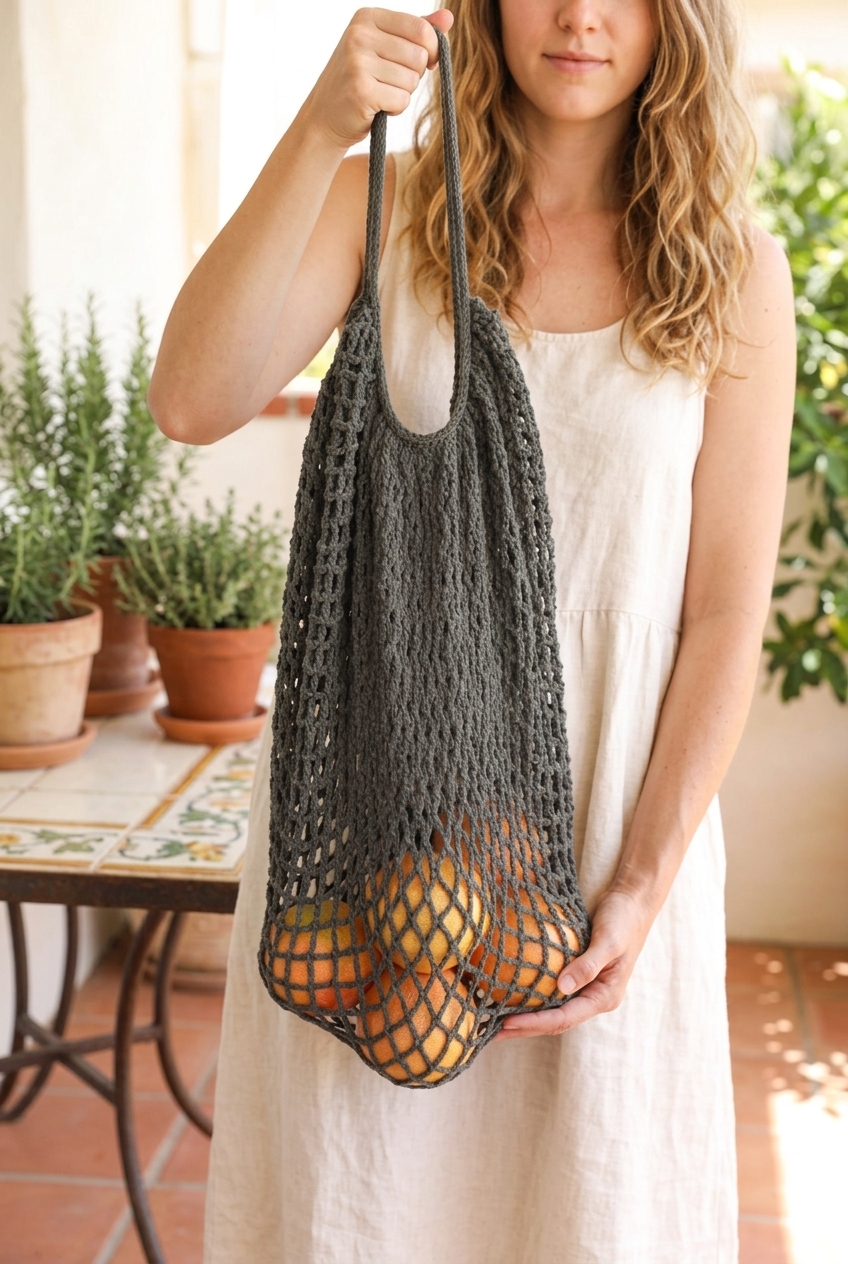
Fortunately, you can easily crochet a shorter version for heavy grocery trips by following this exact adjustment formula.
- Step 1 (Reduce Mesh Rows by an Even Number): Decide how many mesh rows to remove from the body. Make sure you reduce the count by an even number of mesh rows.
- Step 2 (Add Half That Number to the Handle Chains): Remember that the upper bag body forms part of the handle opening. Therefore, shortening the body also shrinks the armhole drop. To keep the same handle drop, divide the removed mesh rows by 2. Add that exact number of chains to each 75-chain strap.
- Exact Adjustment Example: Suppose you remove 16 mesh rows from the body. This leaves 64 mesh rows instead of 80 or 82 mesh rows (excluding the 5-row slip stitch ends). Divide 16 by 2 to get 8. Next, add 8 chains to the 75-chain handle for a total of ch 83 per strap.
Best Things to Carry in Your Mesh Market Crochet Bag.
Aside from farmers market produce, the full-size mesh market crochet bag is perfect for bulky, lighter items. These oversized essentials fit much better inside stretchy mesh than inside rigid canvas totes.
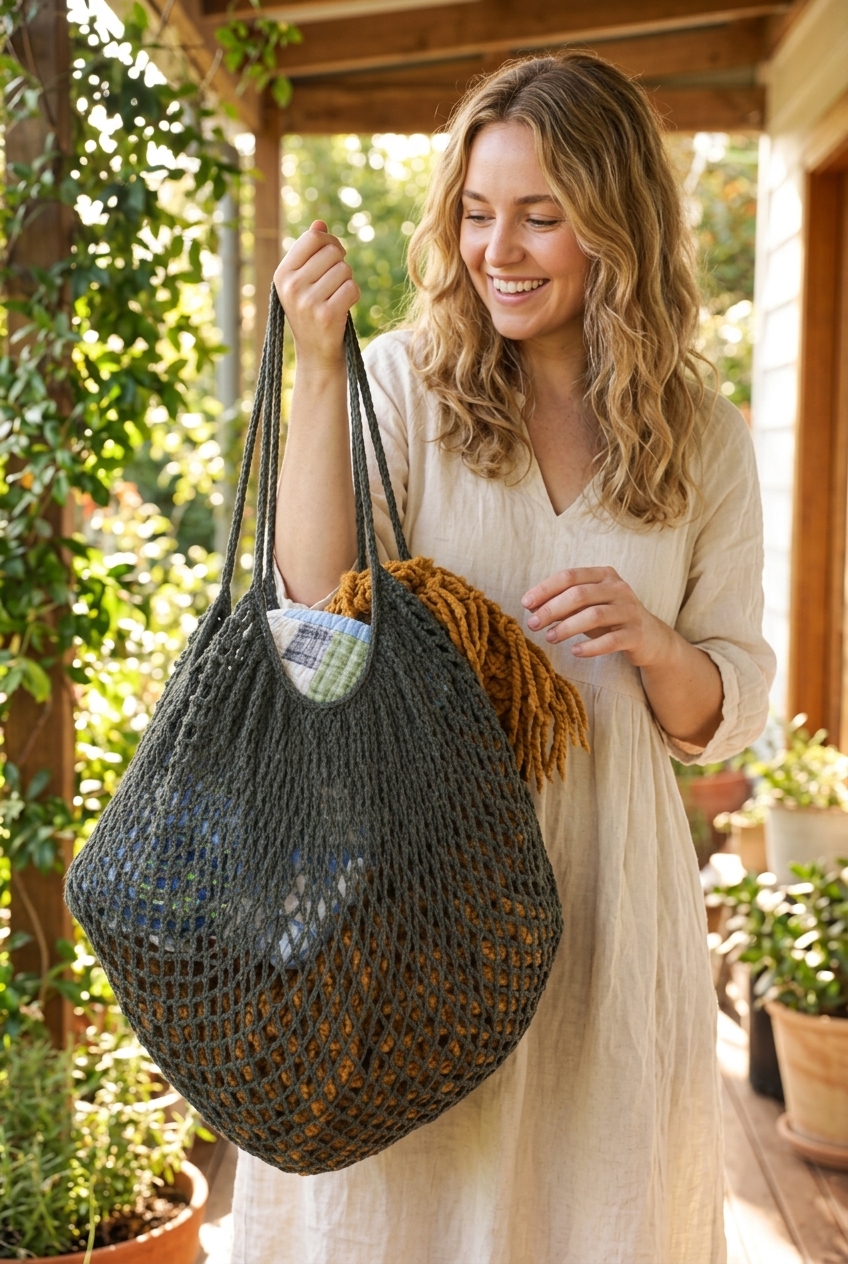
1. Picnic Blankets and Quilts.
First, rolled-up picnic quilts and oversized outdoor blankets slip effortlessly into the stretchy mesh body. Even when you pack two full-size blankets, the bag remains comfortable to sling over your shoulder.
2. Soccer Balls and Sports Gear.
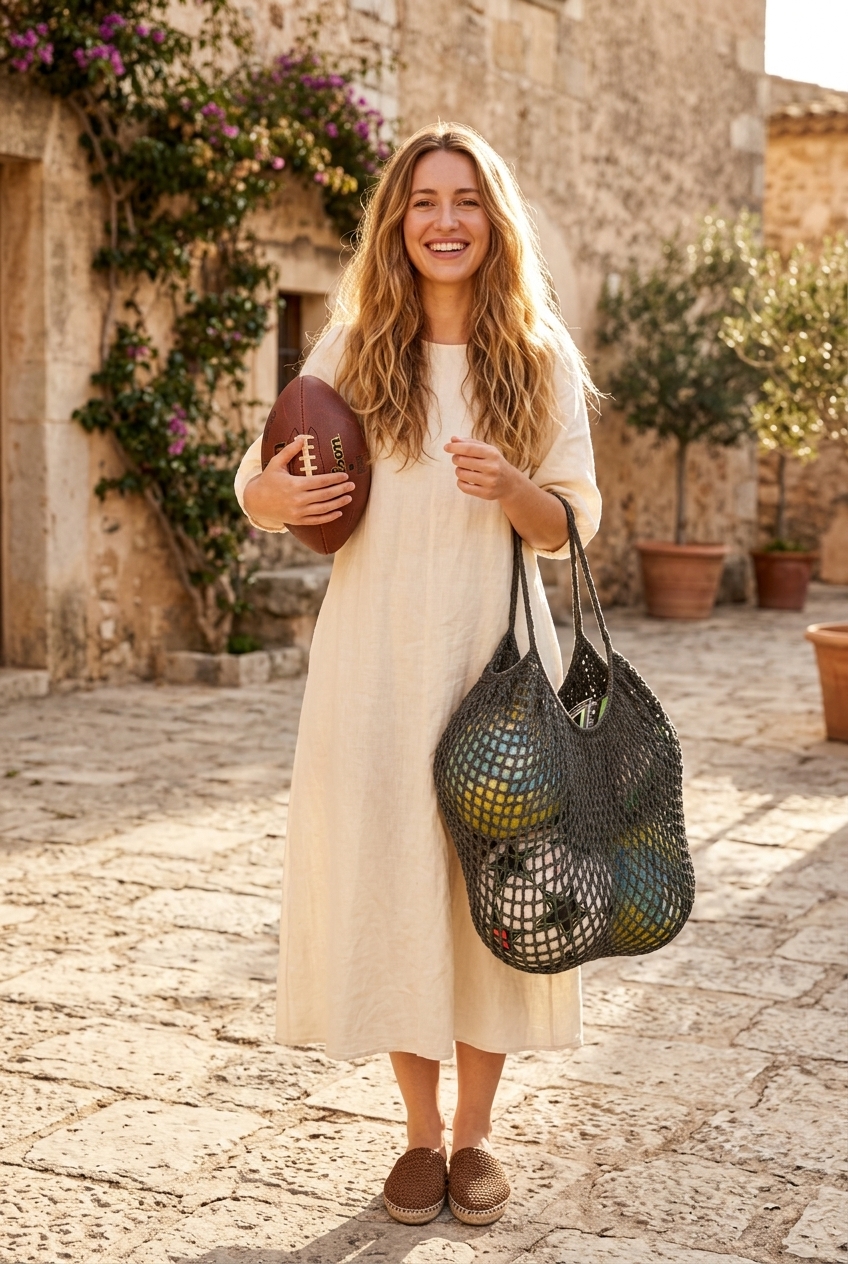
Second, round sports equipment like soccer balls, basketballs, and footballs fit naturally inside the flexible netting. Additionally, the open diamond mesh keeps dusty gear ventilated on the walk home from the park.
3. Damp Beach Towels and Sand Toys.
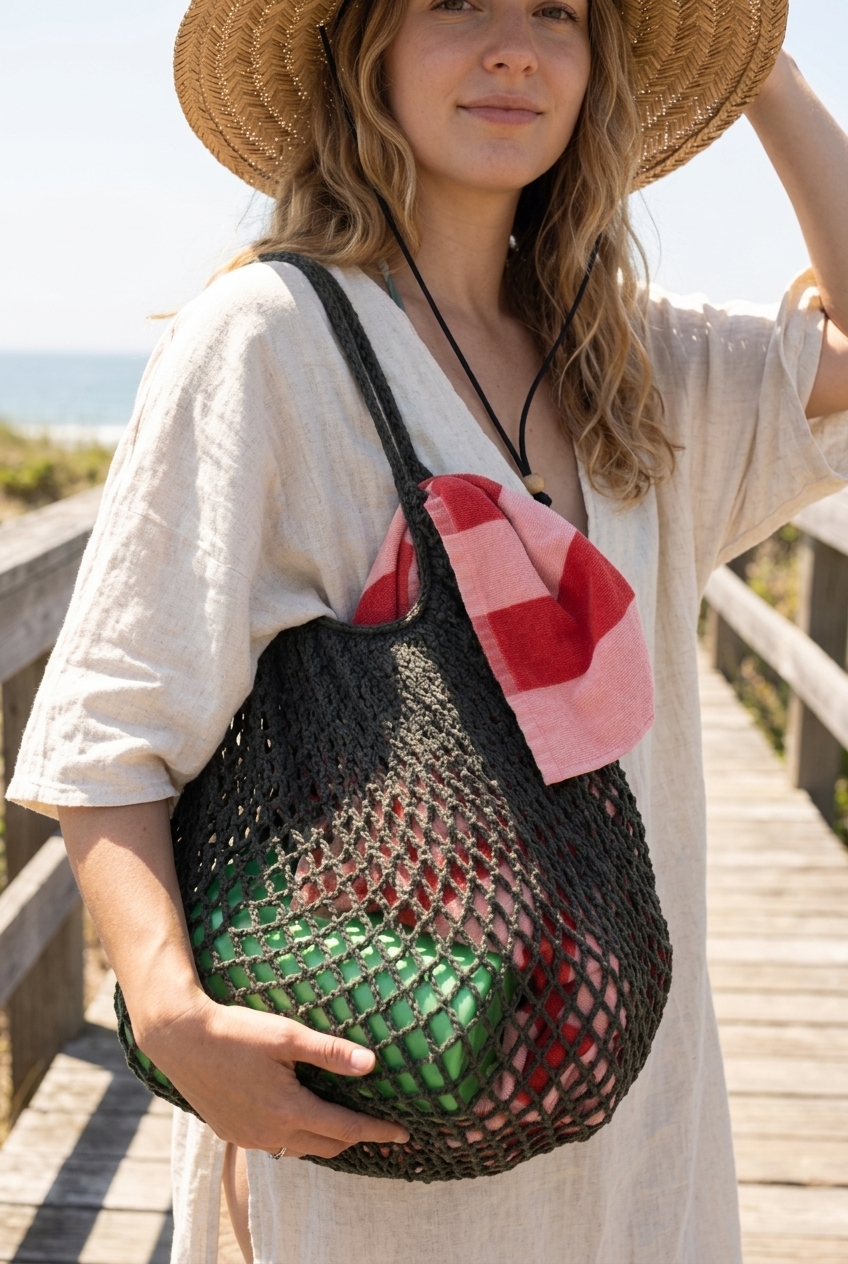
Third, this cotton mesh bag is ideal for pool and beach days. Sand shakes right out through the chain-five openings. Meanwhile, damp beach towels can breathe in the fresh air instead of staying trapped inside a closed bag.
4. Easy Compact Storage.
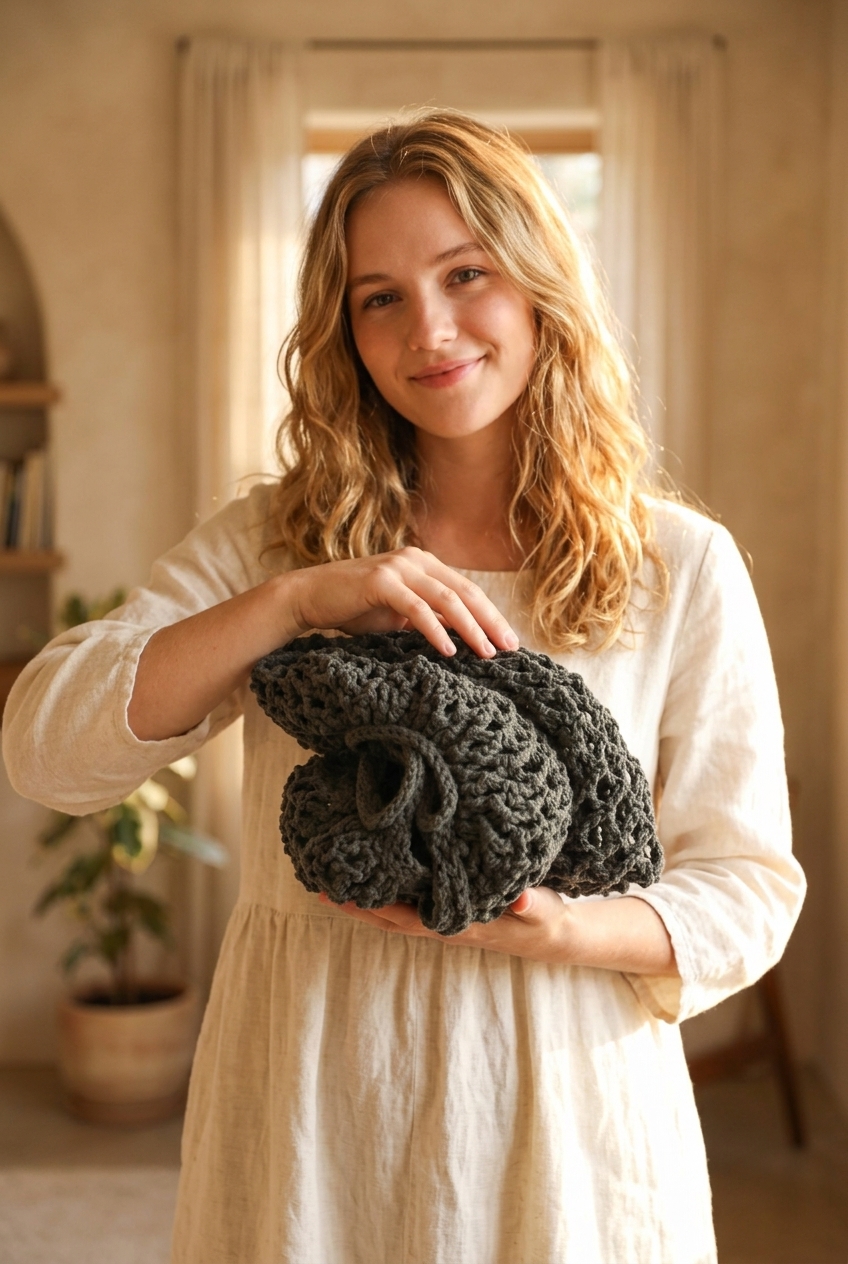
Best of all, the entire mesh market crochet bag folds down into a tiny square after unpacking. Consequently, you can tuck it right into your purse or glove compartment for your next trip. If you want a cute bag charm, check out our free panda crochet pattern. Finally, for a relaxing home project, try our puff stitch crochet blanket tutorial.


0 Comments