

Skeleton Hand Halloween Cake
As the sun sets on Halloween night, the air fills with the rich aroma of cocoa and sugar, and excitement blooms. In my kitchen, a spooky delight takes shape: the Skeleton Hand Halloween Cake. Each layer is a joy, turning a simple baking session into a festive celebration of the season.
The secret to success lies in room temperature butter, ensuring smooth emulsification for a fluffy cake and creamy, spreadable buttercream.
Bewitching Ingredients for the Skeleton Hand Halloween Cake
- Plain Flour: The foundation of our cake, providing structure and creating a tender crumb that’s ideal for layering.
- Cocoa Powder: Adds a rich, chocolatey depth, turning each bite into a dark delight.
- Caster Sugar: Ensures even sweetness throughout, helping achieve a light, airy texture.
- Baking Powder: Our magical leavening agent—it gives the cake its lift, making each layer fluffy and inviting.
- Salt: Just a pinch to balance the sweetness, enhancing all the flavors in a subtle way.
- Unsalted Butter (Room Temperature): Critical for both cake and buttercream, its soft texture aids in emulsification, resulting in a smooth mix.
- Whole Milk: Adds moisture, transforming the dry ingredients into a luscious batter.
- Large Eggs: Bind everything together, acting as the glue that gives the cake its wonderful density and stability.
- Vanilla Extract: Infuses the batter with aromatic sweetness, complementing the chocolate beautifully.
- Icing Sugar (Sifted): The base of our buttercream, dissolving effortlessly for a smooth finish.
- Cocoa Powder (Buttercream): Deepens the flavor of the icing, enhancing the cake.
- Key Technique: Room Temperature Butter: Essential for creamy mixtures that make the cake rise beautifully and buttercream smooth.
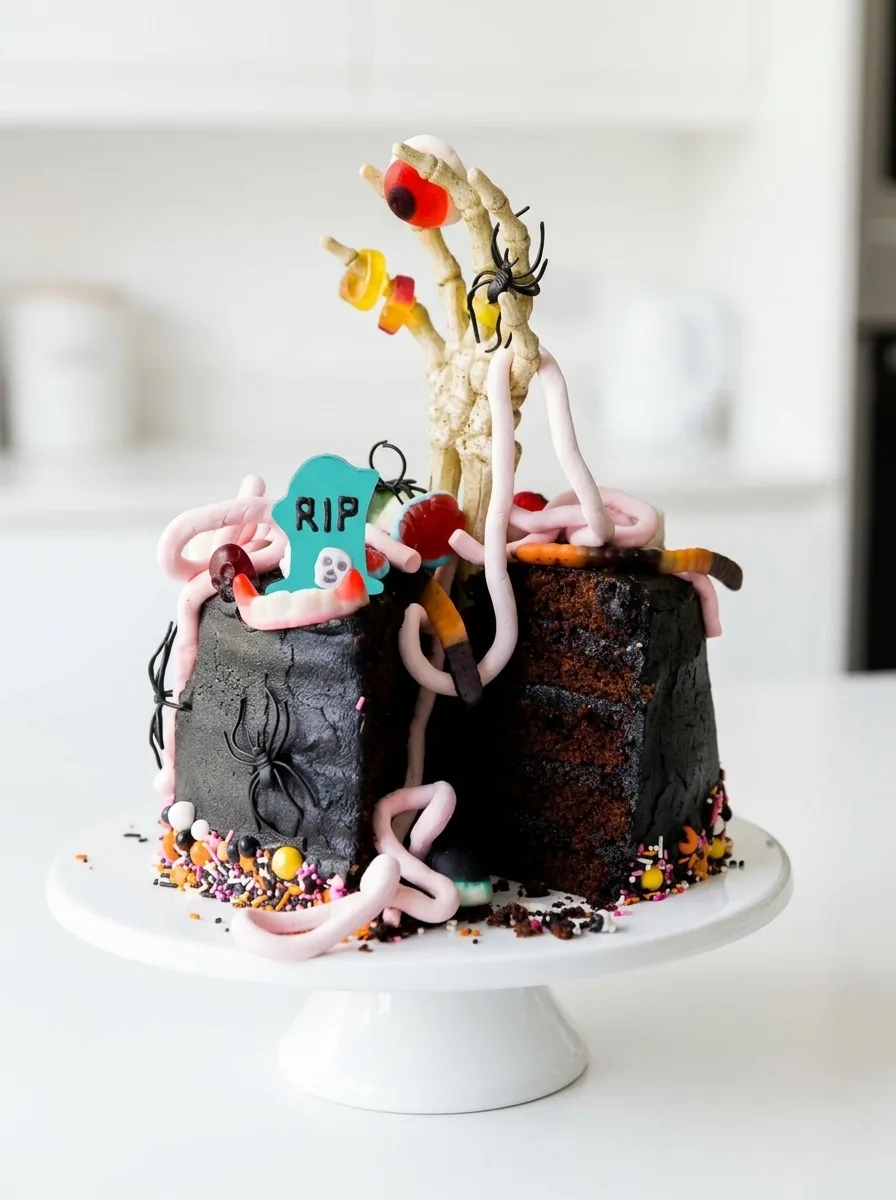
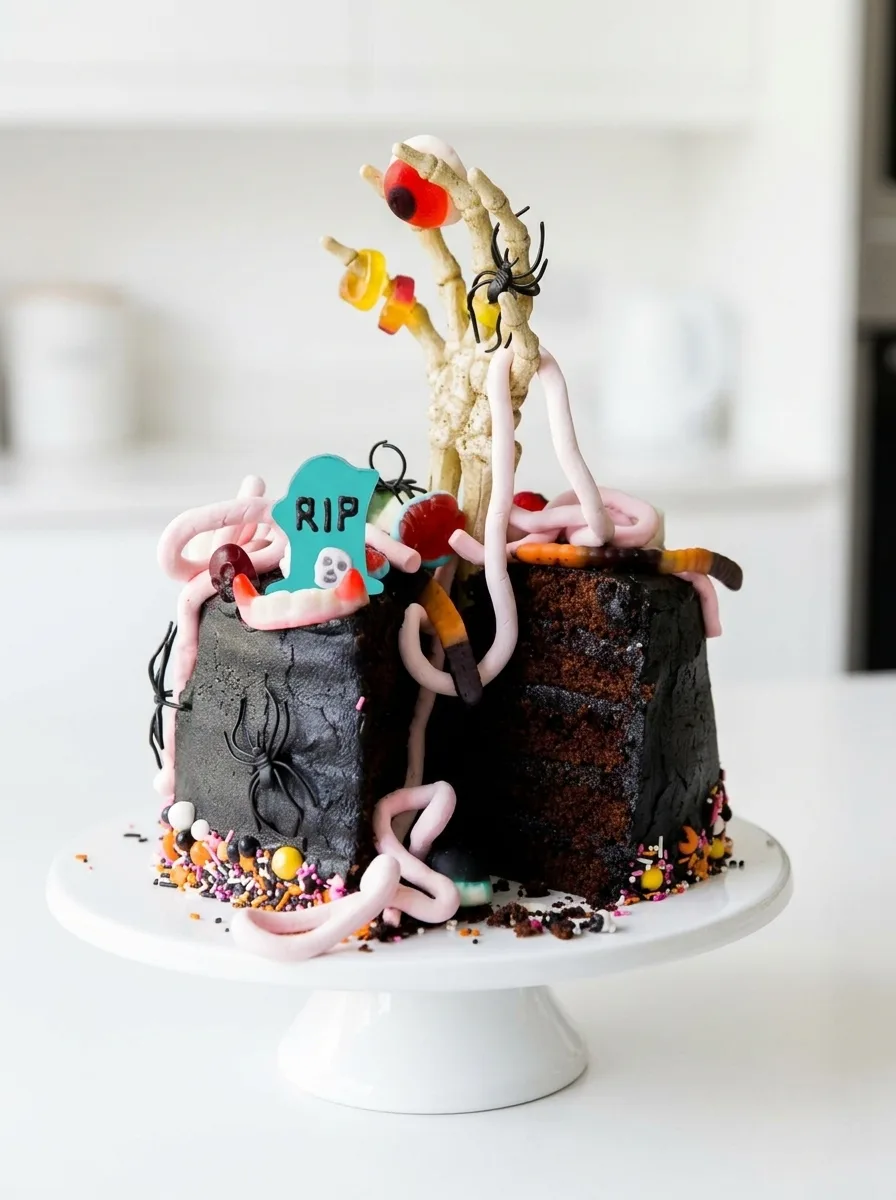
- Halloween Toppings: Skeleton hand, sprinkles, jelly creatures, and plastic spiders conjure a ghoulish charm. Remember, the spiders are for show, not snacking!
Each ingredient is part of the Halloween puzzle, creating a cake delightful to look at and eat.
Let’s Bring This Skeleton Hand Halloween Cake to Life!
In just under three hours, you’ll transform your kitchen into a hub of Halloween magic. This cake isn’t just baking; it’s an experience of rich cocoa and spooky fun. Let’s dive in!
- Preheat & Prep Tins: Preheat your oven to 175ºC / 160ºC Fan / 350ºF / Gas 4. Line five layer tins with baking parchment and give them a quick spray. You’ll want every cake layer to slide out smoothly.
- Mix Dry Ingredients: In a stand mixer or large bowl, add flour, cocoa powder, caster sugar, baking powder, salt, and butter. Beat slowly until the mixture looks like damp sand. Listen for the gentle whirr as the foundation of your cake takes shape.
- Blend Wet Ingredients: In a jug, whisk together milk, eggs, and vanilla. Slowly pour into your sandy mix. Beat on high until silky and lump-free. Scrape the sides, ensuring everything is well-mixed, and whisk for another minute.
- Bake The Layers: Divide the batter evenly into prepared tins. Bake for about 25 minutes. You’ll know they’re done when a skewer inserted comes out clean. Press lightly; they should spring back with gentle resilience.
- Prepare Buttercream: Place room temperature butter in a mixer fitted with the paddle attachment. Beat until creamy, about 3-4 minutes. Gradually add sifted icing sugar and cocoa powder. Slowly incorporate milk and vanilla for a luxurious texture.
- Tint & Chill Buttercream: Mix in a teaspoon of Sugarflair black food coloring. Cover and chill the buttercream to deepen the color for at least two hours, ideally overnight.
- Assemble & Frost: If needed, microwave the buttercream in 15-second bursts until spreadable. Place the first layer on a cake stand. Smooth buttercream on top, repeating with remaining layers. Spread remaining frosting on the sides for a sleek finish.
- Decorate: Press sprinkles along the cake’s base. Insert a skeleton hand in the center. Drape jelly creatures and arrange lollies and plastic spiders as decorations.
Impress your guests with a cake that’s as spooky as it is tasty. Enjoy each slice alongside the gasps of admiration!
Eerie Variations & Spooky Twists
Who says Halloween treats can’t have a personal touch? Let’s explore some fun variations that’ll make your Skeleton Hand Halloween Cake uniquely yours.
- Chocolatey Delight: Swap the vanilla buttercream with a chocolate version by incorporating cocoa powder.
- Deepening the Mystery: Allow buttercream to develop overnight in the fridge, enhancing both color and flavor.
- Inky Perfection: Use Sugarflair Black Extra gel for a deep hue without altering the buttercream’s texture.
Embrace these variations to conjure a cake that’s hauntingly delightful. Each experiment adds another layer to your baking magic. So, grab your bowls and let your creativity run wild!
Keeping the Spookiness Fresh
Once your Skeleton Hand Halloween Cake has mesmerized your guests, you’ll want to store leftovers properly. Wrap the cake snugly in an airtight container at room temperature for up to three days or pop it in the fridge for up to a week. Let the cake cool completely before sealing to prevent condensation on the buttercream.
To enjoy a slice after chilling, let it sit at room temperature for about 15-20 minutes before serving. It helps the buttercream soften, ensuring each bite is as delightful as the first. Trust me, it’s worth the wait!
Spooky Sides for a Bewitching Cake
As the skeleton hand rises from your cake, transform your gathering into a feast of eerie delights. Let each bite be complemented by dishes that enhance the occasion’s spooky charm.
- Vanilla Bean Ice Cream: Its creamy, smooth texture and subtle sweetness contrast with the cake’s cocoa flavors.
- Spiced Hot Cocoa: The warmth and aromatic spices of cocoa paired with a hint of cinnamon offer a cozy companion.
- Dark Berry Compote: Tangy, slightly tart berries cut through the cake’s richness, offering a refreshing burst.
Ghoulish Garnishes
- Whipped Cream Ghosts: A playful touch of airy cream adds lightness and whimsy to your dessert landscape.
- Crushed Honeycomb Pieces: For a delightful crunch and caramel-like sweetness that highlights the chocolate.
- Raspberry Coulis Drizzle: A vibrant splash of red, adding a tart contrast and echoing Halloween’s spirit.
There you have it—a celebration of flavors and textures to accompany your Skeleton Hand Halloween Cake. As the night draws on, what eerie twists will you bring to your dessert table? I’d love to hear about your spooky serving ideas!
Skeleton Hand Halloween Cake
Ingredients
Method
- Preheat your oven to 175ºC / 160ºC Fan / 350º F / Gas 4
- Prepare 5 layer tins with a circle of baking parchment on the bottom and give them a quick spray with Wilton Bake Easy this will stop the cakes from sticking.
- Add the flour, cocoa powder, sugar, baking powder, salt and butter to a stand mixer or into a large bowl if using an electric handheld whisk/ whisking by hand. Beat slowly until the ingredients look like damp sand.
- In a jug, whisk the milk, eggs and vanilla together, then slowly pour it into the sandy mixture. Beat on high speed until the mixture is smooth and creamy without any lumps.
- Scrape the sides of the bowl down and beat for a further minute. Take care not to overmix or the cake will lose its fluffiness.
- Spoon the mixture evenly between the 5 layer tins and bake in the pre-heated oven for around 25 minutes or until a skewer inserted into the middle comes out clean. The cakes are properly baked when they spring back when pressed lightly with your finger.
- Leave the cakes to cool in their tins.
- Add the room temperature butter to a stand mixer with paddle attachment fitted. Beat until very smooth and creamy (at least 3-4 minutes) If you are using a handheld electric whisk this will take longer. It is also possible to make the buttercream by hand but it will take a lot of elbow grease!
- Sift the icing sugar and add it a few tablespoons at a time. Beat until fully incorporated. Add the cocoa powder and beat until there are no streaks of colour and the mixture is an even medium brown shade.
- Slowly add the milk and vanilla and beat until smooth.
- Add a teaspoon of Sugarflair black food colouring and mix thoroughly. The colour will resemble dark concrete and won't look black yet so don't be tempted to add more.
- Cover the bowl and put the buttercream in the fridge to develop in colour for at least two hours but preferably overnight.
- When you're ready to use the buttercream remove it from the fridge and microwave it in 15-second bursts until it's the right consistency.
- Add the first layer cake to a cake stand or turntable.
- Add buttercream icing on top of the cake - you can do this by using a piping bag without a tip fitted or spoon it on. Use a spatula to even out the buttercream.
- Repeat for the next four layers. Don't worry if any of the buttercream escapes from the layers - you can use this to cover the sides of the cake later.
- When you get to the final layer, pile the remaining buttercream on top of the cake and use a spatula to spread it down the sides.
- Even out the buttercream on the sides and top of the cake using a cake scraper.
- Press colourful sprinkles along the bottom border of the cake using the palm of your hand.
- Push the skeleton hand into the centre of the cake. Drape the sweets between the skeleton's fingers. Add jelly rings and other decorations around the hand. Use lollies as tombstones and add any other sweet decorations you like.
- Push a few plastic spiders into the sides of the cake and dangle them from the skeleton's fingers (don't eat them!)


0 Comments