

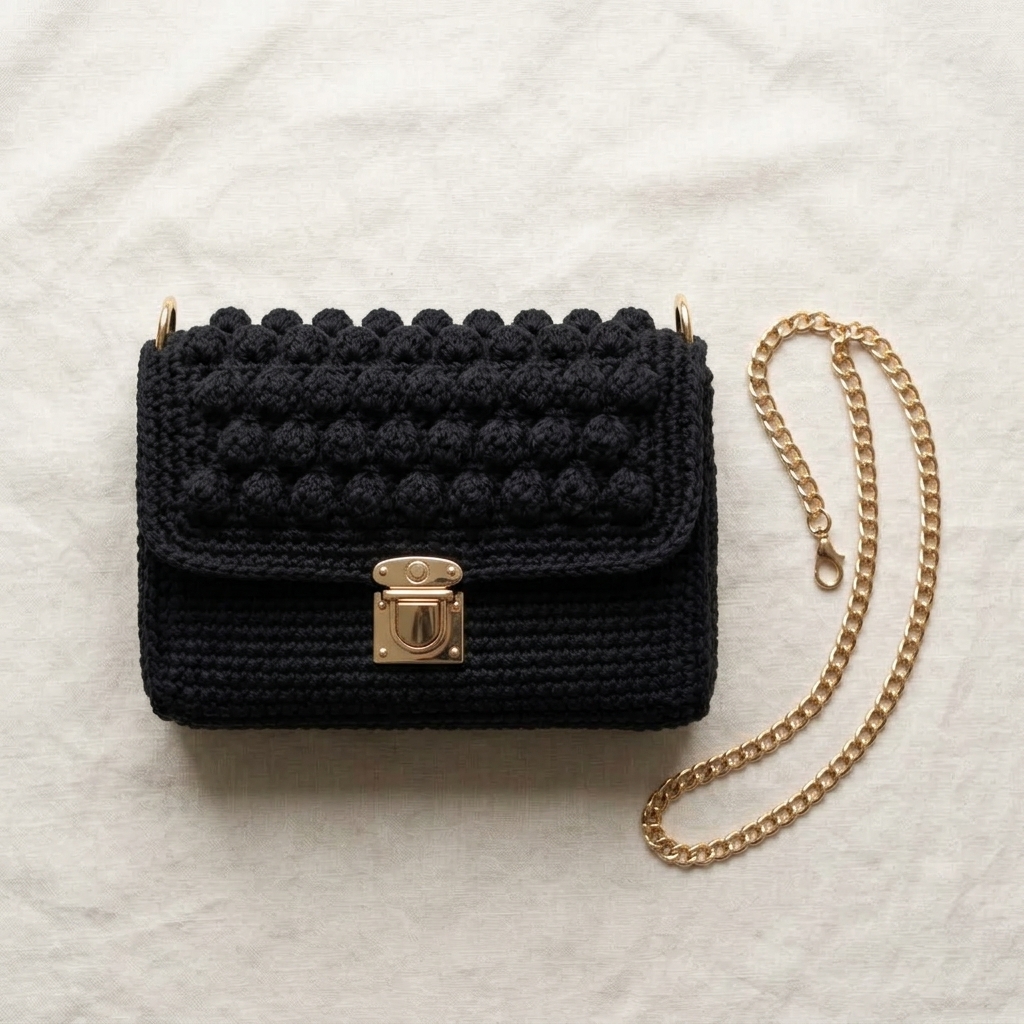
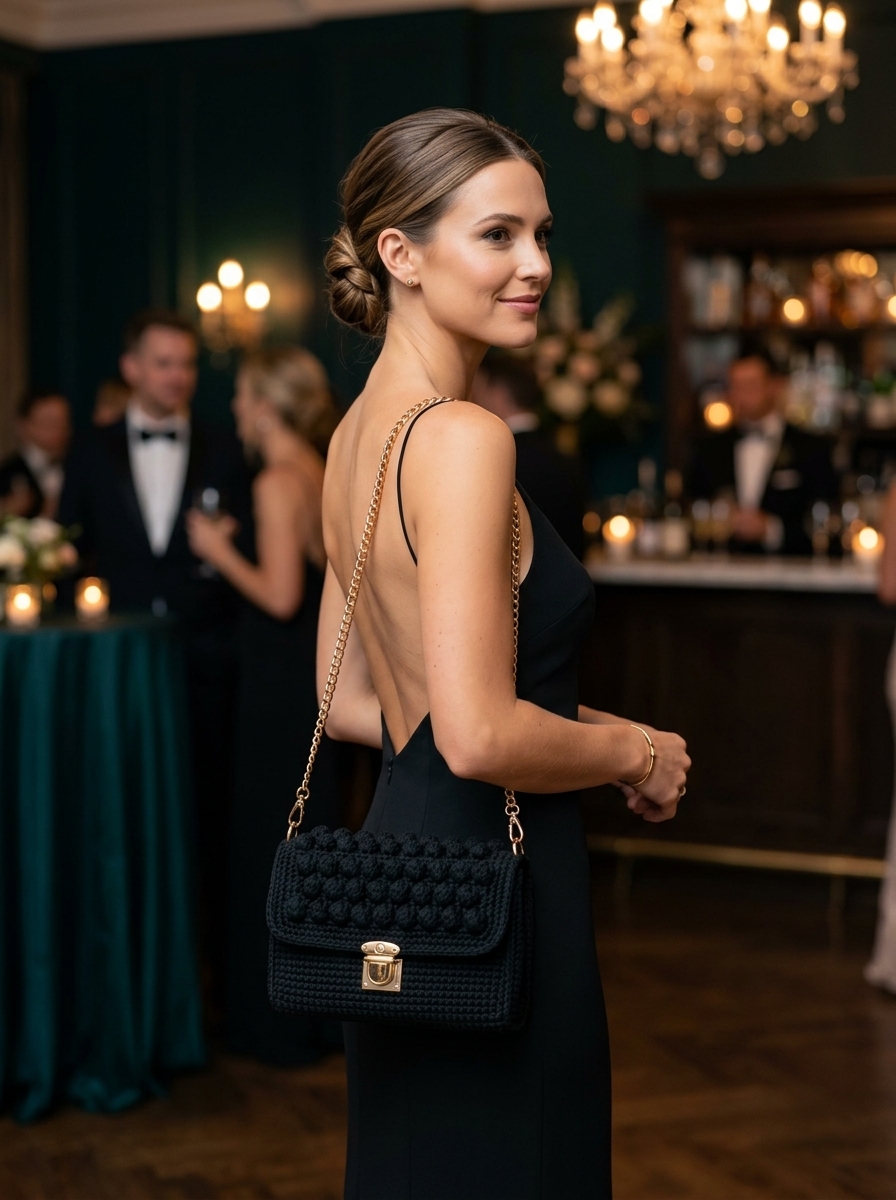
If you’ve been dreaming of a handmade accessory that looks just as polished as anything from a high-end boutique, this crochet clutch purse is exactly what you need. With its beautifully textured bobble stitch flap, sleek gold hardware, and a detachable chain strap, this bag transitions effortlessly from an over-the-shoulder purse to a classic handheld clutch.
Whether you’re attending a wedding, a gala, a prom, or just a fancy dinner out — this little bag will turn heads and start conversations. I wore mine to an engagement party and the compliments didn’t stop all night!
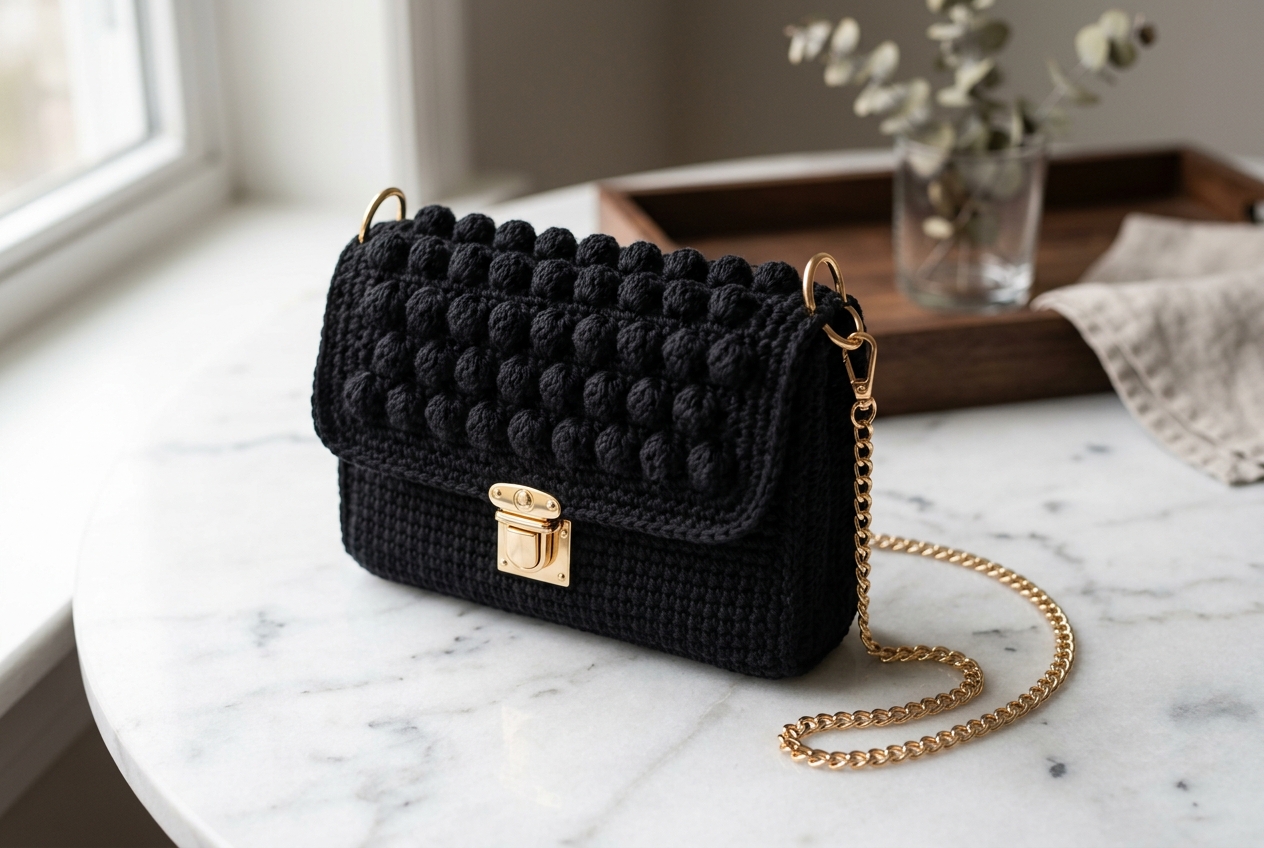
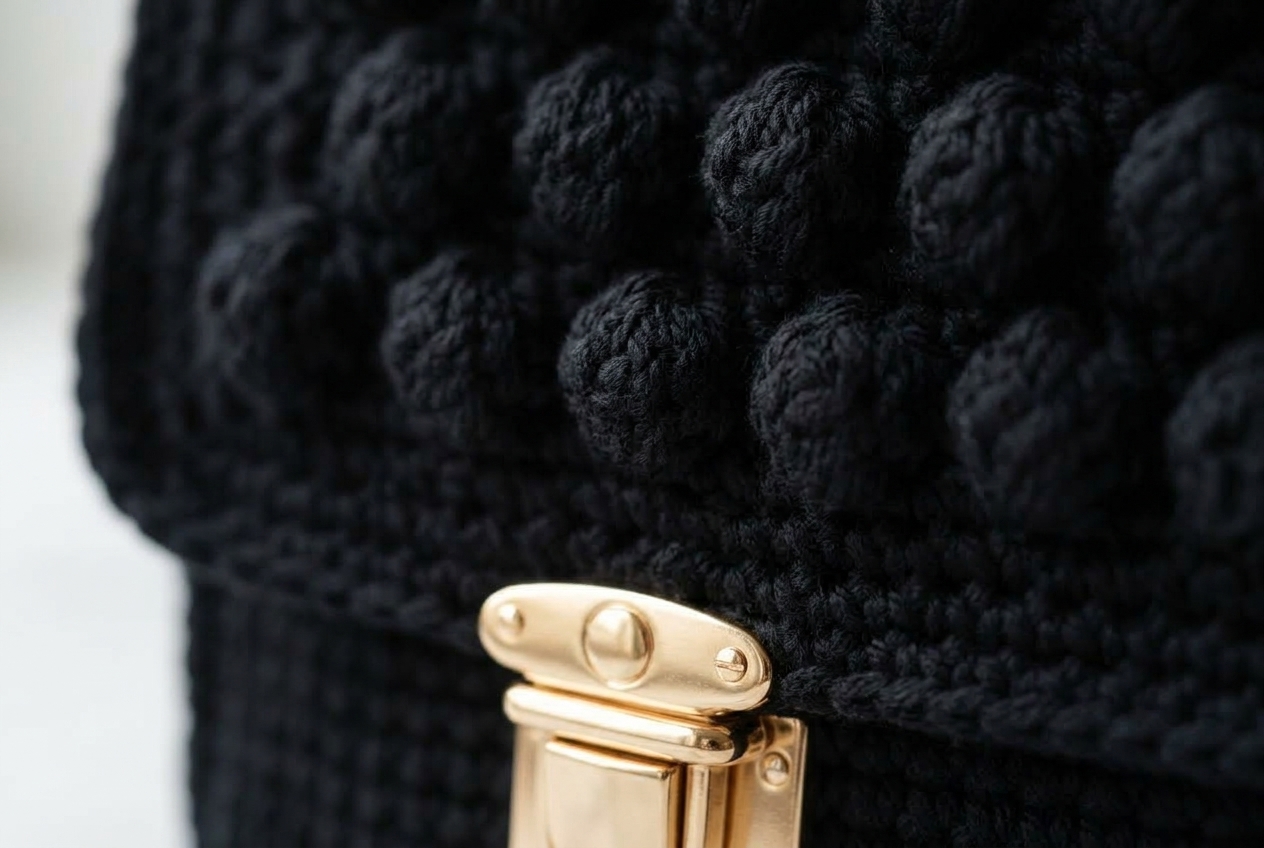
The body is worked in simple, tight single crochet stitches for a clean structured look, while the flap features the stunning ball stitch — a pattern of raised bobble clusters that creates gorgeous three-dimensional texture. The combination of the smooth body and the textured flap gives this bag a designer feel that’s hard to believe was made by hand.
Finished Size
The completed clutch measures approximately:
- 9.5″ × 2.5″ × 8.5″ (L × W × H)
- 24 cm × 5.5 cm × 23 cm (L × W × H)
Gauge
11 sc and 7 rows in single crochet = 4″ × 4″ (10 cm × 10 cm) using a 5 mm hook.
Take the time to check your gauge — it ensures the bag comes out at the right size and has the proper structure.
Bag Construction Overview
This clutch is assembled from just three crocheted pieces:
- 1 large rectangle — this single piece folds over to create both the textured flap and the bag body
- 2 side panels — small pieces with rounded bottoms that give the bag its depth and structured boxy shape
All pieces are worked in rows, which makes this project straightforward and easy to follow.
Supplies You’ll Need
- Yarn: 3 mm polyester cord yarn (approximately 2 skeins/cones, ~230g each). You’ll only need a small amount from the second skein (~35g). This rope-style yarn has a beautiful sheen and gives the bag great structure — no lining needed!
- Hook: 5 mm crochet hook
- Notions: Yarn needle, scissors, measuring tape
- Hardware:
- 39.4″ (100 cm) gold metal flat chain strap
- 2 snap O-ring carabiner buckles (35 mm / 1.38″)
- 1 tuck lock / metal clasp (4.2 × 3 cm / 1.65″ × 1.18″)
- Optional: small gold metal charm or pendant
Stitches & Abbreviations (US Terms)
- ch — chain
- sc — single crochet
- hdc — half double crochet
- slst — slip stitch
- yo — yarn over
- RS — right side
- WS — wrong side
- st(s) — stitch(es)
- beg — beginning
- rep — repeat
- * to * — repeat the stitch sequence between the asterisks
Special Stitch: hdc4tog (Half Double Crochet 4 Together Cluster)
This is the bobble/ball stitch cluster that creates the raised texture on the flap:
- (Yarn over, insert hook into indicated stitch, pull yarn through) — repeat this 4 times. You now have 9 loops on your hook.
- Yarn over and pull through all 9 loops to complete the cluster.
Note: The clusters are worked on the wrong side (WS), but they pop through and show on the right side (RS) of the work.
Invisible Finish Off
After the last stitch of the final round, do not join with a slip stitch. Instead, cut the yarn leaving a tail of a few inches. Thread a yarn needle, insert it from back to front under both top loops of the first stitch at the beginning of the round, pull through, then insert the needle between the front and back loop of the last stitch and pull the yarn through. Weave in the end.
Pattern Instructions
Part 1: The Large Rectangle (Flap + Body)
This piece starts with the ball stitch section (which becomes the flap), then continues with plain single crochet rows (which become the bag body).
With your 5 mm hook, chain 24.
Flap Section (Ball Stitch Pattern)
Row 1 (RS): Working into the back bumps of the foundation chain, work 1 sc into the 2nd ch from hook and 1 sc in each ch across; ch 1, turn. (23 sc)
Tip: Working into the back bumps creates a neater, more polished starting edge.
Row 2 (WS): 1 sc in first sc, 1 sc in each of the next 2 sc, *hdc4tog in next sc, 1 sc in each of the next 3 sc; rep from * across; ch 1, turn.
(5 clusters + 18 sc = 23 sts total)
Row 3 (RS): 1 sc in first sc, 1 sc in each of next 2 sc, *1 sc in top of next cluster, 1 sc in each of next 3 sc; rep from * to end; ch 1, turn. (23 sc)
(In other words: 1 sc in every stitch across.)
Row 4 (WS): 1 sc in first sc, *hdc4tog in next sc, 1 sc in each of the next 3 sc; rep from * to the last 2 sts; hdc4tog in the next-to-last sc, 1 sc in last sc; ch 1, turn.
(6 clusters + 17 sc = 23 sts total)
Row 5 (RS): 1 sc in first sc, 1 sc in top of each cluster and 1 sc in each sc across. (23 sc)
Rows 6–13: Repeat Rows 2–5 two more times. Do not cut the yarn!
Your flap section is now complete — you should have 6 cluster rows, and the final row (Row 13) is all single crochet.
Body Section (Single Crochet)
Rows 14–63: 1 sc in each sc across; ch 1, turn. (23 sc per row, 50 rows total)
At the end of Row 63 (worked on the RS), chain 1 but do not cut the yarn. You’ll continue directly into the edging.
Edging (Around the Long Sides and Flap)
Row 1: Rotate the piece 90° and work 1 sc evenly along the long edge (1 sc in each row end). Work 2 sc into the corner stitch. Then 1 sc in each stitch along the foundation chain edge. Work 2 sc into the next corner. Finally, 1 sc in each row end along the second long side.
Cut the yarn leaving a long tail (you’ll use this to sew on a side piece later). Fasten off.
Part 2: Side Panels (Make 2)
Chain 21.
Row 1: Working into the back bumps of the chain, 1 sc in the 2nd ch from hook, 1 sc in each of the next 18 ch, 4 sc into the last chain; continue along the opposite side of the foundation chain (inserting your hook into the back loops), 1 sc in each of the next 19 sts; ch 1, turn.
(42 sts total)
Row 2: 1 sc in each of the next 19 sts, 2 sc in each of the next 4 sts at the curve, 1 sc in each of the next 19 sts; do not ch 1, but turn.
(46 sts total)
Row 3: 1 slst in each of the 46 sc around the piece, then continue working 4 more slsts across the top straight edge.
(50 slsts total)
Cut yarn leaving a long tail. Fasten off invisibly.
Assembly
Step 1: Fold the Main Piece
Lay the large rectangular piece with the right side facing down, with the textured flap at the top. Fold the bottom edge upward so it sits just below the last row of the flap. The right side of the bag body (and the wrong side of the flap) should now be facing you.
Step 2: Attach the Side Panels
Position each side panel with the rounded edge at the bottom. Align the edge stitches of the bag body with the edge stitches of the side panel — the bottom of the body will curve along the rounded edge.
Using a yarn needle and the long tail, sew the edges together by inserting the needle through the back loops of the edge nearest you and the front loops of the edge further from you. Repeat for the second side.
Step 3: Shape the Sides
Pinch the top of each side panel inward (creating a small dent) and stitch across a few times to secure. This gives the bag a more refined, structured silhouette.
Step 4: Slip Stitch Edging
With the bag upright and the flap open, join yarn with a slip stitch to the first stitch on the right edge of the bag body. Slip stitch across the front body edge, through the pinched side, around the entire flap, and through the second pinched side. Fasten off invisibly.
This round of slip stitches gives all the edges a firm, polished finish.
Step 5: Surface Crochet Embellishment
With the back of the bag facing you and the flap open, join yarn with a slip stitch into the single crochet row just below the first cluster at the right corner. Work surface crochet slip stitches across the top and around the flap edges. Fasten off invisibly.
Optional: Add a line of surface crochet around the front body panel as well for extra definition.
Weave in all remaining yarn ends. Pro tip: If you’re using polyester cord, you can carefully melt the yarn ends with a lighter and press them flat with the metal part of scissors (not your fingers!) to prevent fraying.
Adding the Hardware
Tuck Lock Closure
- Find the center of the flap edge. Push the flap through the gap in the top part of the tuck lock and press firmly to secure.
- Align the bottom part of the lock on the bag body. Push the prongs through the crochet fabric and flatten them on the inside.
Chain Strap & Pendant
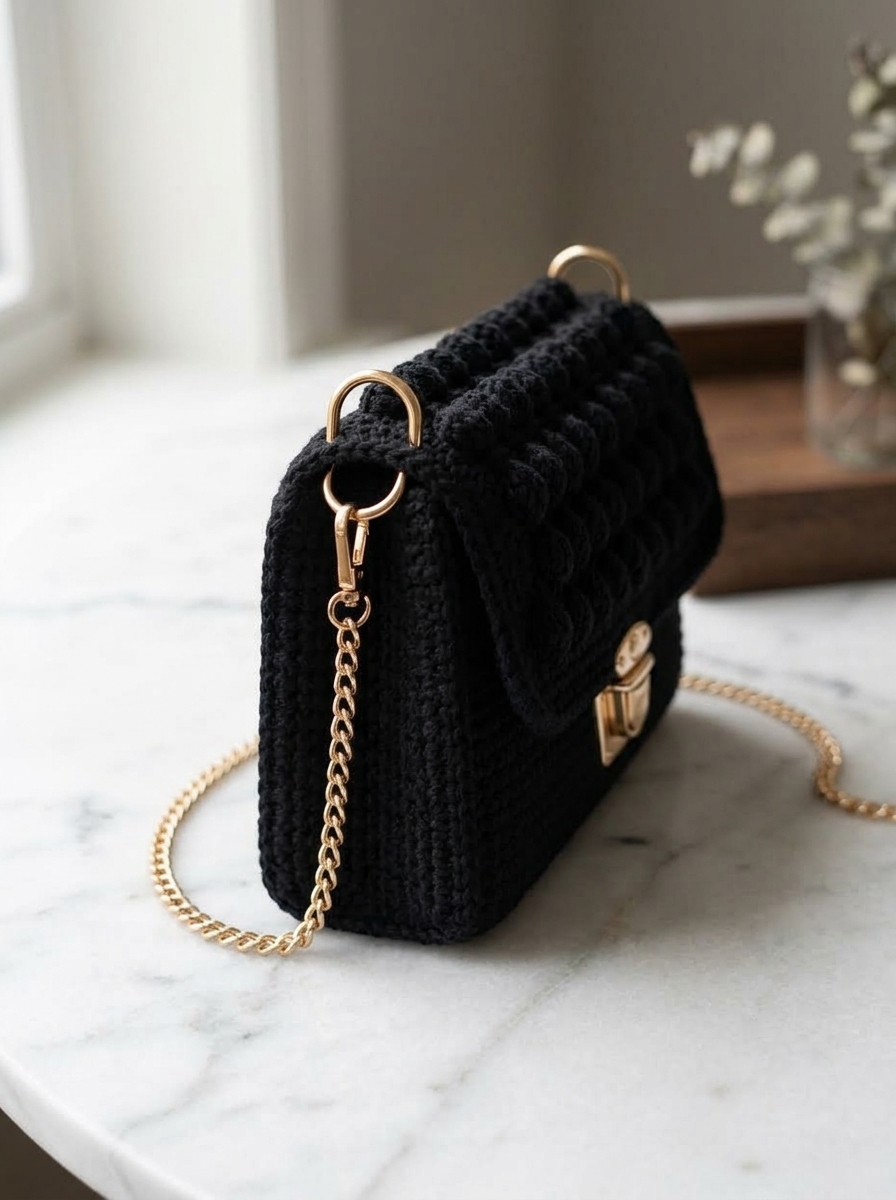
- Insert one snap O-ring through each pinched side, going through the full thickness of the dent.
- Clip the chain strap’s buckles onto the O-rings.
- Optional: Thread a small pendant or charm onto one of the O-rings for a personal touch.
Styling Tips
This clutch is incredibly versatile. Wear it crossbody with the chain strap for hands-free cocktail hour, or remove the chain and carry it as a sleek clutch for more formal occasions. It pairs beautifully with everything from a little black dress to a colorful evening gown — the black and gold combination is timelessly elegant.
Quick Reference Notes
- The ball stitch multiple is 4 + 3 stitches, plus 1 for the turning chain
- All pieces are worked flat in rows
- The polyester cord yarn makes the bag stiff enough to stand on its own — lining is optional
- Always leave long tails when fastening off for easier seaming
- The chain strap is fully removable, giving you two bag styles in one
And that’s it — your stunning crochet clutch purse is complete! This is one of those projects that looks so much more complicated than it actually is. Once you get the rhythm of the ball stitch, the flap works up quickly, and the rest is just simple single crochet. Give it a try and I promise you’ll be proud to carry it to your next event. Happy crocheting! 🧶✨


0 Comments