

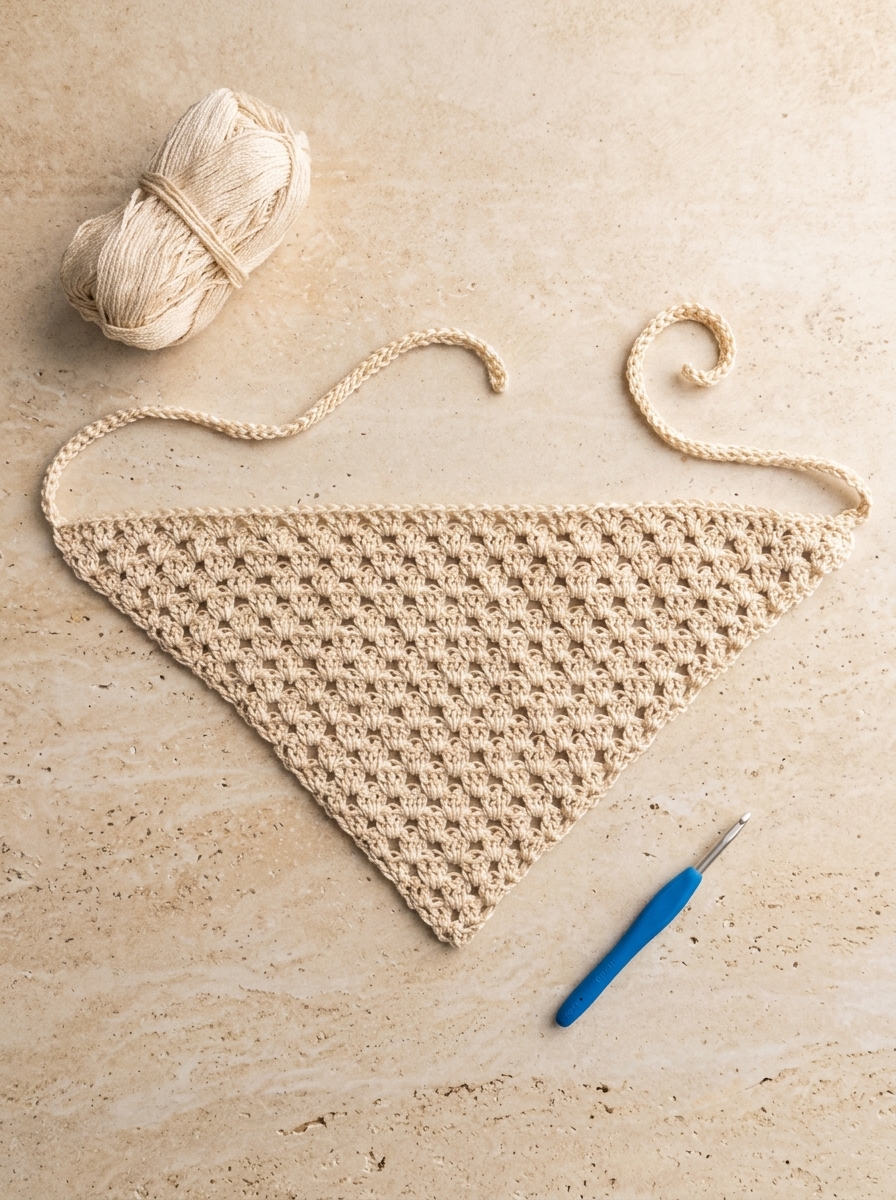
A handmade crochet bandana pattern is one of the fastest warm-weather accessories you can stitch with cotton yarn. Whether you love boho-chic summer outfits or cottagecore style, this granny-stripe headscarf adds effortless texture. Better yet, the triangle works up flat from the bottom point upward using simple double crochet clusters. As a result, beginners can finish this relaxing weekend project in under two hours.
Why You Will Love This Free Crochet Bandana Pattern
In this step-by-step guide, you will learn how to make a beginner-friendly crochet bandana pattern from start to finish. Because the kerchief uses airy three-double-crochet granny clusters, the fabric stays lightweight and breathable on hot days. Furthermore, you only need three basic stitches: chain, slip stitch, and double crochet.
If you are new to accessories, this small wearable project builds essential skills without feeling overwhelming. Specifically, you will practice working into spaces, counting turning chains, and creating sturdy slip-stitched straps. If you enjoy quick summer headwear, you can also try our free crochet bucket hat pattern next. Once you finish your first cream bandana, you can easily add colorful stripes from leftover yarn.
Materials and Tools Needed
You only need a few basic supplies to start stitching your headscarf today. Gathering the right fiber and hook size first ensures crisp stitch definition and a comfortable fit.
- Yarn: 1 ball of Lion Brand 24/7 Cotton in Ecru (100% mercerized natural cotton, 3.5 oz / 100 g, 186 yds / 170 m). You can also use any light-worsted (#4) or DK-weight (#3) cotton yarn.
- Crochet Hook: US Size G-6 (4.0 mm) ergonomic aluminum crochet hook. If you substitute another yarn, check the label for the recommended hook size.
- Tapestry Needle: A blunt metal or plastic yarn needle for weaving in your yarn tails securely.
- Scissors: Sharp embroidery or craft scissors for trimming cotton ends cleanly.
- Tape Measure or Ruler: Use this tool to check your gauge swatch and measure the finished triangle dimensions.
- Stitch Markers (Optional): Locking stitch markers help beginners track the top of the turning chain-three on every row.
Best Yarn Choices for a Crochet Bandana
While you can use any fiber, lightweight plant yarns deliver the best results for a wearable crochet bandana pattern. Natural cotton and linen blends breathe well against your hair and hold their triangular shape without sagging. Moreover, you can check the Craft Yarn Council weight standards when comparing #3 DK and #4 worsted cottons.
| Yarn Name. | Fiber Content. | Weight Category. | Yardage per Ball. | Why It Works Well. |
|---|---|---|---|---|
| Lion Brand 24/7 Cotton. | 100% Mercerized Cotton. | #4 Light Worsted / DK-like. | 186 yds / 100 g. | Corded ply prevents splitting, gives a subtle sheen, and creates crisp granny clusters. |
| WeCrochet CotLin. | 70% Tanguis Cotton, 30% Linen. | #3 DK Light Weight. | 123 yds / 50 g. | Cool, airy cotton-linen blend that softens nicely with every wash for warm weather. |
| WeCrochet Dishie. | 100% Natural Cotton. | #4 Medium Worsted Weight. | 190 yds / 100 g. | Tightly spun, durable, and soft. It is slightly thicker, so 19 rows reach full size. |
Avoid heavy 100% acrylic yarns for summer headscarves if you live in a warm climate. Acrylic traps heat against your scalp and slips on smooth hair. In contrast, mercerized cotton grips gently and stays put all afternoon, much like our cotton mesh market bag.
Finished Measurements and Gauge
Checking your measurements as you work guarantees that your kerchief covers your head comfortably. Below are the exact specifications for the standard adult bandana.
- Skill Level / Difficulty: Beginner – Easy.
- Main Triangle Dimensions: The bandana measures 8.5 inches (21.6 cm) tall by 16.5 inches (41.9 cm) wide, excluding ties.
- Tie Length: Each tie measures 14 inches (35.6 cm) long, creating a total tip-to-tip wingspan of 44.5 inches (113 cm). You can easily make the ties longer or shorter by adjusting the starting chains.
- Gauge (4″ x 4″ / 10 cm x 10 cm): 5 granny clusters (3-dc clusters) wide by 4.5 rows tall with a 4.0 mm hook.
Your gauge might differ slightly if you choose a thinner DK yarn or a thicker worsted cotton. However, that is completely fine for this project. Simply measure your triangle as you work, and crochet as many rows as needed to reach 8.5 inches tall by 16.5 inches wide.
Stitch Abbreviations and Special Techniques
This tutorial uses standard US crochet terms. Review these four basic stitches and cluster placement rules before starting your first row.
- ch: chain stitch.
- dc: double crochet.
- sl st: slip stitch.
- st / sts: stitch / stitches.
How to Work a Granny Cluster
In this crochet bandana pattern, a granny cluster means 3 double crochet (3 dc) stitches worked into the same stitch or space. Grouping three double crochets together creates the classic open geometric triangles seen in traditional granny squares.
Working in the Space Between Granny Clusters
Starting in Row 3, you will work interior granny clusters into the spaces between clusters from the row below. To work in the space between stitches, do not insert your hook under the top two loops. Instead, insert your 4.0 mm hook directly into the open gap between the posts of two adjacent clusters. At the end of every row, however, always work into the top chain of the turning ch-3.
Essential Pattern Notes
- The pattern is written using standard US crochet terminology.
- The bandana triangle is worked flat in turned rows from the bottom point upward.
- The ch 3 at the beginning of the row always counts as a double crochet (dc) stitch.
- Each row increases by one 3-dc granny cluster, adding 3 stitches per row up to Row 20 (60 sts).
- Do not cut the yarn after Row 20; you will chain and slip stitch both ties continuously.
Step-by-Step Crochet Bandana Pattern Instructions
Follow these row-by-row instructions and macro step photos to crochet the main triangle, add the ties, and block your headscarf.
Part 1: Crochet the Main Triangle (Rows 1 to 5)
Row 1: Make a slip knot and ch 4. Work 2 dc in the 4th chain from the hook (the 3 skipped chains count as 1 dc). Turn your work. [3 sts / 1 granny cluster]
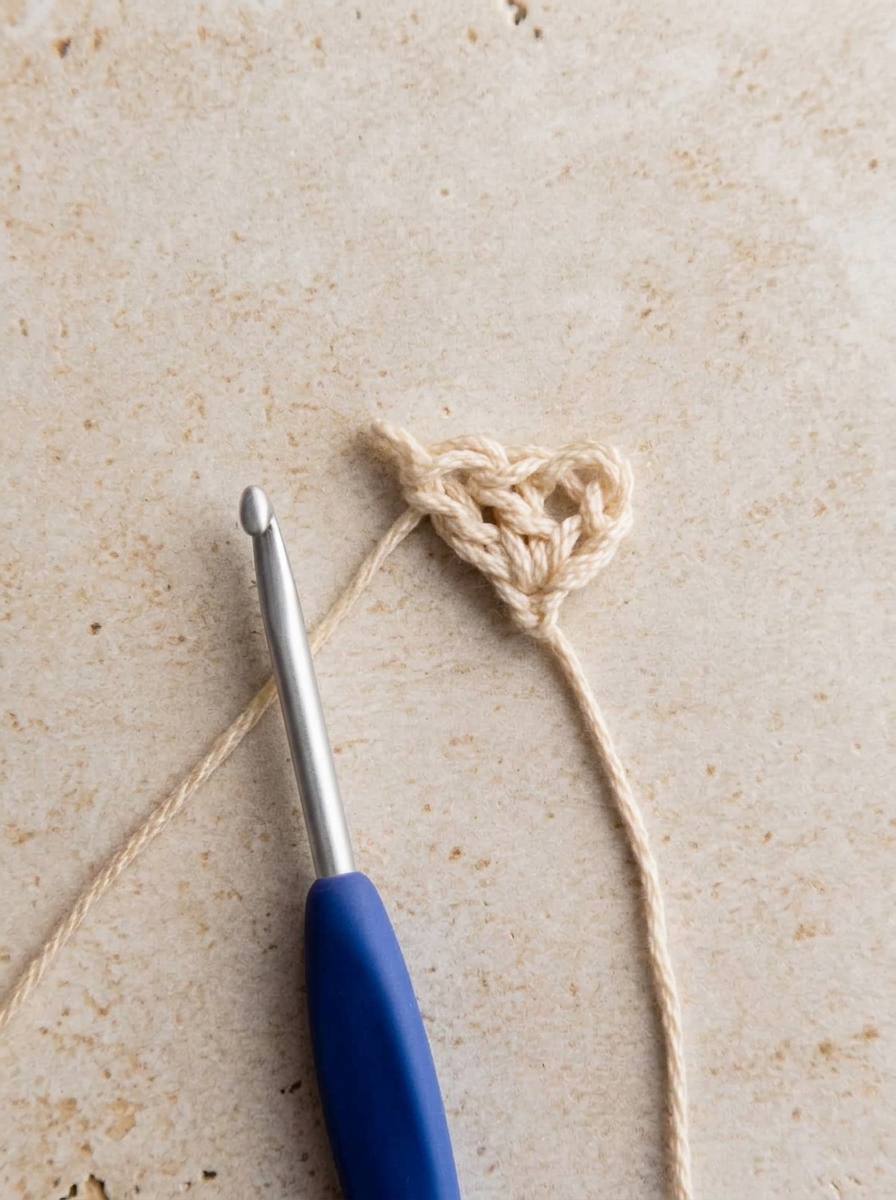
Row 2: Ch 3 (counts as 1 dc here and throughout the pattern). Work 2 dc in the same first stitch, skip the next stitch, and work 3 dc in the top of the turning ch-3 in the row below. Turn your work. [6 sts / 2 granny clusters]
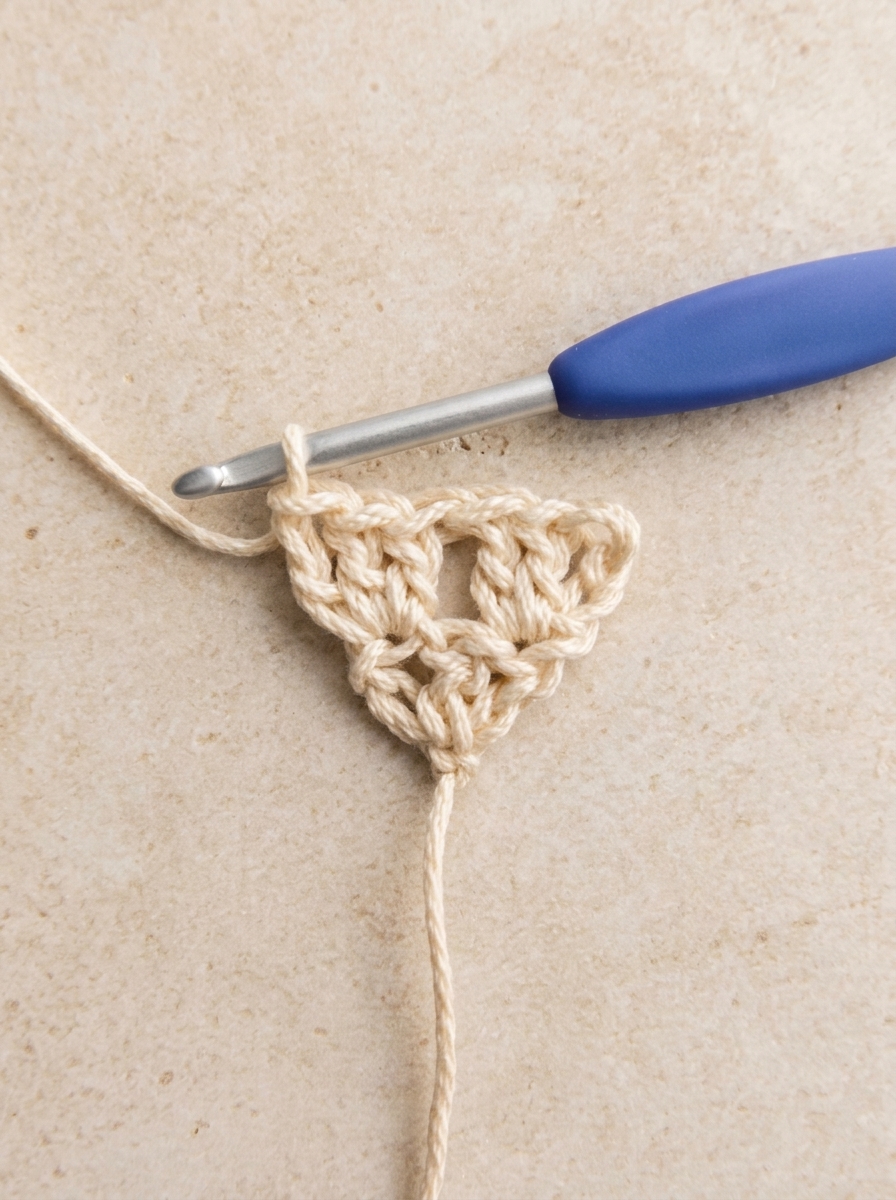
Row 3: Ch 3, and work 2 dc in the same first stitch. Next, work 3 dc in the space between the 3-dc clusters in the row below. Finally, work 3 dc in the top of the turning ch-3 in the row below. Turn your work. [9 sts / 3 granny clusters]
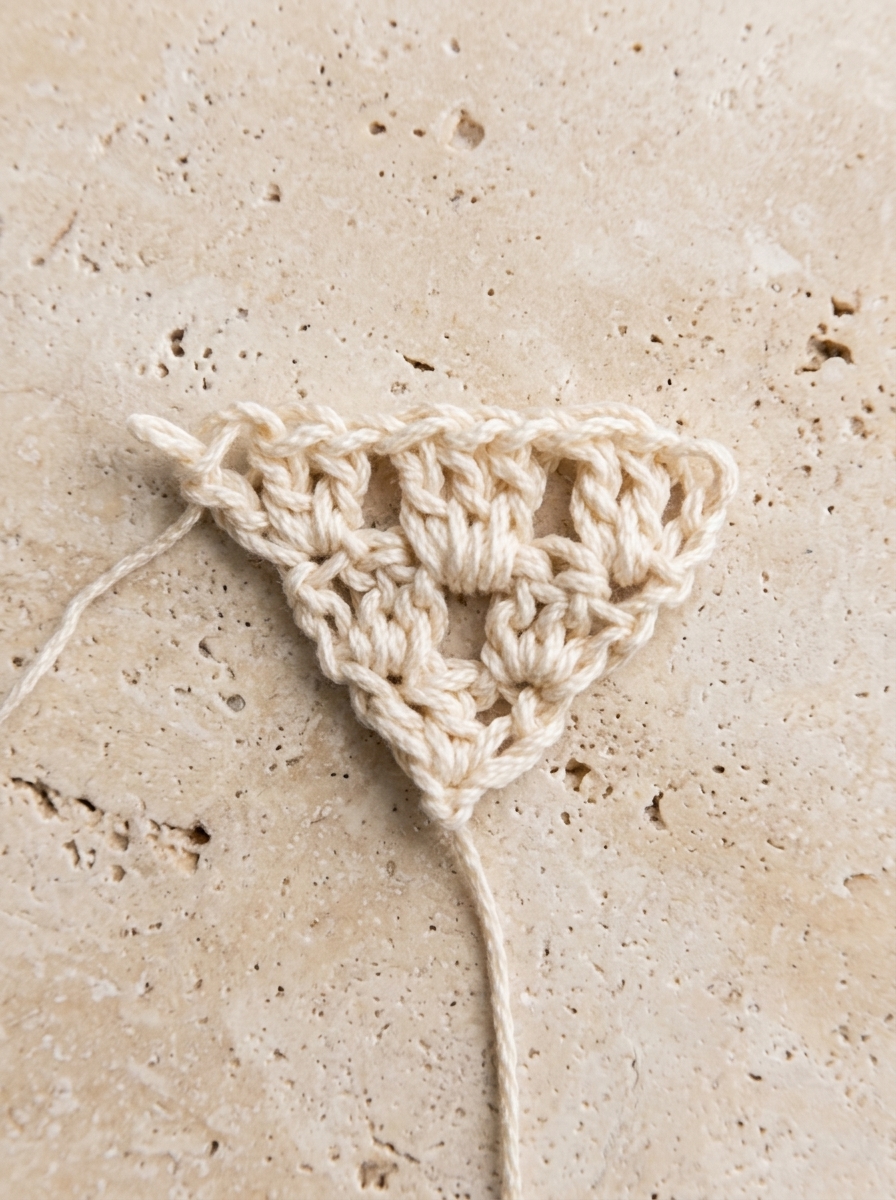
Row 4: Ch 3, and work 2 dc in the same first stitch. Work 3 dc in the first space, then work 3 dc in the next space between clusters. Finish with 3 dc in the top of the turning ch-3 in the row below. Turn your work. [12 sts / 4 granny clusters]
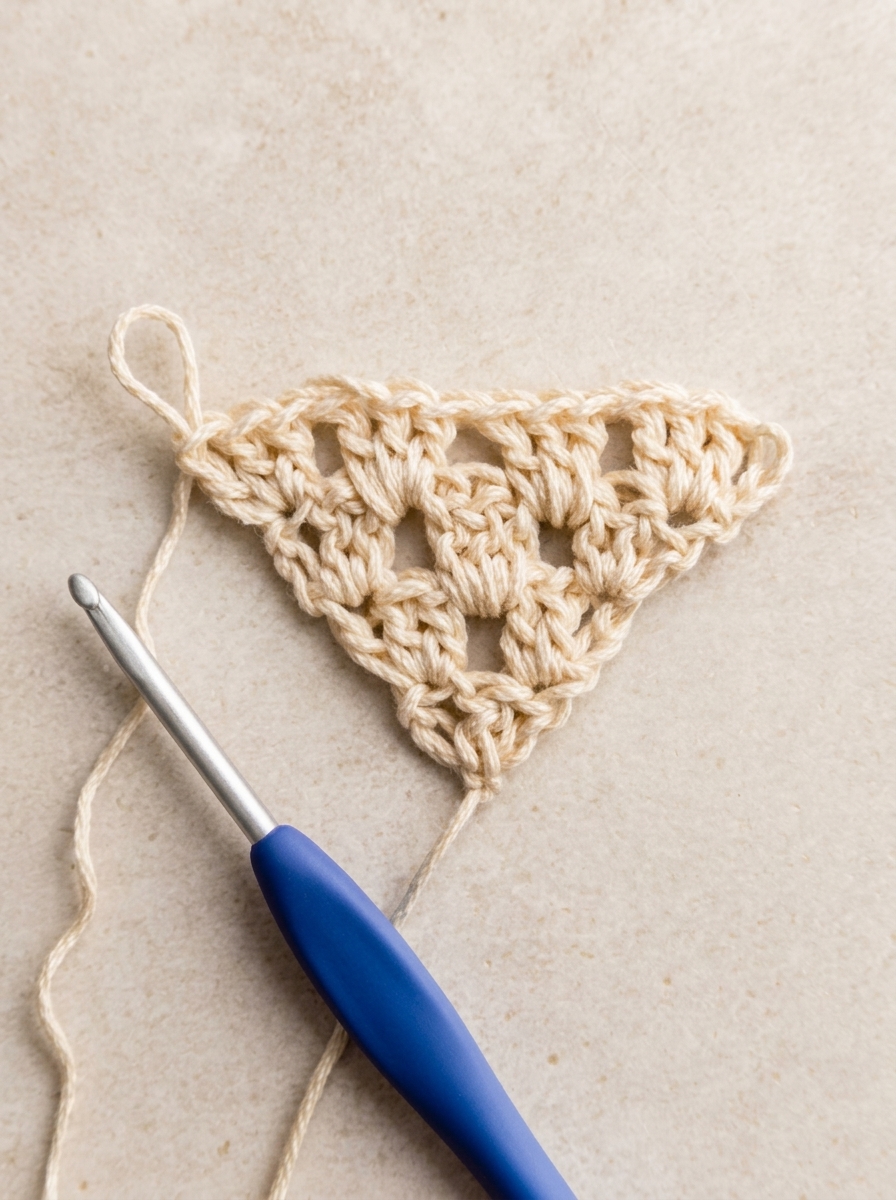
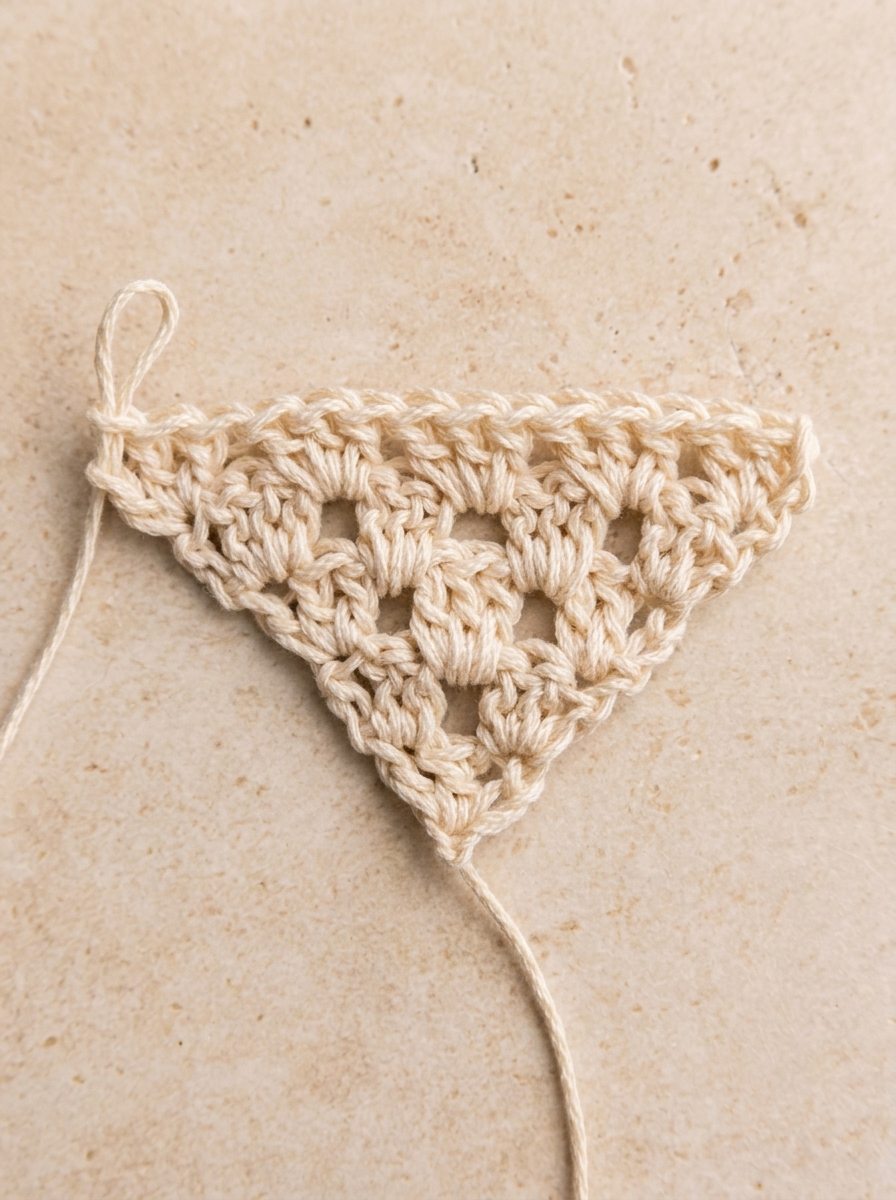
Row 5: Ch 3, and work 2 dc in the same first stitch. Work 3 dc in each space across the row (three spaces total). Then work 3 dc in the top of the turning ch-3 in the row below. Turn your work. [15 sts / 5 granny clusters]
Part 2: Growing the Triangle (Rows 6 to 20)
Rows 6–20: Continue following the Row 5 repeat for a total of 20 rows. Stop when your triangle measures 8.5 inches (21.6 cm) tall by 16.5 inches (41.9 cm) wide. Every row starts with (ch 3, 2 dc in same st), places 3 dc in each space across, and ends with 3 dc in the turning ch-3.
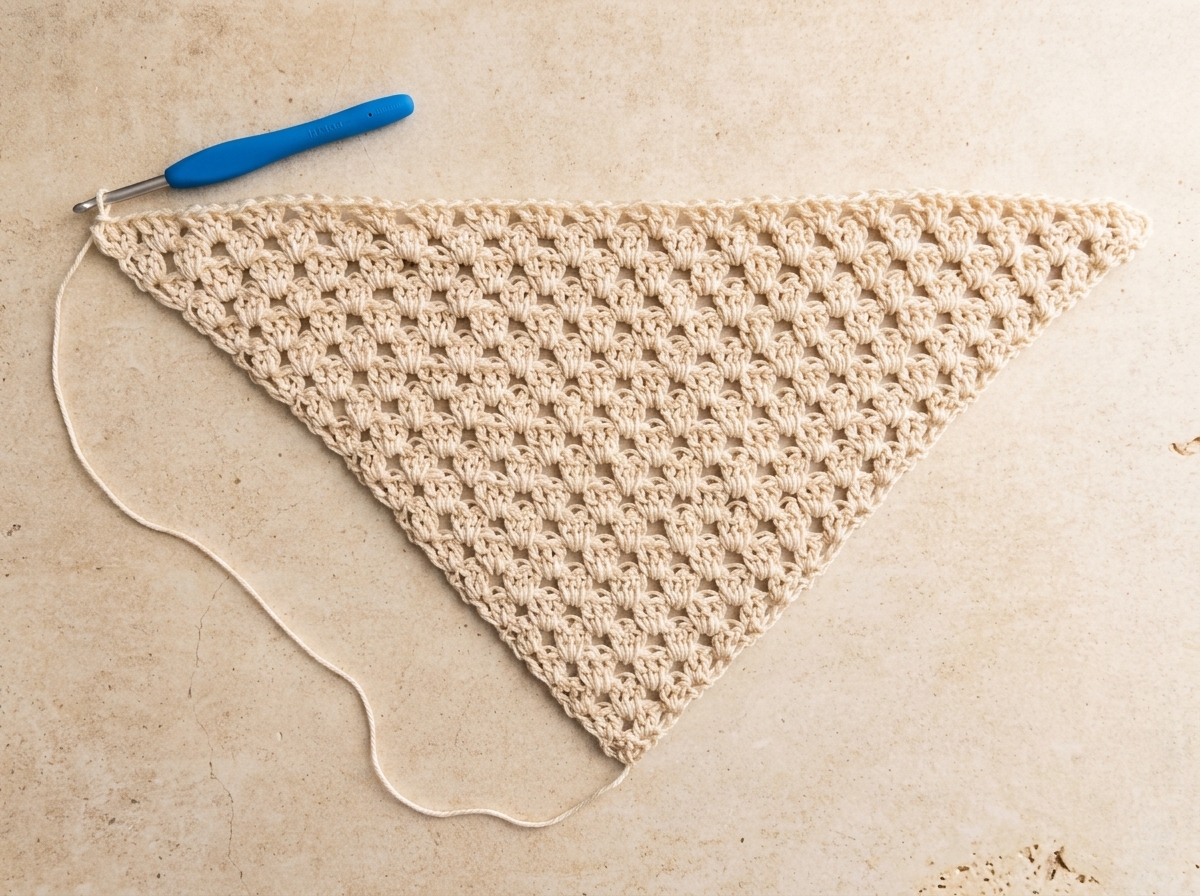
When you complete Row 20, do not cut the yarn or fasten off. Leave the active loop on your 4.0 mm hook and continue directly to the ties section.
Row-by-Row Stitch Count Reference Table
Use this chart to verify your cluster and stitch counts at the end of every row.
| Row Number. | Granny Clusters. | Interior Spaces. | Total Stitch Count. | Approximate Height. |
|---|---|---|---|---|
| Rows 1–4. | 1, 2, 3, 4 clusters. | 0, 0, 1, 2 spaces. | 3, 6, 9, 12 sts. | 0.4″ to 1.7″ (1 to 4.3 cm). |
| Rows 5–8. | 5, 6, 7, 8 clusters. | 3, 4, 5, 6 spaces. | 15, 18, 21, 24 sts. | 2.1″ to 3.4″ (5.3 to 8.6 cm). |
| Rows 9–12. | 9, 10, 11, 12 clusters. | 7, 8, 9, 10 spaces. | 27, 30, 33, 36 sts. | 3.8″ to 5.1″ (9.7 to 13 cm). |
| Rows 13–16. | 13, 14, 15, 16 clusters. | 11, 12, 13, 14 spaces. | 39, 42, 45, 48 sts. | 5.5″ to 6.8″ (14 to 17.3 cm). |
| Rows 17–20. | 17, 18, 19, 20 clusters. | 15, 16, 17, 18 spaces. | 51, 54, 57, 60 sts. | 7.2″ to 8.5″ (18.3 to 21.6 cm). |
Part 3: Adding the Ties and Top Border
Now you will create two 14-inch ties and a neat slip-stitched top border without breaking your yarn.
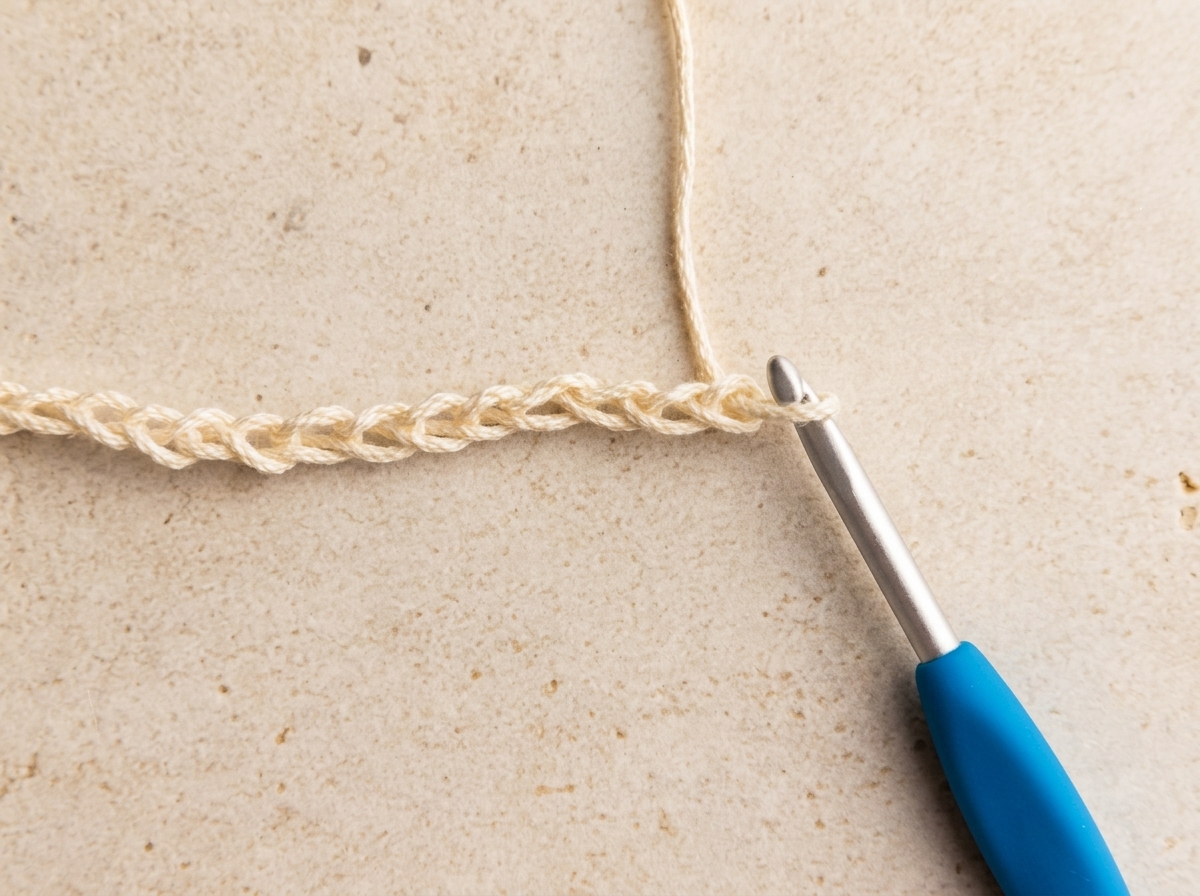
- Make the First Tie: With yarn still attached at the corner after Row 20, ch 50. Skip the first chain from the hook, then work 1 sl st in each remaining chain across (49 sl sts). Insert your hook into the back bump of each chain for a neat braided cord look.
- Slip Stitch Across the Main Triangle: When you reach the main triangle corner, work 1 sl st into each stitch across the top edge (60 sl sts). Keep your tension relaxed so the headband edge lies flat.
- Make the Second Tie: At the opposite top corner, ch 50. Skip the first chain from the hook, then work 1 sl st in the back bump of each chain across (49 sl sts). Work 1 final sl st into the corner stitch to anchor the tie.
Part 4: Finishing and Blocking Your Bandana
Cut the yarn, leaving a 6 to 8 inch (15 to 20 cm) tail, and pull it through the last loop. Thread the tail onto your tapestry needle and weave all ends securely into the back of the granny clusters.
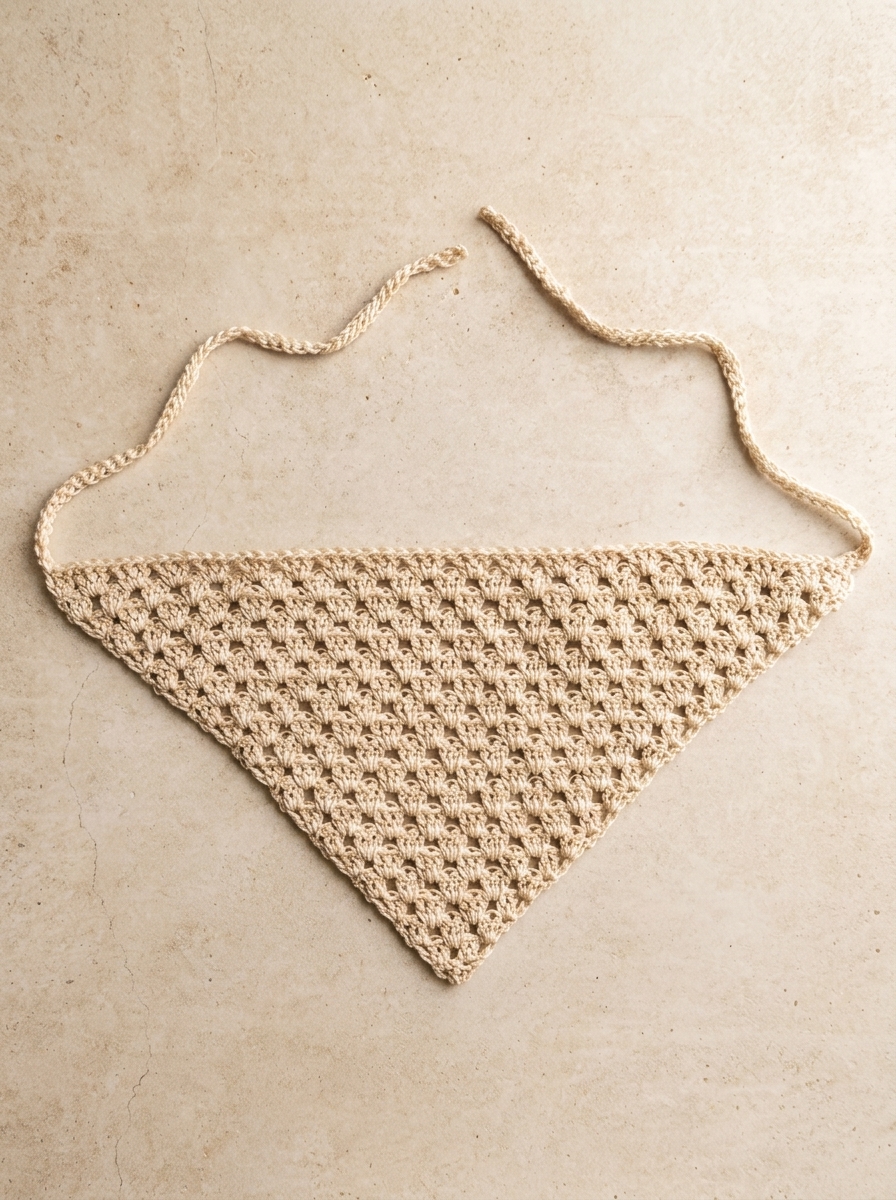
Finally, block the bandana to the finished measurements of 8.5″ by 16.5″. Lightly mist the cotton triangle with water or steam it gently, then pin the corners and ties straight on a foam mat. Once dry, pair your kerchief with one of our beginner crochet cardigan patterns for a complete handmade outfit.
Custom Sizing Guide for Every Head Size
Because this crochet bandana pattern grows from the bottom point upward, you can easily adjust the size. Simply stop at an earlier row for kids or add extra rows for a deeper adult kerchief.
| Size Category. | Total Rows Worked. | Triangle Height x Width. | Starting Chain per Tie. | Finished Tie Length. |
|---|---|---|---|---|
| Toddler / Pet Size. | 12 Rows. | 5.1″ tall x 10.0″ wide. | Ch 38 (37 sl sts). | 10.5 inches each. |
| Child / Youth Size. | 16 Rows. | 6.8″ tall x 13.2″ wide. | Ch 44 (43 sl sts). | 12.0 inches each. |
| Adult Standard (Pattern Size). | 20 Rows. | 8.5″ tall x 16.5″ wide. | Ch 50 (49 sl sts). | 14.0 inches each. |
| Adult Large / Deep Kerchief. | 24 Rows. | 10.2″ tall x 19.8″ wide. | Ch 58 (57 sl sts). | 16.0 inches each. |
Frequently Asked Questions (FAQ)
Can a total beginner make this crochet bandana pattern?
Yes! Even if you are still learning to crochet, this bandana project is a fantastic choice. It is small enough to finish quickly while letting you practice double crochet clusters and slip-stitched straps.
Why are the side edges of my triangle waving?
Wavy edges happen when you accidentally add an extra cluster or work your turning chain too loosely. Always place your first 2 dc into the very first stitch, and work your last 3 dc into the top of the turning ch-3.
Can I add a scalloped border along the angled sides?
Absolutely. Before fastening off after the second tie, you can work 5-dc shell clusters evenly along both angled sides for a vintage lace trim.
How much yarn does one bandana require?
One standard adult bandana uses about 75 to 85 grams (140 to 160 yards) of Lion Brand 24/7 Cotton yarn. Therefore, a single 100-gram skein (186 yards) easily completes the entire triangle and both 14-inch ties.


0 Comments