

When golden leaves begin to carpet your lawn and the first crisp morning frosts nip at your fingertips, it can be tempting to simply hang up your trowel and retreat indoors. But seasoned growers know a fundamental botanical truth: autumn is not the finish line of the gardening year—it is the secret starting gate for the next season.
While above-ground plant growth slows to a peaceful crawl, soil beneath the surface remains comfortably warm and teeming with life. Roots continue expanding well into late autumn, beneficial fungi weave protective mycorrhizal webs, and the harsh freeze-thaw cycles of winter slowly tenderize organic amendments into rich, bioavailable plant food.
Tackling these 15 essential fall gardening tasks before winter arrives ensures you protect your investments, prevent devastating winterkill and burst pipes, break cycles of destructive fungal blights, and set the stage for an explosive, stress-free spring bloom.
Autumn Garden Preparation Master Matrix
| Task | Optimal Window | Priority | Tools / Supplies | Spring Payoff |
|---|---|---|---|---|
| #1. Plant Spring Bulbs | Early-to-Mid Fall | High | Bulb planter, auger, bone meal | Dazzling early-season blooms (tulips, daffodils) |
| #2. Shred Fallen Leaves | Mid Fall | High | Mulching mower, leaf shredder | Free nutrient-rich mulch, improved soil structure |
| #3. Clean & Oil Tools | Late Fall | Medium | Wire brush, whetstone, camellia oil | Razor-sharp, disease-free, rust-free equipment |
| #4. Winterize Irrigation | Before First Freeze | Critical | Blowout adapter, spigot covers | Prevents catastrophic cracked pipes and burst valves |
| #5. Mulch Perennial Crowns | After 2 Hard Frosts | High | Clean straw, wood chips, boughs | Prevents deadly frost-heaving of shallow roots |
| #6. Lift Tender Bulbs | After Light Frost | High | Garden fork, peat moss, crates | Saves expensive dahlias and cannas from rotting |
| #7. Soil Test & Compost | Early Fall | Medium | Soil probe, lab kit, wheelbarrow | Nutrient-balanced soil biological web for spring |
| #8. Plant Garlic & Cover Crops | Mid-to-Late Fall | High | Seed garlic, winter rye seed, straw | Huge summer garlic harvest; zero topsoil erosion |
| #9. Remove Diseased Foliage | Throughout Fall | Critical | Bypass pruners, paper waste bags | Breaks fungal blight and mildew cycles |
| #10. Divide Perennials | Early Fall | Medium | Border spades, hori-hori knife | Vigorous renewed blooming; free multiplied plants |
| #11. Prune the ‘3 Ds’ | Late Fall | Medium | Loppers, pruning saw, hand shears | Eliminates winter wind hazards and disease entry points |
| #12. Deep Pre-Freeze Soak | Late Fall | High | Soaker hose, flow meter, timer | Prevents evergreen winter burn and desiccation |
| #13. Wrap Tree Trunks | Late Fall | Medium | White tree guards, breathable wrap | Prevents southwest sunscald splits and rodent damage |
| #14. Clean & Store Pots | Mid-to-Late Fall | Medium | Tub, coir brush, diluted vinegar | Stops terracotta spalling and cracking in winter |
| #15. Leave Seed Heads | Leave all Winter | High | None (hands off until spring!) | Winter sustenance for native birds and solitary bees |
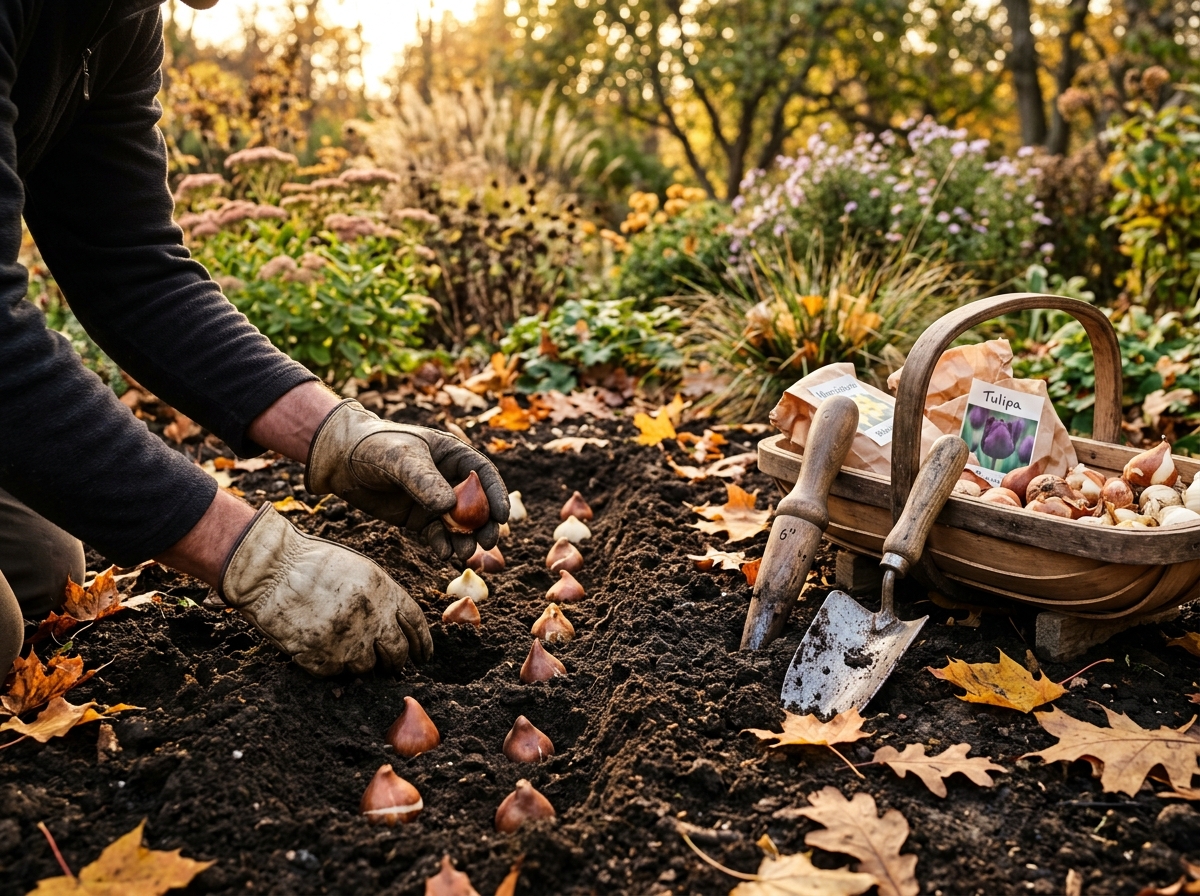
#01. Plant Spring-Flowering Bulbs for Early Colour
📋 Task Quick Facts:
- Optimal Window: 6 to 8 weeks before the first hard ground freeze
- Ideal Soil Temp: 40°F to 50°F (4°C to 10°C)
- Key Tools: Bulb auger or handheld bulb planter, bone meal
- Common Mistake: Planting bulbs upside down or in poorly draining waterlogged soil
Autumn is the secret starting line for spring’s most dazzling floral display. Hard spring bulbs—such as tulips, daffodils (*Narcissus*), alliums, crocus, and hyacinths—require an extended period of cold vernalization (typically 12 to 16 weeks between 35°F and 45°F) to initiate root development and trigger blossom formation.
Step-by-Step Execution
- Select plump, firm bulbs free of soft spots, mold, or mechanical bruising.
- Follow the universal planting depth rule: excavate a trench or drill holes to a depth roughly 2 to 3 times the vertical height of the bulb (typically 6 to 8 inches for daffodils and tulips; 3 inches for crocuses).
- Orient each bulb with the pointed growing tip facing upward and the flattened basal root plate pointing down. If an allium or anemone corm is difficult to orient, plant it on its side.
- Blend a pinch of organic bone meal or rock phosphate into the bottom of the planting hole to stimulate root establishment.
- Backfill with loose loam, tamp down gently to eliminate underground air pockets, and soak thoroughly with water.
🍂 Horticulturist Pro-Tip: If neighborhood squirrels, voles, or chipmunks dig up your tulip bulbs, plant daffodil and allium bulbs alongside them. Both contain bitter, non-toxic alkaloids that naturally deter rodent pests.
#02. Shred and Harvest Fallen Leaves for Rich Leaf Mold
📋 Task Quick Facts:
- Optimal Window: Mid to late autumn as deciduous trees drop foliage
- Material Output: Shredded carbon-rich leaf mulch (‘black gold’)
- Key Tools: Mulching lawn mower, leaf shredder, burlap sacks
- Common Mistake: Leaving whole, matted leaves across lawns and tender perennial crowns
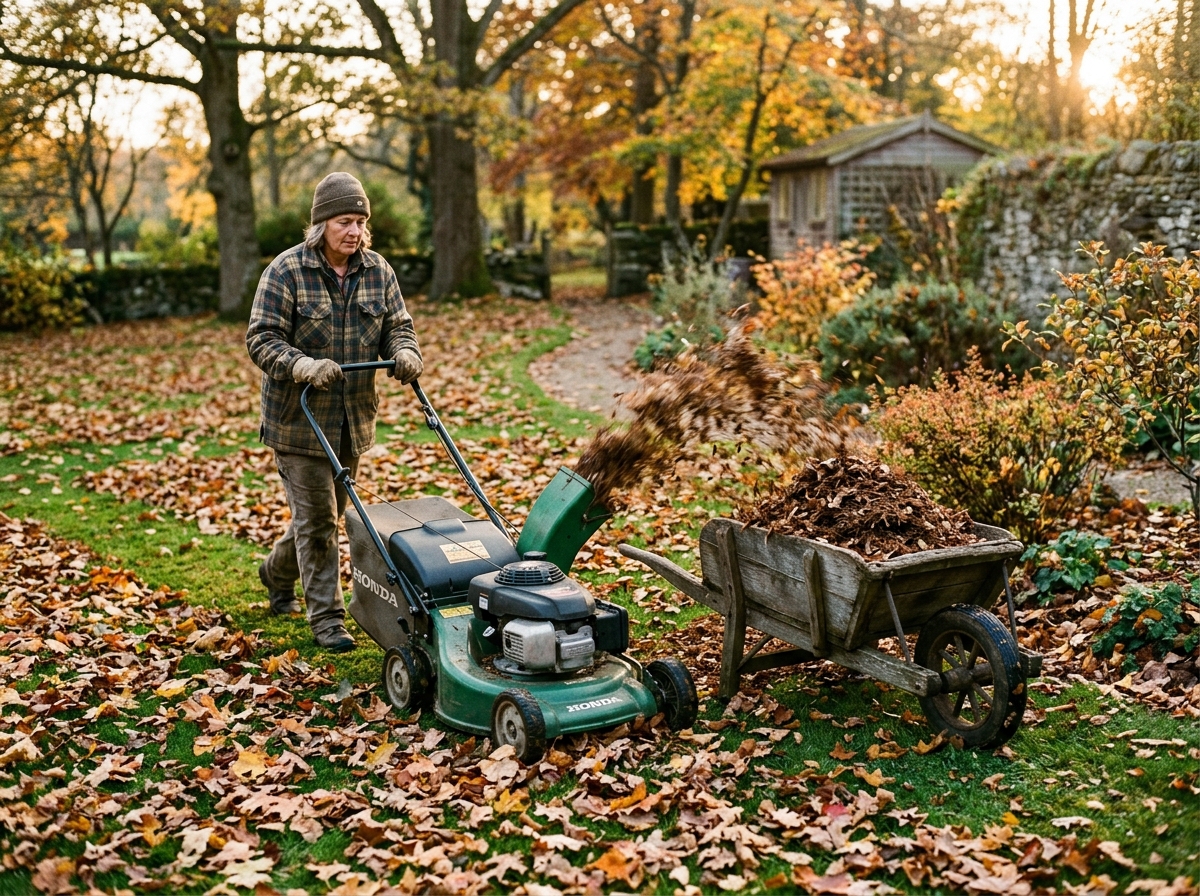
Whole fallen leaves can smother lawns and form impenetrable, wet mats that suffocate emerging perennials in spring. However, running your lawnmower or leaf shredder over fallen maple, oak, and birch leaves transforms a disposal chore into the garden’s most valuable organic resource: leaf mold.
Step-by-Step Execution
- Collect dry leaves on a clear, sunny afternoon when moisture levels are low.
- Run a rotary mulching mower over piles directly on the lawn, or feed them through an electric stand-up leaf shredder to reduce leaf volume by an 8:1 ratio.
- Distribute a 2- to 3-inch blanket of shredded leaves across empty vegetable beds and around perennial borders to prevent soil erosion and frost heaving.
- Store excess shredded leaves in ventilated wire corrals or breathable burlap bags to slowly decompose into dark, fungal-rich leaf mold for next year’s seed starting.
🍂 Horticulturist Pro-Tip: Oak leaves break down slowly due to high tannin content. Chop them finely and mix them 50/50 with nitrogen-rich grass clippings to accelerate decomposition.
#03. Clean, Sharpen, and Oil Garden Hand Tools
📋 Task Quick Facts:
- Optimal Window: Late autumn after final harvesting and planting chores
- Maintenance Goal: Prevent oxidation, eliminate pathogen transfer, maintain cutting edges
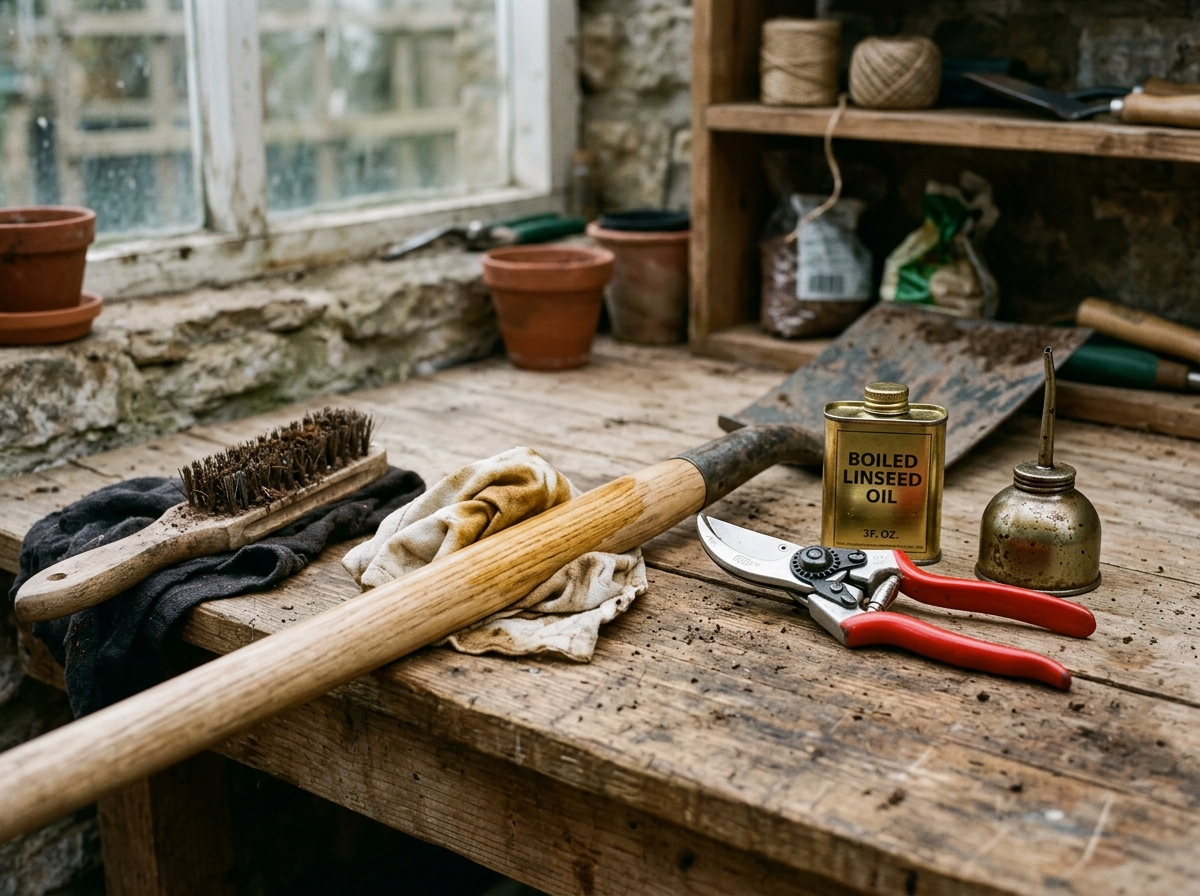
- Key Tools: Wire brush, 600-grit diamond whetstone, mineral or camellia oil, boiled linseed oil
- Common Mistake: Storing muddy pruners and spades in an unheated shed with wet metal blades
Dull, rusted cutting blades crush plant stems instead of making clean cuts, introducing fungal entry wounds. Storing tools covered in garden dirt traps ambient atmospheric moisture against the steel, accelerating pitting and oxidation throughout winter.
Step-by-Step Execution
- Scrape hardened mud and clay off shovels, trowels, and hand weeders using a stiff wire brush and warm soapy water.
- Dissolve stubborn rust spots by soaking metallic blades in a 50/50 white vinegar and water solution or scouring with grade 0000 steel wool.
- Hone the bevelled cutting edge of bypass pruners and loppers using a diamond hone or whetstone, matching the factory 20-degree bevel angle.
- Coat all metal cutting surfaces with a light protective film of camellia oil or 3-In-One oil.
- Sand rough wooden tool handles lightly with 120-grit sandpaper, then rub with boiled linseed oil to prevent splitting.
🍂 Horticulturist Pro-Tip: Keep a 5-gallon bucket filled with coarse builder’s sand mixed with a quart of mineral oil in your shed. Plunging spade heads into this mixture immediately cleans and lubricates them.
#04. Drain Drip Irrigation Lines and Winterize Outdoor Spigots
📋 Task Quick Facts:
- Optimal Window: 2 to 3 weeks before the first hard freeze (<28°F / -2°C)
- Critical Risk: Ruptured pipes, burst backflow preventers, cracked brass spigots
- Key Tools: Air compressor or blowout adapter, insulated spigot cover, hose reel
- Common Mistake: Leaving a garden hose attached to an outdoor frost-free sillcock valve
Water expands by approximately 9% when freezing. Trapped moisture inside brass valves, pressure regulators, drip emitters, and garden hoses exerts hydrostatic pressures exceeding 20,000 PSI—enough to split heavy copper pipes and shatter expensive irrigation manifold components.
Step-by-Step Execution
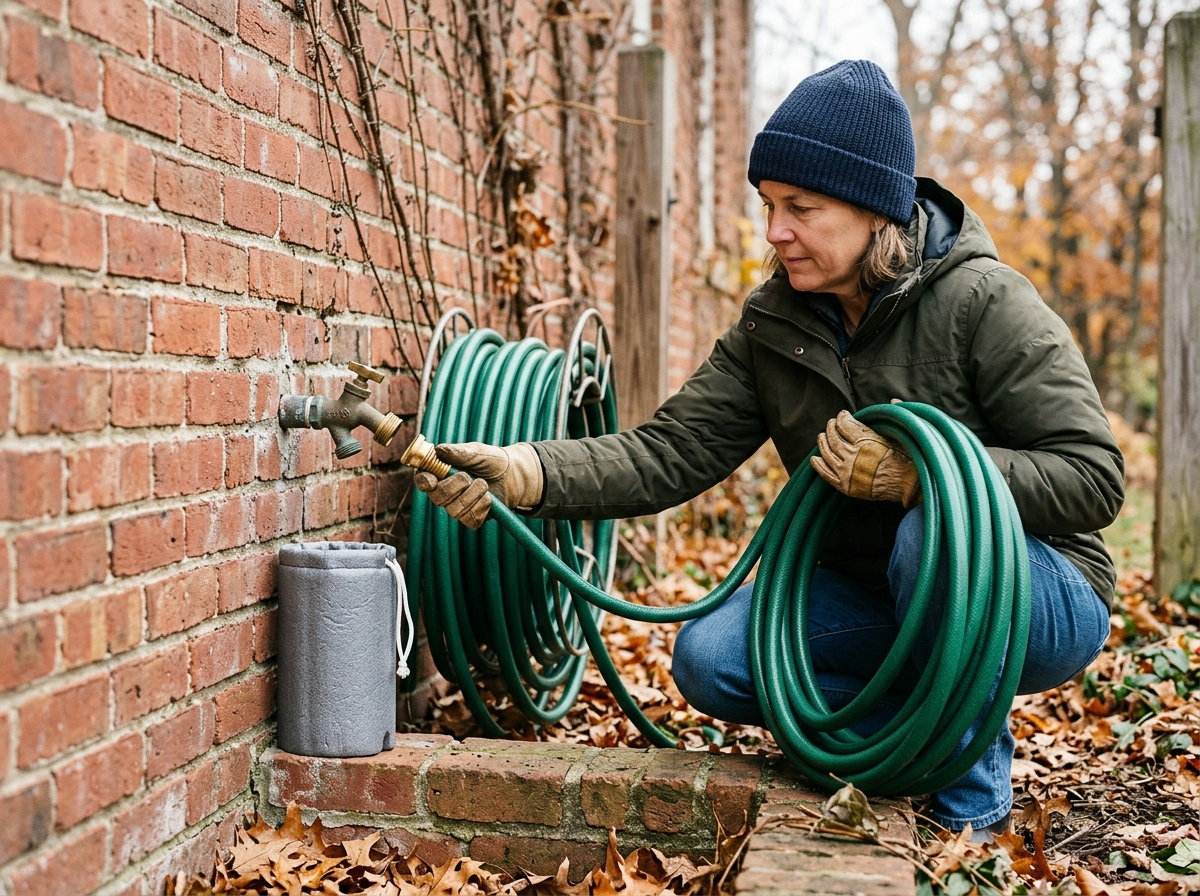
- Disconnect every garden hose, nozzle, and timer from exterior hose bibbs. Drain hoses completely by coiling them downhill, then store them indoors.
- Shut off the interior shut-off gate valve dedicated to exterior sillcocks, open the outdoor faucet fully, and drain the brass bleeder cap indoors into a bucket.
- Remove digital battery-operated watering timers and store them in a climate-controlled room to protect sensitive solenoid diaphragms.
- Use an air compressor set to a safe 30 to 40 PSI to gently blow standing water out of drip irrigation tubing and underground distribution lines.
- Fit foam polystyrene faucet socks or insulated neoprene covers over all exterior hydrants.
🍂 Horticulturist Pro-Tip: Even ‘frost-free’ spigots will burst if a hose remains connected. The siphon tube cannot drain back when a closed hose nozzle holds water in the barrel.
#05. Insulate Tender Perennial Crowns and Shrub Roots
📋 Task Quick Facts:
- Optimal Window: After the first 2 to 3 hard killing frosts have frozen the top inch of soil
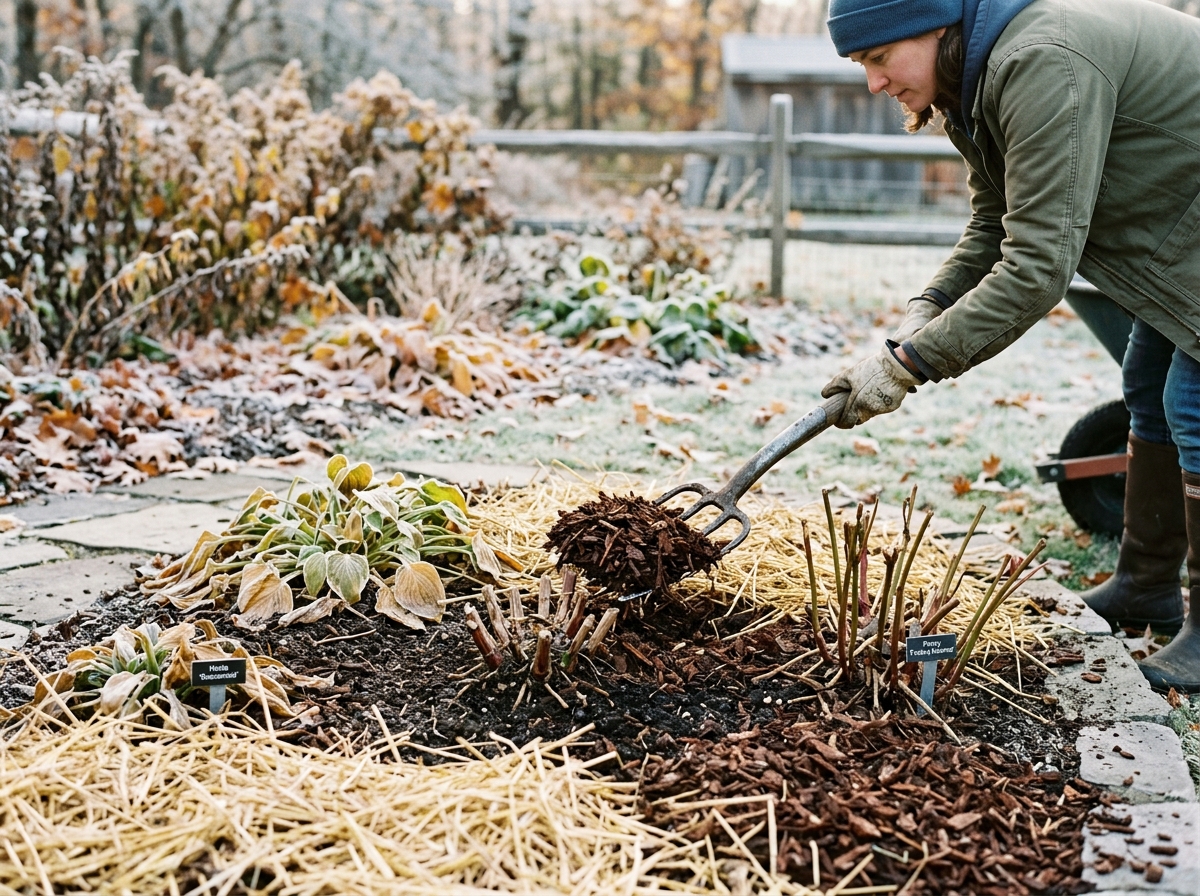
- Mulch Depth: 3 to 4 inches of loose, breathable organic matter
- Best Materials: Clean oat straw, shredded hardwood bark, pine needles, evergreen boughs
- Common Mistake: Applying thick mulch too early in warm autumn weather, encouraging rodent nesting
Winter mulch is not applied to keep the soil warm; its true biological purpose is to keep the soil consistently frozen. Midwinter warm spells thaw topsoil, followed by overnight plunges below freezing, which violently heaves shallow-rooted perennials right out of the soil bed.
Step-by-Step Execution
- Wait until several hard killing frosts have completely put perennials into deep physiological dormancy.
- Weed the perimeter around the plant base thoroughly before laying down winter protection.
- Collar fragile crowns (such as hybrid tea roses, lavender, and tender salvias) with a 3- to 4-inch layer of clean wheat straw, dry shredded bark, or pine needle duff.
- Lay cut evergreen boughs crisscrossed over loose straw to anchor the mulch against blustery winter winds without trapping excess stagnant humidity.
- Keep mulch 2 to 3 inches away from the direct woody stems of shrubs to prevent vole gnawing and moisture rot.
🍂 Horticulturist Pro-Tip: For hybrid tea roses, construct a simple chicken-wire cylinder around the canes, fill it loosely with clean straw or chopped leaves, and mound soil 8 inches up over the bud union.
#06. Lift and Overwinter Tender Summer Bulbs and Tubers
📋 Task Quick Facts:
- Optimal Window: Promptly after the first light blackening frost (Zones 7 and colder)
- Key Species: Dahlias, Canna lilies, Elephant Ears (*Colocasia*), Gladioli, Begonias
- Storage Conditions: 45°F to 50°F (7°C to 10°C), dark, 50% relative humidity
- Common Mistake: Storing damp tubers in airtight plastic bags, leading to catastrophic fungal rot
Tropical and subtropical geophytes cannot survive freezing ground temperatures. When the first autumn frost blackens dahlia foliage and canna leaves, the plant shifts its final carbohydrates down into the root system, signaling the precise moment to lift and safely store the storage organs.
Step-by-Step Execution
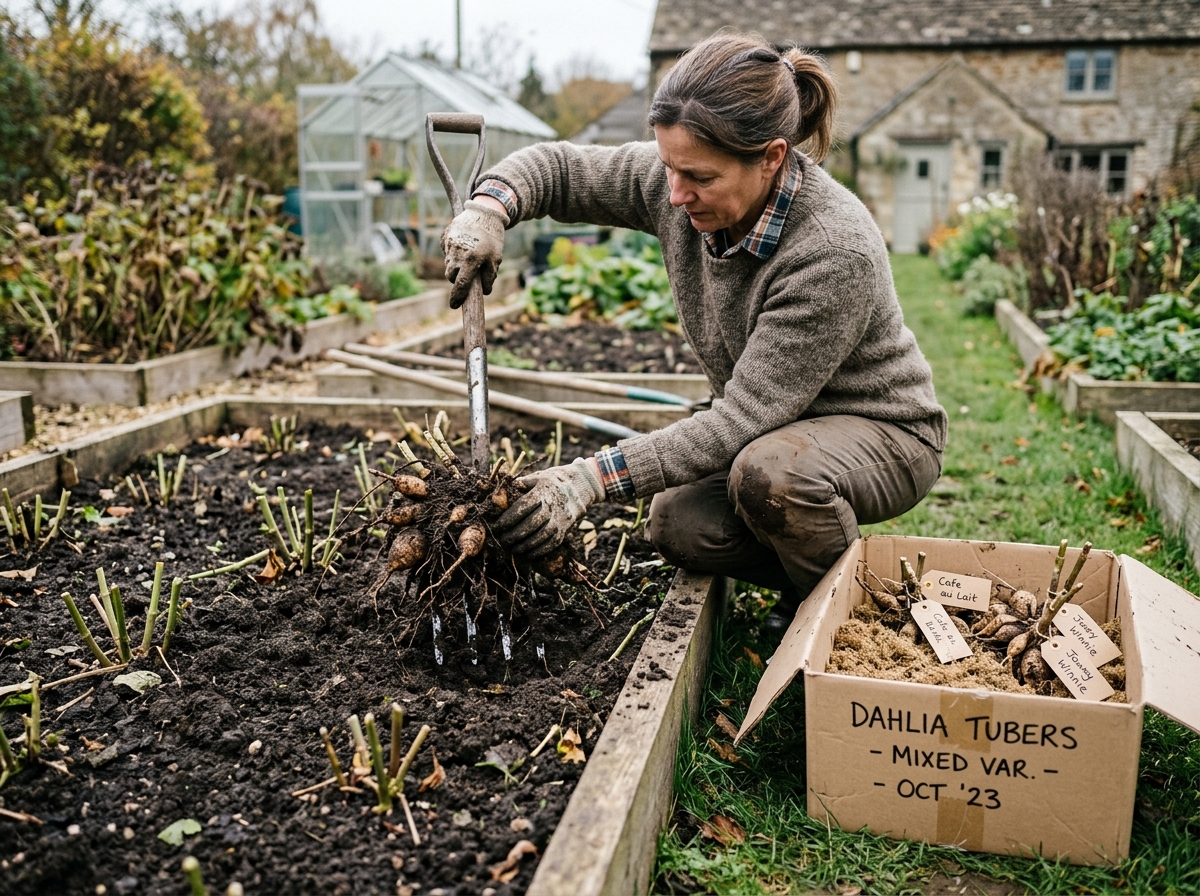
- Cut blackened stems back to 2 to 4 inches above the ground using clean bypass pruners.
- Carefully loosen the soil 12 inches away from the main stems using a garden fork to avoid puncturing tuber necks.
- Gently lift the tuber clump, shake off loose garden loam, and rinse lightly with water if heavy clay clings to the roots.
- Cure the tubers in a ventilated, frost-free location (such as a garage or porch) for 2 to 3 days to dry outer skins.
- Pack dry tubers in cardboard boxes or breathable crates filled with slightly moist peat moss, vermiculite, or dry wood shavings.
- Check monthly throughout winter; discard any mushy tubers and lightly mist dry packing material if tubers begin to shrivel.
🍂 Horticulturist Pro-Tip: Label each tuber clump directly on the skin using an indelible graphite pencil or permanent fine-tip marker so you know exact cultivars and flower colors come planting time in May.
#07. Test Soil Chemistry and Top-Dress Beds with Compost
📋 Task Quick Facts:
- Optimal Window: Early to mid-autumn while soil biology remains active (>50°F / 10°C)
- Key Amendments: Finished compost, agricultural limestone (for acidic soils), sulfur (for alkaline soils)
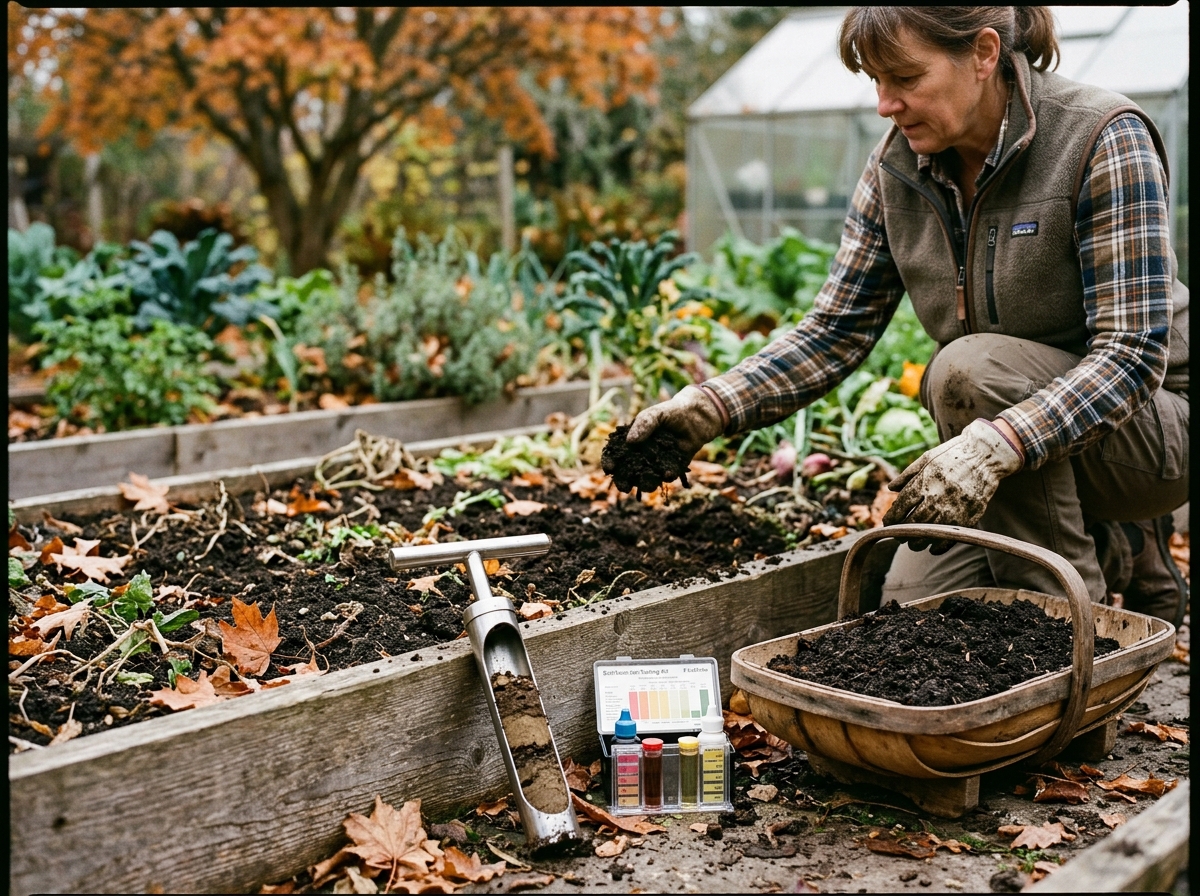
- Key Tools: Soil sampling core probe, soil test kit or laboratory submission box, wheelbarrow
- Common Mistake: Adding high-nitrogen fast-release chemical fertilizers late in autumn
Autumn soil testing provides an unhurried, accurate assessment of soil nutrients and pH. Slow-acting soil amendments like agricultural limestone, greensand, and rock phosphate require 3 to 6 months of winter moisture and microbial activity to break down and become bioavailable for spring roots.
Step-by-Step Execution
- Take 10 to 15 core samples 6 inches deep across your garden beds using a clean stainless soil probe.
- Mix cores thoroughly in a clean plastic bucket and send a 2-cup composite sample to your local university agricultural extension laboratory.
- Spread a generous 1- to 2-inch top-dressing layer of well-aerated, dark finished compost across all vegetable and ornamental beds.
- Do not till the compost into the soil; let earthworms, mycorrhizal fungi, and freeze-thaw cycles pull organic matter down naturally into root zones.
- Top the compost layer with a light cover of shredded leaves or clean straw to shield beneficial microbes from heavy winter rains.
🍂 Horticulturist Pro-Tip: Avoid applying quick-release nitrogen fertilizer in fall. It triggers weak, succulent new vegetative growth that is instantly killed by the first freeze, wasting your fertilizer and inviting stem rot.
#08. Plant Hardneck Garlic Cloves and Sow Winter Cover Crops
📋 Task Quick Facts:
- Optimal Window: 2 to 4 weeks after the first autumn frost (October to November)
- Target Varieties: Hardneck cultivars (Music, German Extra Hardy, Chesnok Red) for cold climates
- Cover Crop Seeds: Winter rye (*Secale cereale*), hairy vetch, crimson clover
- Common Mistake: Separating garlic cloves weeks before planting; cloves dry out quickly once peeled
Garlic requires cold winter temperatures to trigger clove division and develop large, pungent bulbs next summer. Concurrently, bare vegetable soil left exposed to harsh winter snow and rain loses vital topsoil nutrients to leaching. Sowing a fast-rooting cover crop maintains living roots in the soil.
Step-by-Step Execution
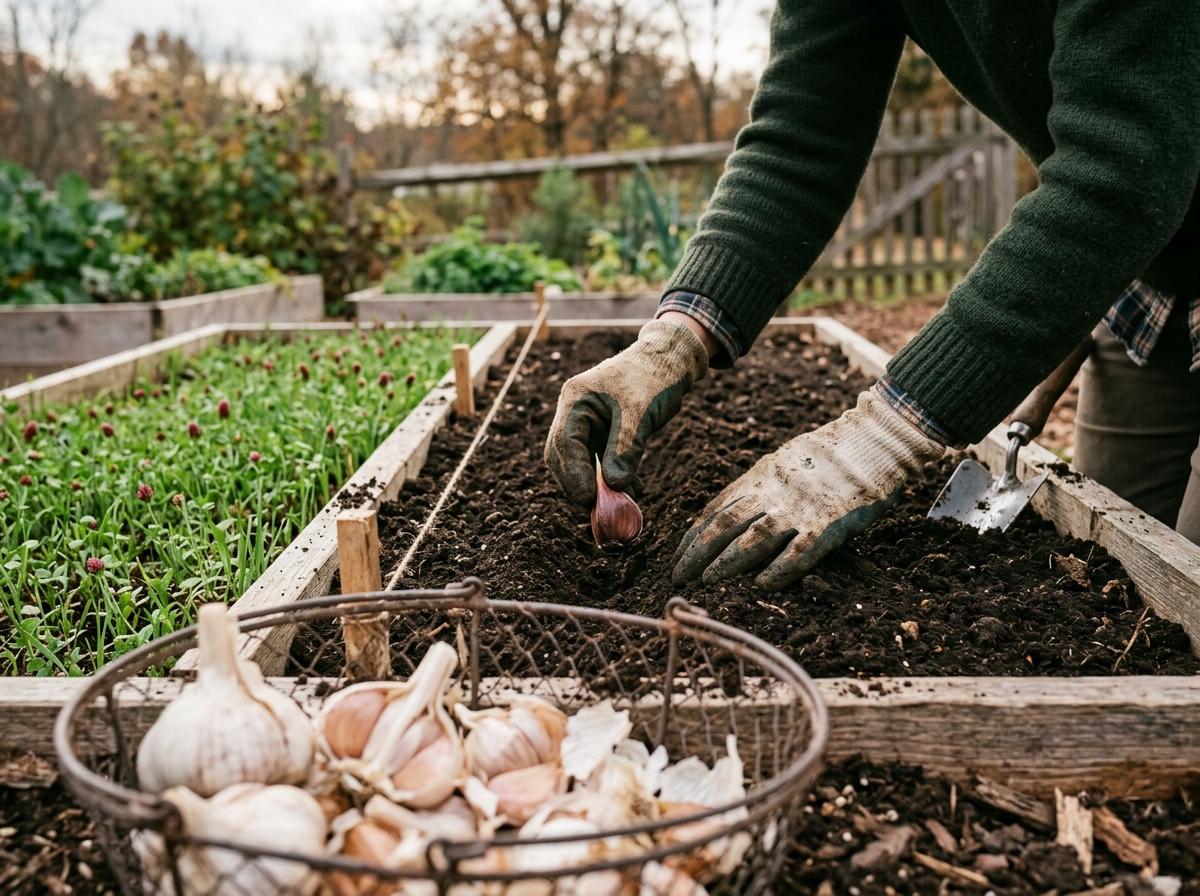
- Separate whole seed garlic heads into individual cloves just 24 to 48 hours prior to planting, retaining the papery protective wrappers.
- Press individual cloves base-down and pointed-tip up 2 to 3 inches deep, spaced 6 inches apart in rows 10 inches apart.
- Sow winter rye or hairy vetch over adjacent bare beds, raking seeds 1/2 inch deep into moist soil.
- Water thoroughly to trigger rapid germination of cover crop seedlings and early root development in garlic cloves.
- Cover the garlic bed with a thick 4- to 6-inch insulating layer of clean wheat straw before severe ground freezing arrives.
🍂 Horticulturist Pro-Tip: Always purchase certified disease-free seed garlic from reputable growers. Grocery store garlic is often treated with sprout-inhibiting growth regulators and may harbor soil-borne nematodes.
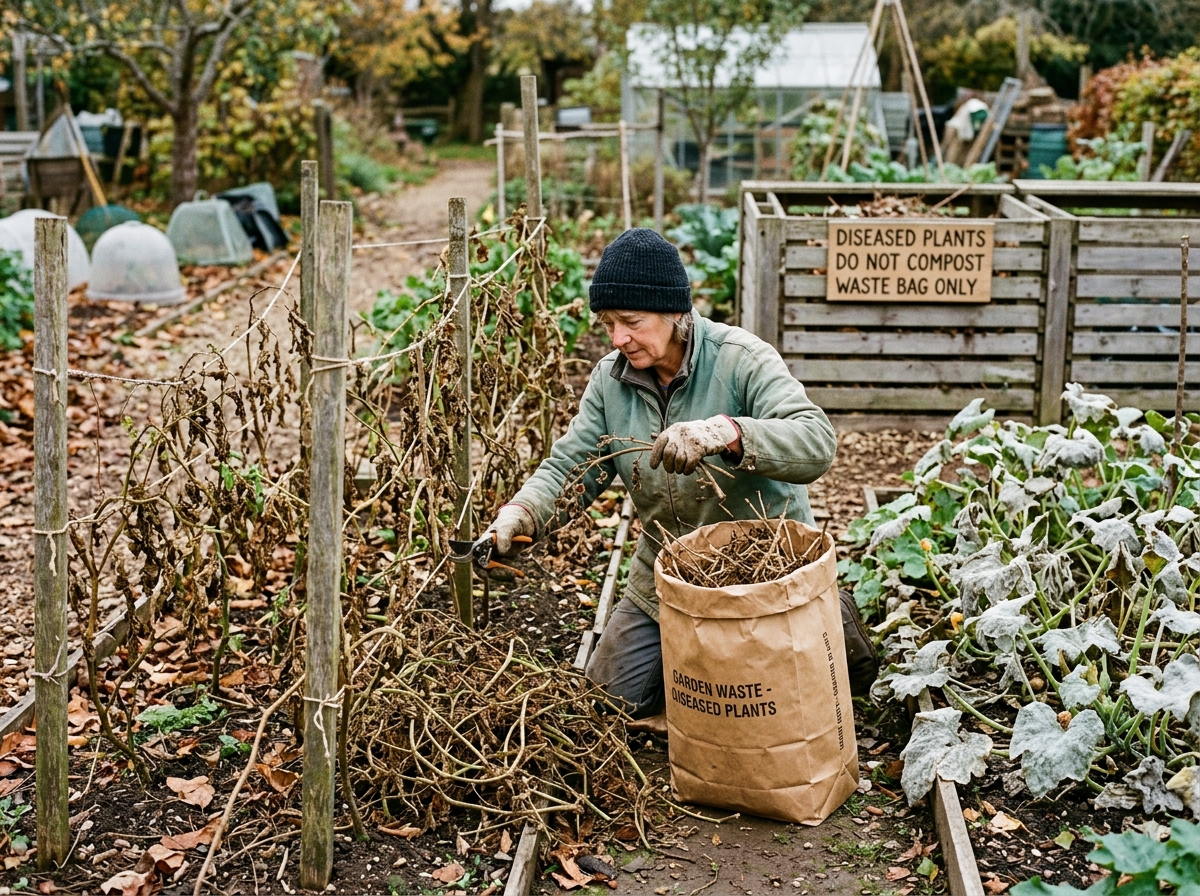
#09. Remove and Destroy Blighted or Diseased Plant Debris
📋 Task Quick Facts:
- Optimal Window: Immediately upon harvest completion, before winter storms knock debris flat
- Primary Threats: Late blight (*Phytophthora*), powdery mildew, anthracnose, rust spores
- Disposal Method: Bag for municipal hot composting or landfill; never home cold compost
- Common Mistake: Tossing diseased tomato vines or blighted peony foliage into your backyard compost pile
Fungal spores and bacterial pathogens readily overwinter within desiccated stems, dropped leaves, and decaying fruit. Leaving blighted tomato vines, powdery mildew-covered squash foliage, or spotted rose leaves in the garden provides an active pathogen nursery for the upcoming spring.
Step-by-Step Execution
- Inspect all spent vegetable plants and herbaceous perennials for signs of leaf spot, blight, rust, or powdery mildew.
- Sever diseased plants right at ground level using clean, sanitized bypass pruners.
- Rake up all dropped mummified fruit, diseased leaves, and infected stems from the surrounding soil bed.
- Place all diseased debris directly into heavy-duty yard waste bags for municipal green-waste disposal or burn where local bylaws permit.
- Disinfect pruners between cuts with 70% isopropyl alcohol wipes to avoid transferring pathogens to healthy plants.
🍂 Horticulturist Pro-Tip: Backyard compost piles rarely reach the sustained 140°F–160°F (60°C–71°C) internal temperatures required to kill fungal spores like late blight or tobacco mosaic virus. When in doubt, bag it out.
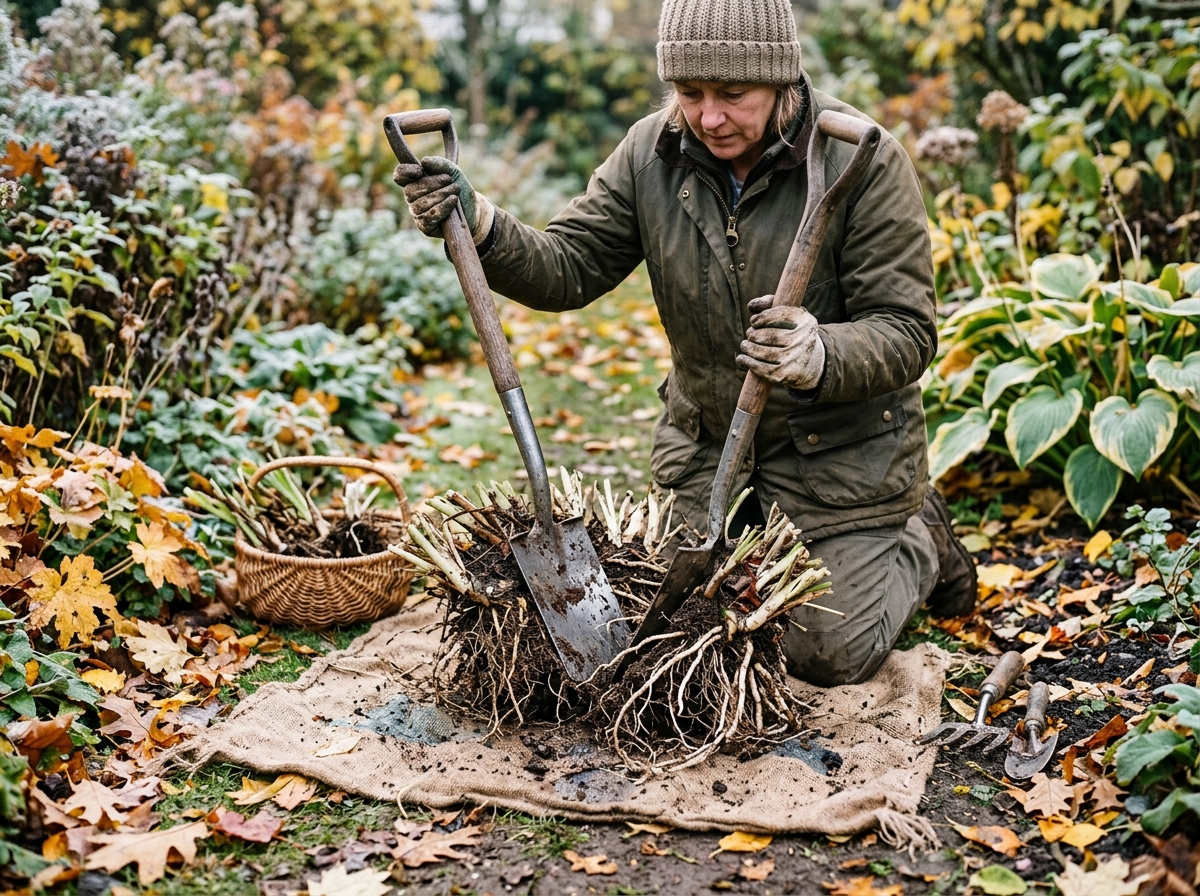
#10. Divide and Transplant Overgrown Spring-Blooming Perennials
📋 Task Quick Facts:
- Optimal Window: Early fall (4 to 6 weeks before ground freezes)
- Best Candidates: Hostas, Siberian irises, daylilies, peonies, oriental poppies
- Key Tools: Pair of border spades, hori-hori knife, hand pruners, bucket of water
- Common Mistake: Dividing late-blooming autumn perennials (asters, mums) in fall instead of spring
Perennials that bloom in spring and early summer complete their seasonal cycle by late autumn. When mature clumps develop hollow centers, produce smaller blossoms, or outgrow their border boundaries, autumn dividing rejuvenates root health and yields dozens of free, vigorous plants.
Step-by-Step Execution
- Water the parent clump deeply 24 hours prior to digging to soften soil and hydrate roots.
- Slice downward through root perimeters with a sharp border spade, prying the root mass out of the ground onto a tarp.
- Insert two garden forks back-to-back into the center of fibrous clumps and lever the handles outward to pry divisions apart cleanly.
- For dense rhizomes or woody crowns (like hostas or daylilies), use a sanitized hori-hori knife to slice clean divisions with 3 to 5 healthy shoot buds each.
- Replant the healthiest perimeter divisions immediately at their original soil depth, enrich with compost, and water generously.
🍂 Horticulturist Pro-Tip: Discard the tired, woody central core of older perennial clumps; the freshest, most vigorous vegetative growth is always along the outer ring of the clump.
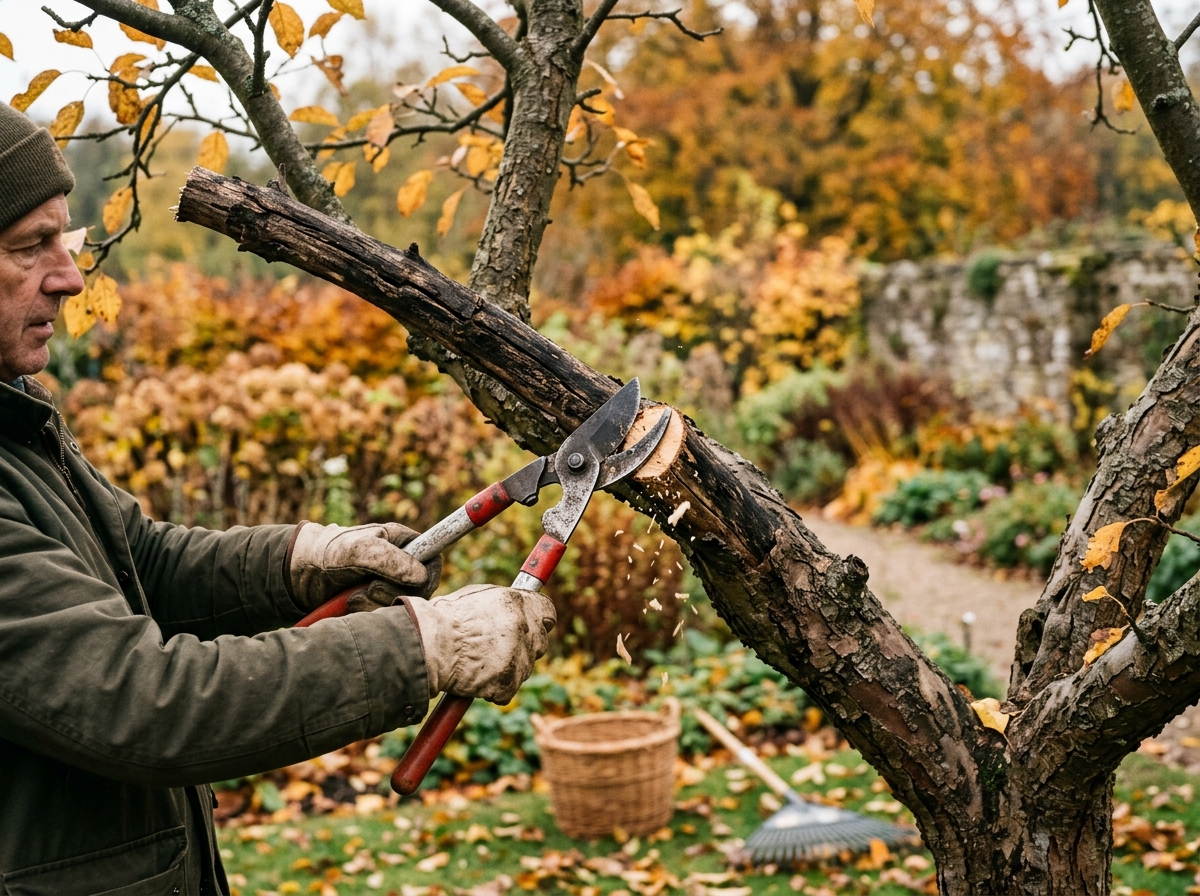
#11. Prune Only Dead, Diseased, and Damaged Wood (The 3 Ds)
📋 Task Quick Facts:
- Optimal Window: Mid-autumn after deciduous leaves fall and branch structure is visible
- Pruning Scope: Dead wood, Diseased limbs, Damaged/cracked branches only
- Key Tools: Bypass hand pruners, anvil loppers, folding arborist pruning saw
- Common Mistake: Aggressive late-fall structural pruning, which stimulates tender freeze-vulnerable growth
Pruning stimulates new hormonal growth surges. If you prune healthy, living branches in early or mid-autumn, the shrub produces tender sap-filled shoots that will freeze and die during the first frost, creating entry wounds for dieback fungi. Limit autumn cuts strictly to the ‘3 Ds’: Dead, Diseased, and Damaged wood.
Step-by-Step Execution
- Wait until deciduous trees have dropped their leaves so the structural branch framework is completely exposed.
- Identify and remove dead branches (wood that snaps brittlely and shows brown beneath scratched bark).
- Cut out cracked, broken, or storm-damaged branches that could tear away under heavy winter snow or ice loads.
- Make cuts just outside the branch collar and branch bark ridge without cutting flush into the trunk or leaving long, rotting branch stubs.
- Postpone major aesthetic reshaping and spring-flowering shrub pruning (lilacs, forsythia) until after their spring bloom.
🍂 Horticulturist Pro-Tip: Never apply tree wound paint or pruning sealers to cut surfaces. Arboricultural research proves these petroleum products trap interior moisture and encourage fungal heart-rot.
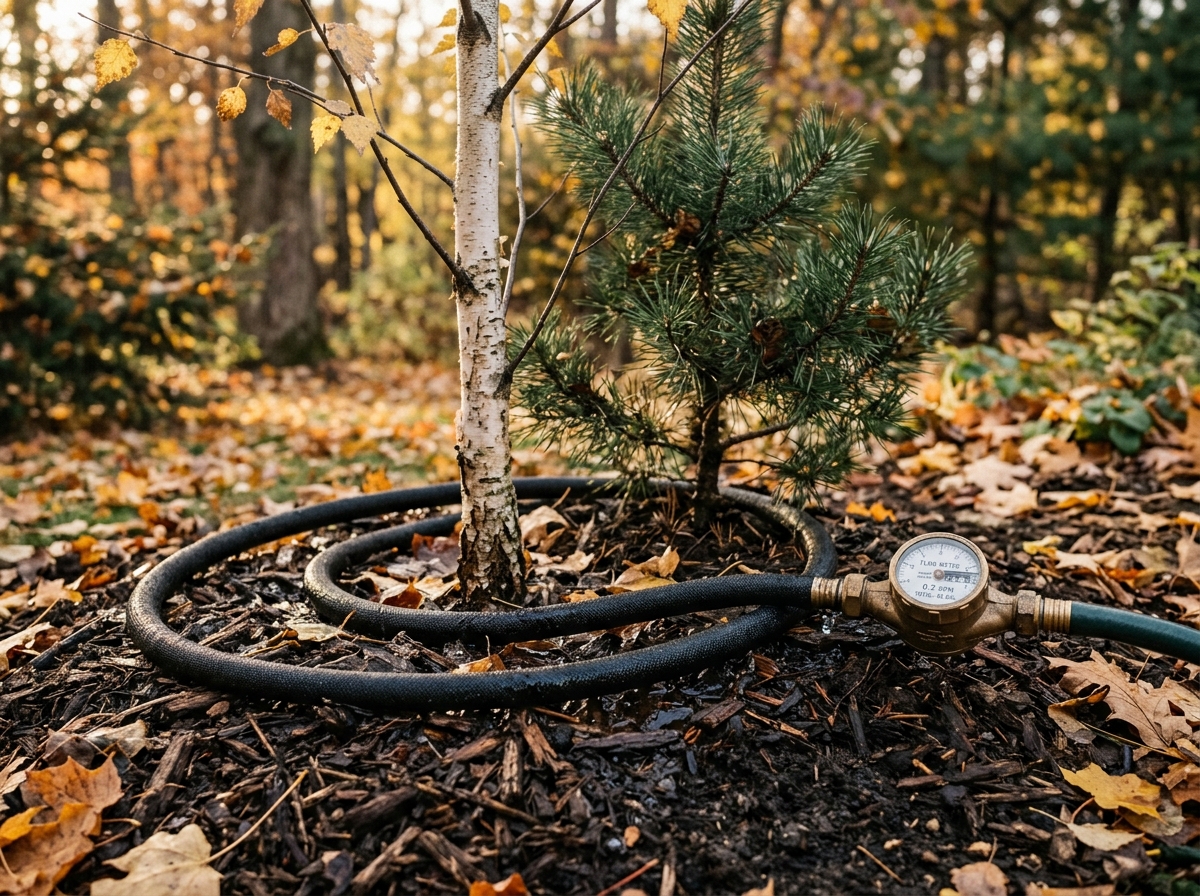
#12. Give Trees, Shrubs, and Evergreens a Deep Pre-Freeze Soak
📋 Task Quick Facts:
- Optimal Window: Late autumn, after deciduous leaves drop but prior to the soil freezing solid
- Watering Depth: Moistening the top 12 to 18 inches of soil
- Target Species: Broadleaf evergreens (rhododendrons, boxwoods, hollies), conifers, newly planted trees
- Common Mistake: Assuming autumn rain is sufficient without checking subsoil moisture levels
Winter winds and sunny winter afternoons constantly pull moisture from evergreen needles and broad leaves. However, when the surrounding topsoil freezes solid, plant roots cannot extract replacement water. Winter dieback and ‘winter burn’ are almost always the result of seasonal dehydration, not cold air alone.
Step-by-Step Execution
- Check soil moisture by digging 6 inches down near the drip line; if soil is dry and crumbly, deep hydration is required.
- Snake a porous soaker hose around the drip line (the outer perimeter of the branch canopy, where feeder roots concentrate).
- Run water at low pressure for 2 to 4 hours, allowing the slow trickle to infiltrate 12 to 18 inches deep without surface runoff.
- Pay exceptional attention to trees and shrubs planted within the past 1 to 2 growing seasons that lack extensive root systems.
- Finish with a 3-inch layer of organic bark mulch over root zones to lock water into the soil before winter freeze-up.
🍂 Horticulturist Pro-Tip: Moist soil holds significantly more thermal energy than dry, porous soil. Thoroughly hydrated root systems stay several degrees warmer throughout winter frosts than dry root systems.
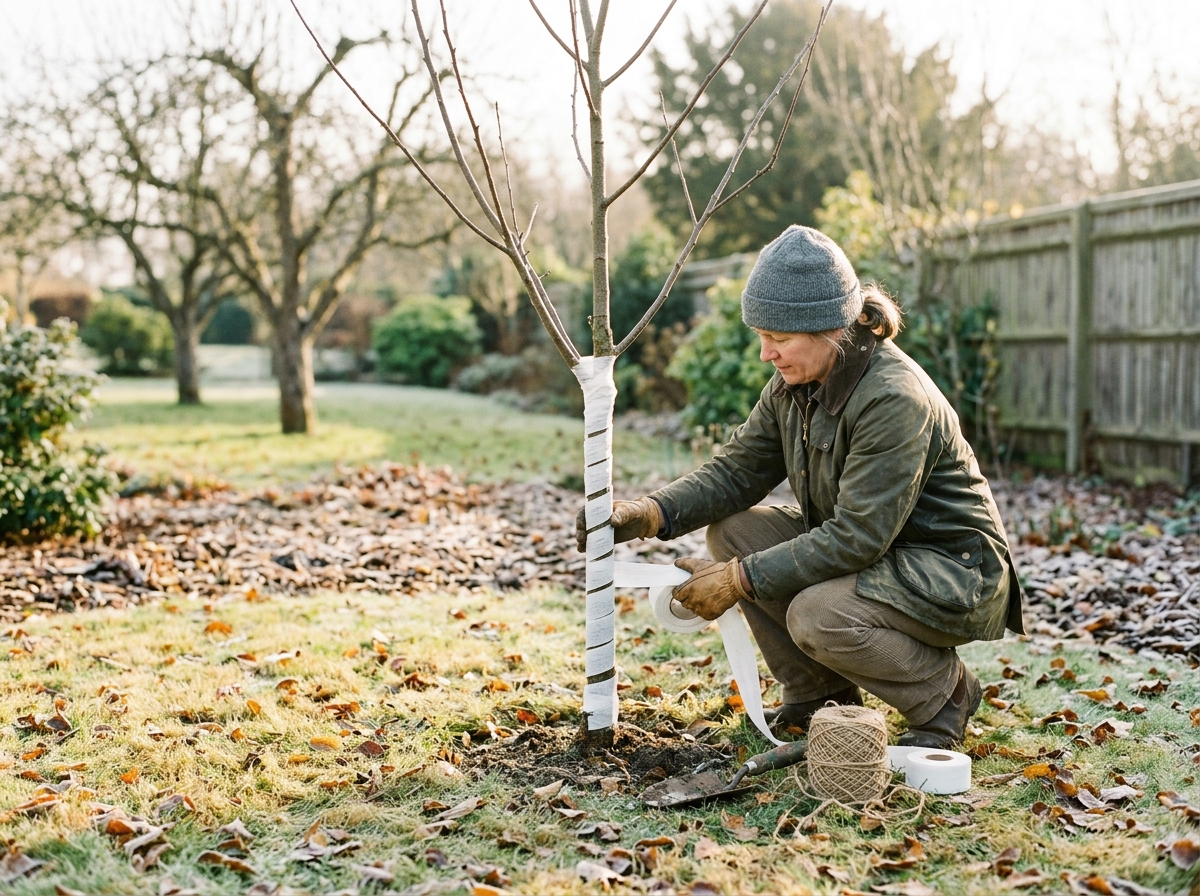
#13. Wrap Young Tree Trunks Against Sunscald and Rodents
📋 Task Quick Facts:
- Optimal Window: Late autumn before snow cover and sub-freezing temperatures arrive
- Target Trees: Young thin-barked trees: fruit trees (apples, cherries), maples, lindens, honey locusts
- Key Materials: White polypropylene spiral tree guards, commercial kraft paper wrap, wire hardware cloth
- Common Mistake: Leaving wraps on year-round, which creates damp hideouts for summer boring insects
On bright winter afternoons, strong low-angle sunlight warms the south and southwest bark of thin-barked trees, awakening dormant cambium cells. When temperatures drop below freezing after sunset, the active cells freeze and rupture, resulting in vertical bark splits called ‘sunscald’. In addition, hungry mice and rabbits gnaw lower bark under snow cover.
Step-by-Step Execution
- Inspect the trunk base and gently pull back excess mulch 3 inches from the root flare.
- Begin wrapping at the base of the trunk just below the soil line to prevent mice from tunneling beneath the protector.
- Overlap the breathable white commercial tree wrap or spiral guard by 30% as you wind upward toward the lowest scaffold branch.
- Secure the wrap at the top using biodegradable garden twine or masking tape; avoid tight wire ties that could girdle bark.
- For heavy rabbit and rodent pressure, install a cylinder of 1/4-inch galvanized hardware cloth mesh spaced 2 inches from the trunk.
🍂 Horticulturist Pro-Tip: Always remove trunk wraps promptly in early spring (March or April). Leaving guards on during warm spring and summer months traps moisture, promotes fungal disease, and harbors earwigs.
#14. Scrub, Disinfect, and Store Terracotta Containers Indoors

📋 Task Quick Facts:
- Optimal Window: After tender container plants are harvested or moved inside
- Protection Goal: Prevent frost spalling, hairline fractures, and pathogenic fungal carryover
- Key Supplies: Galvanized tub, stiff coir brush, 10% white vinegar solution or diluted bleach, dry storage racks
- Common Mistake: Leaving water-saturated soil in unglazed clay pots outdoors during freezing weather
Terracotta is porous clay that naturally absorbs water like a sponge. When left outside saturated with wet potting soil during sub-freezing weather, freezing water expands inside the clay pores, causing the walls to flake, spall, and shatter into pieces. Proper autumn cleaning also eliminates lingering pathogens.
Step-by-Step Execution
- Empty spent container plants and potting mix onto your compost pile (or garden beds if disease-free).
- Soak terracotta containers in a large tub containing warm water and 10% white vinegar to dissolve stubborn white calcium carbonate crusts.
- Scrub internal and external surfaces thoroughly using a stiff-bristled coir brush to remove algae and soil residues.
- Dip pots into a mild sanitizing solution (1 part household bleach to 9 parts water or 70% alcohol) and allow them to air-dry completely in the sun.
- Store dry terracotta pots inverted on wooden shelving inside a garage, basement, or garden shed away from sub-zero moisture.
🍂 Horticulturist Pro-Tip: If you have giant concrete or glazed ceramic planters that are too heavy to carry indoors, empty the top half of soil, elevate the pot on ‘pot feet’ so drainage holes stay clear, and wrap the container in bubble wrap covered by a waterproof canvas tarp.
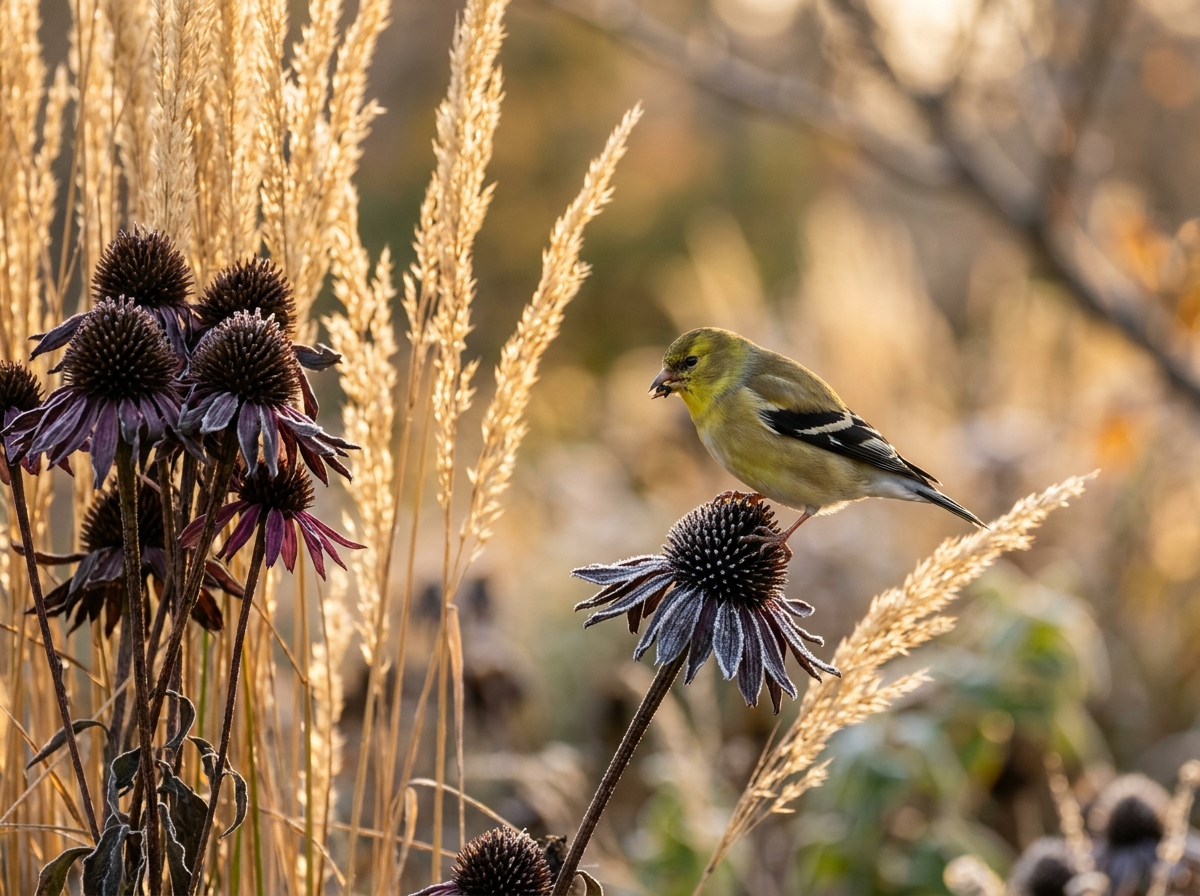
#15. Leave Structural Grasses and Seed Heads Standing for Wildlife
📋 Task Quick Facts:
- Optimal Window: Late autumn through late winter (leave untouched until March)
- Key Species: Coneflower (*Echinacea*), Black-Eyed Susan (*Rudbeckia*), Sedum ‘Autumn Joy’, Switchgrass (*Panicum*)
- Ecological Value: High-lipid bird seed, overwintering native bee nesting stems, microclimate shelter
- Common Mistake: Shearing the entire garden flat into a sterile brown wasteland in October
A pristine, completely shorn garden may look tidy to human eyes, but to native wildlife, it is an ecological desert. Leaving sturdy perennial seed heads and ornamental grasses standing provides critical winter food for goldfinches, chickadees, and juncos, while hollow stems shelter dormant native solitary bees and beneficial predators.
Step-by-Step Execution
- Identify resilient, upright-standing perennials with sturdy seed cones: *Echinacea*, *Rudbeckia*, sunflowers, Joe Pye weed, and globe thistles.
- Leave ornamental grasses—such as miscanthus, feather reed grass, and switchgrass—fully intact to provide golden architectural height, motion, and winter bird roosts.
- Cut back only floppy, wet, mushy foliage (like hostas, daylily leaves, and diseased tomato plants) that would harbor slugs and fungal spores.
- Let spent perennial crowns catch falling snow, which naturally forms an insulating thermal blanket that protects root systems.
- Delay your comprehensive garden clean-up cutback until late spring when daytime temperatures consistently exceed 50°F (10°C).
🍂 Horticulturist Pro-Tip: Hollow stems of coneflowers and elderberries house tiny native pollinator larvae through the winter. When you finally cut them back in spring, leave 8- to 12-inch stubs to serve as ready-made bee nesting hotels.
5 Golden Rules for Flawless Autumn Garden Care
To avoid common fall gardening missteps that can inadvertently harm plants through winter, always keep these five research-backed principles in mind:
Rule 1: Never Mulch Against Tree Bark (Avoid the Volcano)
Never pile mulch directly against the trunks of trees or woody shrubs in conical ‘mulch volcanoes’. Trapping moisture against living bark suffocates lenticels, rots cambium tissue, and invites rodents to chew through bark beneath snow cover. Always maintain a 2- to 3-inch bare clearance donut around the trunk flare.
Rule 2: Don’t Heavy-Prune Living Branches Late in the Season
Pruning stimulates hormonal growth surges. Pruning living wood in autumn causes tender growth that lacks time to harden off before sub-zero freezes hit, creating blackened dieback and entry wounds for wood-decay fungi. Save structural shaping for late winter when plants are deeply dormant.
Rule 3: Never Compost Diseased Plant Material at Home
Backyard compost piles rarely sustain the internal 140°F–160°F core temperatures needed to kill resilient fungal spores like tomato late blight, rust, and powdery mildew. Always bag diseased stems and foliage for municipal green waste or burn them where permitted.
Rule 4: Hydrate Root Zones Deeply Before the Freeze
Moist soil holds significantly more heat than dry soil, insulating root systems against extreme temperature swings. Broadleaf evergreens and conifers constantly transpire moisture through winter winds; if the soil is bone-dry when it freezes solid, plants will suffer severe winter desiccation burn.
Rule 5: Keep Bare Soil Covered All Winter Long
Nature abhors bare soil. Uncovered soil beds exposed to torrential winter rains and freezing winds suffer nutrient leaching, microbial die-off, and heavy surface crusting. Always blanket beds with shredded leaves, clean straw, compost top-dressing, or living cover crops.
Frequently Asked Questions (FAQs)
When is it officially too late to do fall garden chores?
Most fall garden tasks can continue right up until the top 2 to 3 inches of topsoil freeze solid (typically when daytime temperatures consistently stay below 32°F / 0°C). Spring bulbs can technically be planted as long as you can break the ground with a spade. However, irrigation blowouts and tender bulb lifting must be completed before the first hard killing freeze (<28°F / -2°C) to prevent catastrophic cold damage.
Should I cut back all my perennial flowers in autumn?
No. While diseased plants and mushy-foliage perennials (like hostas and daylilies) should be cleared to reduce slug eggs and fungal spores, sturdy structural perennials (such as coneflowers, sedum, and ornamental grasses) should be left standing all winter. Their seed cones feed overwintering songbirds, and their hollow stems provide safe winter habitat for native pollinating solitary bees.
Can I fertilize my perennials and fruit trees in late fall?
No, avoid quick-release high-nitrogen fertilizers in late autumn. Nitrogen triggers tender succulent vegetative growth that cannot harden off before freezing weather strikes, resulting in devastating freeze dieback. Instead, top-dress beds with organic finished compost, rock phosphate, or greensand, which release nutrients slowly over winter without stimulating inappropriate soft growth.
How deep should I plant spring bulbs before winter arrives?
The universal rule of thumb is to plant bulbs at a depth equal to two to three times the vertical height of the bulb. For large bulbs like tulips, daffodils, and giant alliums, dig 6 to 8 inches deep. For smaller bulbs like crocuses, grape hyacinths, and snowdrops, plant 3 to 4 inches deep. Always measure depth from the bottom of the bulb to the soil surface.
Why do terracotta pots crack in winter, and how do I prevent it?
Terracotta is unglazed, porous earthenware that absorbs ambient moisture. When saturated soil inside a terracotta pot freezes, the expanding ice exerts outward hydrostatic pressure against the clay walls, while moisture trapped within the clay pores themselves expands, causing outer spalling and hairline cracking. Always empty pots, scrub them clean, and store them inverted in a dry shed, basement, or garage.
What happens if I leave a garden hose connected to an outdoor spigot?
Leaving a garden hose attached to an outdoor faucet prevents the internal siphon tube from draining back, even on modern ‘frost-free’ hydrants. Trapped water inside the brass casting freezes, expands with tremendous hydrostatic force, and ruptures the copper pipe inside your home’s wall cavity. When you turn the water on next spring, catastrophic indoor flooding will occur.
A Well-Prepared Garden Equals an Effortless Spring
By investing just a couple of crisp autumn weekends into working through this 15-step checklist, you insulate your outdoor sanctuary against the harshest elements of winter. When the ground finally begins to warm in March, you won’t be scrambling to repair split hoses, hunt down dull rusty tools, or replace rotted crowns. Instead, you’ll be greeted by vibrant emerald shoots, early jewel-toned crocuses, and nutrient-dense living soil ready to power another year of bountiful growth.


0 Comments