

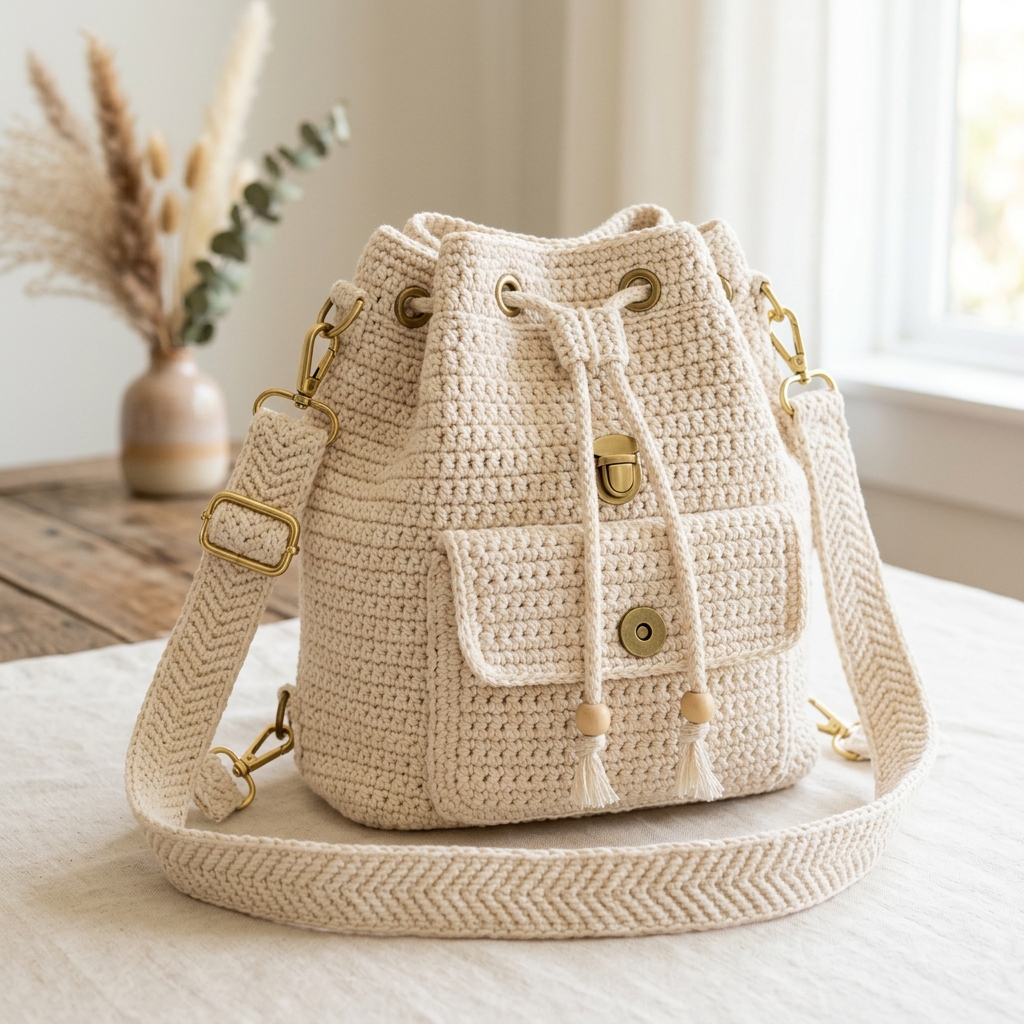
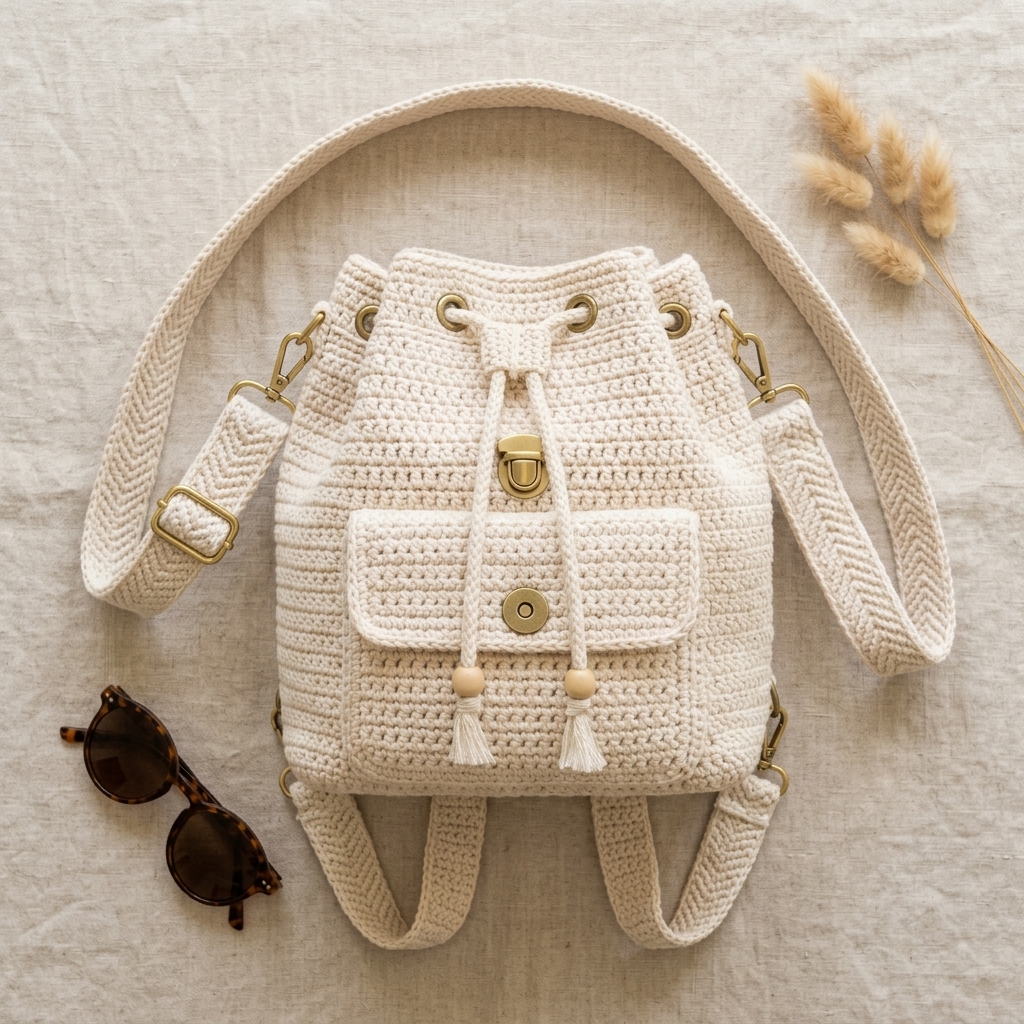
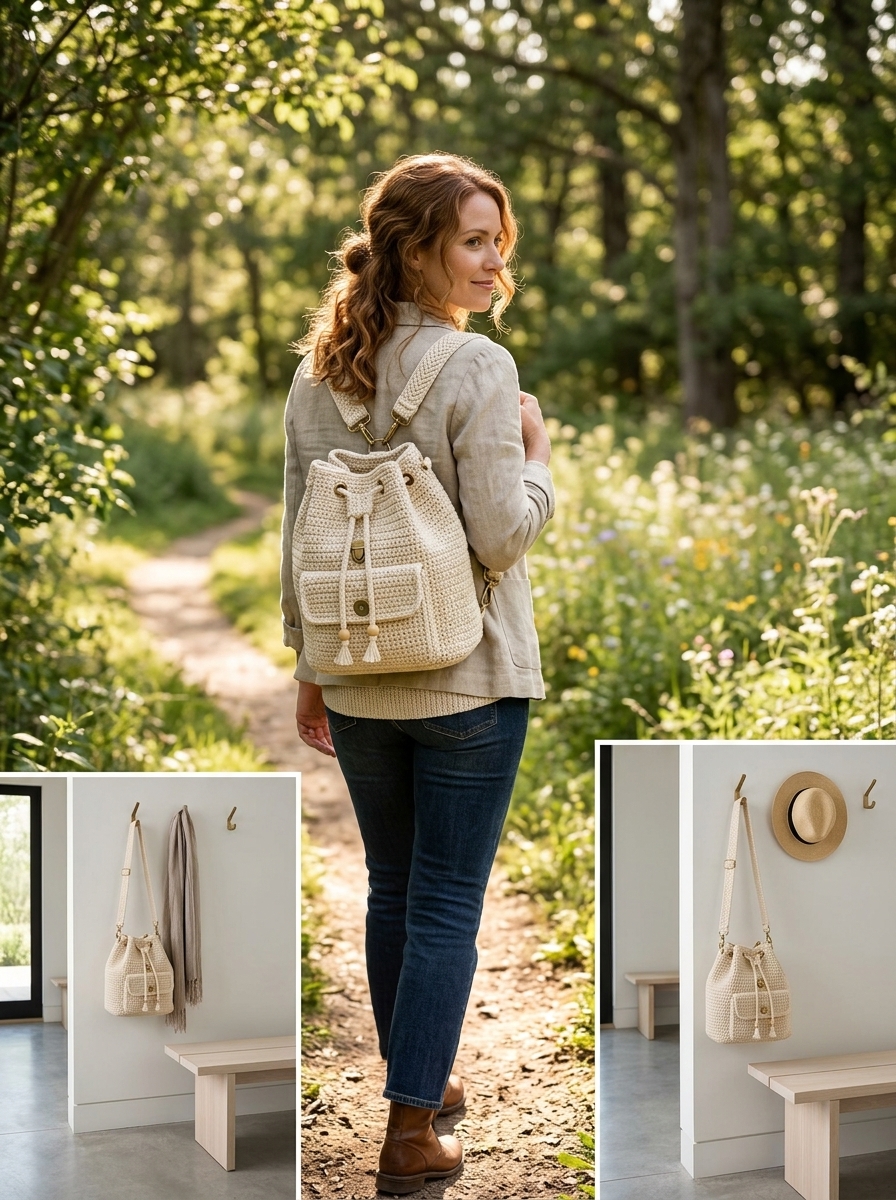
If you’ve been searching for the perfect everyday bag that is both practical and stylish, look no further! This beautifully structured crochet crossbody backpack is about to become your new favorite accessory. Crocheted with sturdy cotton yarn, it features a classic drawstring closure, a convenient front flap pocket, and modern hardware that gives it a professional, store-bought finish.
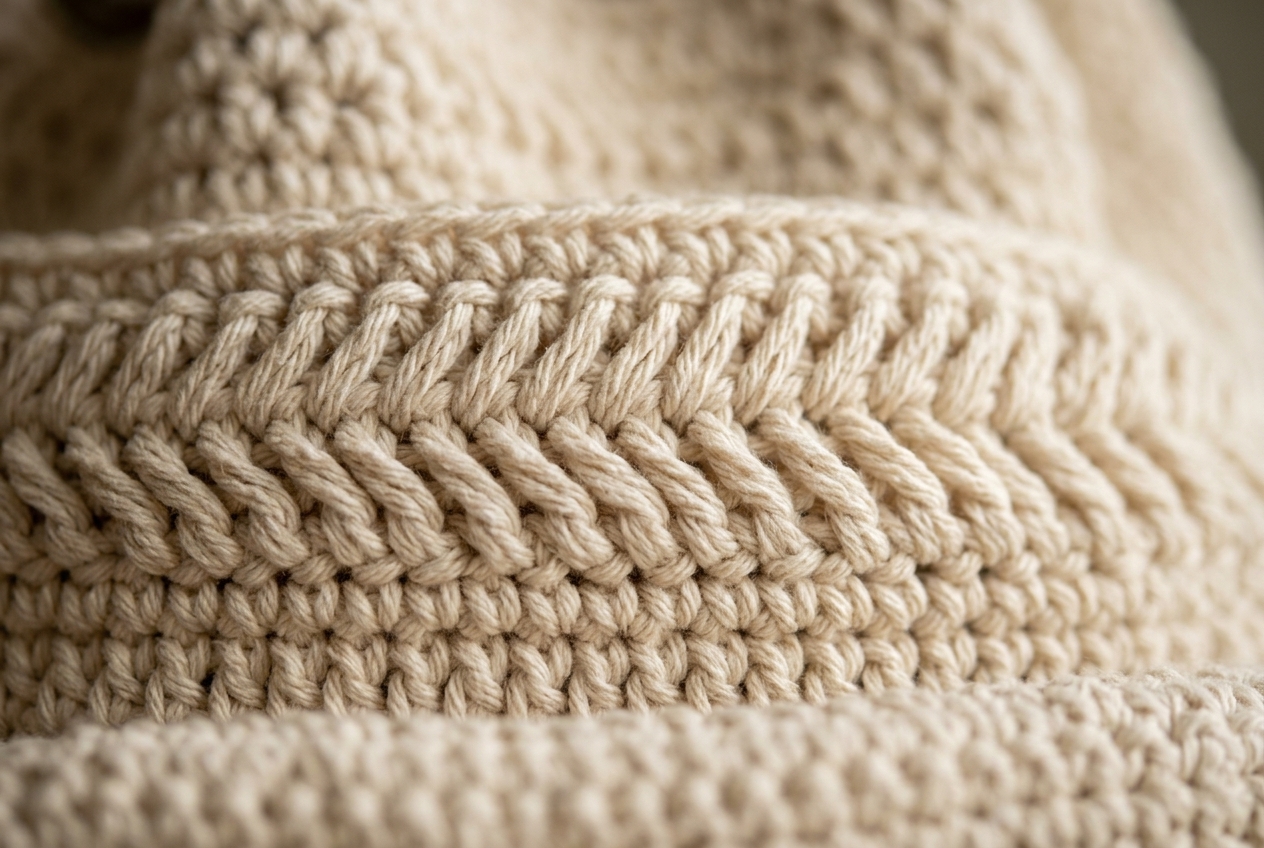
Whether you’re heading to the farmer’s market, exploring a new city, or just running errands around town, this bag offers hands-free convenience without compromising on style. The dense single crochet stitches create a fabric that is durable enough to hold its shape, while the spike stitch details add a subtle touch of texture that elevates the overall design.
Ready to make your own? Grab your hook and let’s get started on this satisfying project!
Finished Size
When completed, this backpack measures approximately 17 inches (43 cm) deep and 15 inches (38 cm) wide, with a comfortable 35-inch (89 cm) adjustable strap.
Gauge
To ensure your bag comes out to the correct dimensions, check your gauge: 20 stitches by 20 rows of single crochet worked in the round should measure exactly 4 x 4 inches (10 x 10 cm).
Construction Overview
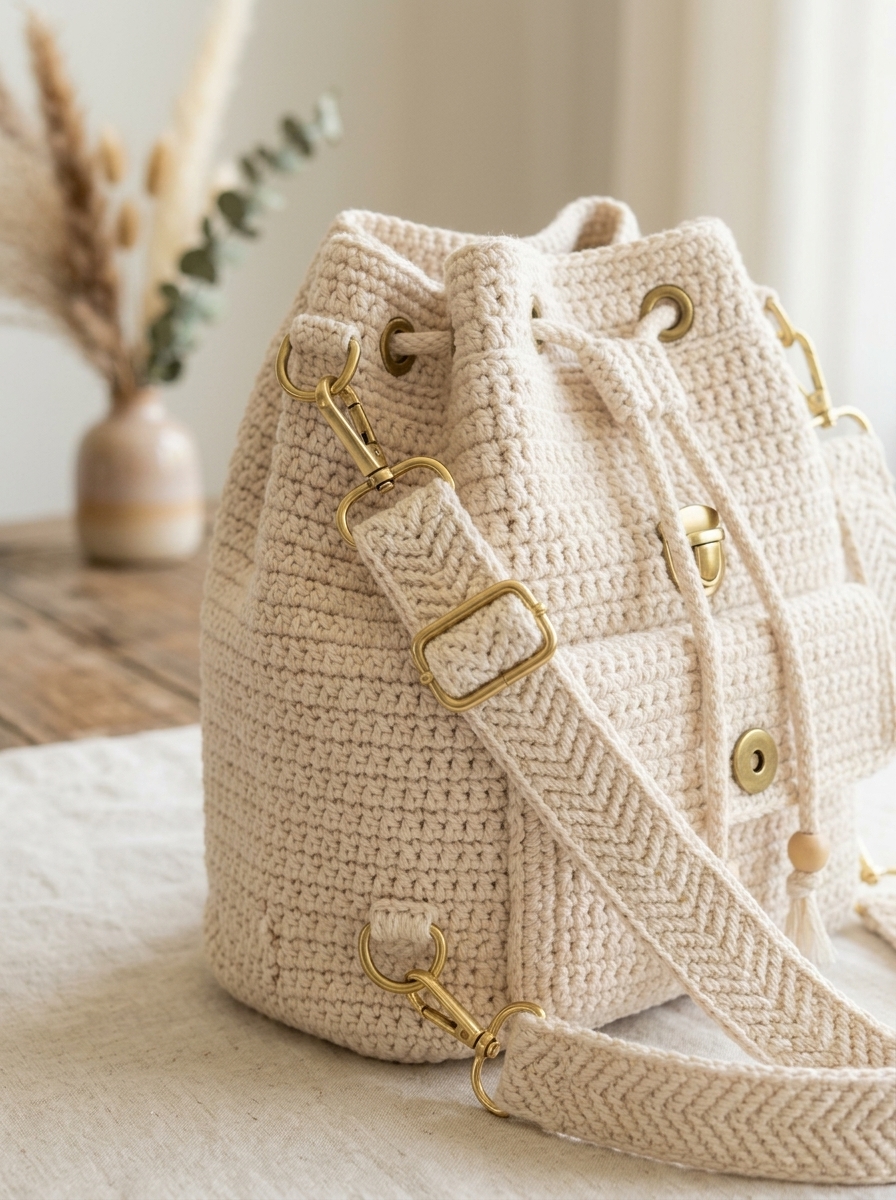
This backpack is constructed in three main parts: the body, the strap, and the front flap. You’ll start by working the body from the base up. The first 25 rounds form a flat circular base using joined rounds. After that, you’ll switch to continuous spiral rounds to build the sides seamlessly. The long crossbody strap is worked in rows directly from the top edge of the bag. The front flap is crocheted separately in rows and then attached to the back using a surface slip stitch. Finally, an easy I-cord is threaded through the top for the drawstring closure.
Supplies Needed
Gather the following materials before you begin:
- Yarn: Medium weight (#4 worsted) cotton yarn. You will need approximately 840 yards (768 meters). A mercerized cotton is highly recommended for durability and stitch definition.
- Hook: 4.00 mm (G/6) crochet hook.
- Notions: 2 stitch markers, a tapestry needle for weaving in ends, and scissors.
Stitches & Abbreviations
- ch: Chain Stitch
- sl st: Slip Stitch
- st(s): Stitch(es)
- sk: Skip
- SM: Stitch Marker
- sc: Single Crochet
- sc2tog: Single Crochet Two Together (Decrease)
Special Stitches
Foundation Single Crochet (Fsc): Chain 2. Insert hook into the 2nd chain from the hook, yarn over and pull up a loop (2 loops on hook). Yarn over, draw through 1 loop (this creates the base chain). Yarn over, draw through both remaining loops to complete the sc. *Insert hook into the base chain you just created (it looks like a ‘V’), yarn over and pull up a loop. Yarn over, draw through 1 loop (chain created). Yarn over, draw through both loops.* Repeat from * to * for the required number of stitches.
Single Crochet Spike Stitch (SPsc): Work a single crochet as you normally would, but insert your hook into the stitch from the row/round directly below the current one, elongating the stitch.
Pattern Instructions
The Base and Body
Round 1: Ch 2, place 6 sc into the 2nd chain from your hook. Ch 1, sl st to the first st to join. Note: Join and ch 1 at the end of every round through Round 24. (6 sts)
Round 2: Work 2 sc in each st around, ch 1. (12 sts)
Round 3: *Sc in the next st, 2 sc in the next st; repeat from * to the end, ch 1. (18 sts)
Round 4: *Sc in the next 2 sts, 2 sc in the next st; repeat from * to the end, ch 1. (24 sts)
Round 5: *Sc in the next 3 sts, 2 sc in the next st; repeat from * to the end, ch 1. (30 sts)
Round 6: *Sc in the next 4 sts, 2 sc in the next st; repeat from * to the end, ch 1. (36 sts)
Round 7: *Sc in the next 5 sts, 2 sc in the next st; repeat from * to the end, ch 1. (42 sts)
Round 8: *Sc in the next 6 sts, 2 sc in the next st; repeat from * to the end, ch 1. (48 sts)
Round 9: *Sc in the next 7 sts, 2 sc in the next st; repeat from * to the end, ch 1. (54 sts)
Round 10: *Sc in the next 8 sts, 2 sc in the next st; repeat from * to the end, ch 1. (60 sts)
Round 11: *Sc in the next 9 sts, 2 sc in the next st; repeat from * to the end, ch 1. (66 sts)
Round 12: *Sc in the next 10 sts, 2 sc in the next st; repeat from * to the end, ch 1. (72 sts)
Round 13: *Sc in the next 11 sts, 2 sc in the next st; repeat from * to the end, ch 1. (78 sts)
Round 14: *Sc in the next 12 sts, 2 sc in the next st; repeat from * to the end, ch 1. (84 sts)
Round 15: *Sc in the next 13 sts, 2 sc in the next st; repeat from * to the end, ch 1. (90 sts)
Round 16: *Sc in the next 14 sts, 2 sc in the next st; repeat from * to the end, ch 1. (96 sts)
Round 17: *Sc in the next 15 sts, 2 sc in the next st; repeat from * to the end, ch 1. (102 sts)
Round 18: *Sc in the next 16 sts, 2 sc in the next st; repeat from * to the end, ch 1. (108 sts)
Round 19: *Sc in the next 17 sts, 2 sc in the next st; repeat from * to the end, ch 1. (114 sts)
Round 20: *Sc in the next 18 sts, 2 sc in the next st; repeat from * to the end, ch 1. (120 sts)
Round 21: *Sc in the next 19 sts, 2 sc in the next st; repeat from * to the end, ch 1. (126 sts)
Round 22: *Sc in the next 20 sts, 2 sc in the next st; repeat from * to the end, ch 1. (132 sts)
Round 23: *Sc in the next 21 sts, 2 sc in the next st; repeat from * to the end, ch 1. (138 sts)
Round 24: *Sc in the next 22 sts, 2 sc in the next st; repeat from * to the end, ch 1. (144 sts)
Round 25: *Sc in the next 23 sts, 2 sc in the next st; repeat from * to the end. Place a SM in the last stitch to mark the end of the round. You will now work in continuous spiral rounds without joining. (150 sts)
Rounds 26–39: Sc in each st around. Move the SM up as you finish each round. (150 sts)
Round 40: *Sc in the next st, SPsc in the next st; repeat from * around to the SM. (150 sts)
Rounds 41–42: Sc in each st around. (150 sts)
Rounds 43–45: Repeat Rounds 40 to 42. (150 sts)
Round 46: Repeat Round 40. (150 sts)
Rounds 47–78: Sc in each st around. (150 sts)
Round 79: *Sc in the next st, SPsc in the next st; repeat from * around to the SM. (150 sts)
Round 80: Sc in each st around. (150 sts)
Rounds 81–84: Repeat Rounds 79 and 80 twice. (150 sts)
Rounds 85–92: Sc in each st around. (150 sts)
Alignment Note: Check your base seam. Add or subtract a few stitches here so that the start of Round 93 is perfectly centered above your base seam. Once centered, place your SM.
Round 93 (Eyelet Round): Sc in the next 14 sts, ch 2 and sk 2 sts. *Sc in the next 8 sts, ch 2 and sk 2 sts, sc in the next 23 sts, ch 2 and sk 2 sts.* Sc in the next 8 sts, ch 2 and sk 2 sts, sc in the next 28 sts, ch 2 and sk 2 sts, sc in the next 8 sts, ch 2 and sk 2 sts, sc in the next 23 sts, ch 2 and sk 2 sts, sc in the next 8 sts, ch 2 and sk 2 sts, sc in the remaining sts to the SM. (150 sts counting ch-spaces)
Round 94: Sc in each sc and place 2 sc in each ch-2 space around. (150 sts)
Rounds 95–96: Sc in each st around. (150 sts)
Do not fasten off. The strap is worked directly from here in turned rows. Remove your SM.
The Strap
Row 1: Sc in the next 19 sts, ch 1, turn.
Row 2: Sc across the 19 sts you just made, and continue to sc over the next 19 sts of Round 96. Ch 1, turn. (38 sts)
Row 3: Sc2tog, sc across until 2 sts remain, sc2tog. Ch 1, turn. (36 sts)
Row 4: Sc in the next 2 sts. *SPsc in the next st, sc in the next st; repeat from * across. Ch 1, turn. (36 sts)
Rows 5–30: Repeat Rows 3 and 4, continuing to decrease until you have 10 sts remaining on Row 30. (10 sts)
Row 31: Sc across. Ch 1, turn. (10 sts)
Row 32: Sc in the first st. *SPsc in the next st, sc in the next st; repeat from * until 1 st remains, sc in the last st. Ch 1, turn. (10 sts)
Row 33: Sc across. Ch 1, turn. (10 sts)
Row 34: Sc in the next 2 sts. *SPsc in the next st, sc in the next st; repeat from * across. Ch 1, turn. (10 sts)
Rows 35–190: Repeat Rows 31 to 34 until your strap is about 35 inches long. Fasten off, leaving a 12-inch tail for sewing.
The Flap
Row 1: Fsc 38, turn. Leave a long starting tail for seaming later. (38 sts)
Row 2: Sc across. Turn. (38 sts)
Row 3: Sc2tog, sc across until 2 sts remain, sc2tog. Turn. (36 sts)
Row 4: Sc in the next 2 sts. *SPsc in the next st, sc in the next st; repeat from * across. Turn. (36 sts)
Rows 5–32: Repeat Rows 3 and 4, decreasing until you have 8 sts remaining on Row 32. (8 sts)
Row 33: Sc2tog, sc across until 2 sts remain, sc2tog. Fasten off. (6 sts)
The I-Cord Drawstring
Row 1: Ch 3.
Row 2: Pull up a loop in the 2nd and 3rd ch from the hook (3 loops on hook). Carefully remove the 2nd and 3rd loops from your hook, pinching them so they don’t unravel. Yarn over and pull through the 1st loop still on the hook. Insert hook into the 2nd loop, yarn over and pull through. Insert hook into the 3rd loop, yarn over and pull through.
Remaining Rows: Repeat Row 2 until the cord measures roughly 48 inches. Fasten off.
Assembly & Finishing
Attaching the Strap: Lay the backpack flat with the front facing up. Align the loose end of the strap with the spike stitch details from Rounds 40–46 on the side. Using the 12-inch tail and a tapestry needle, whip stitch the strap securely to the bag. Weave in ends.
Attaching the Flap: Position Row 1 of the flap along Row 2 of the strap (where the bag transitioned from rounds to rows). With wrong sides facing, use a surface slip stitch to join the flap to the backpack body, making sure the stitches are aligned. Fasten off and weave in ends.
Adding the Drawstring: Weave the I-cord through the eyelet holes created in Round 93. If desired, you can add decorative tassels or wooden beads to the ends of the I-cord.
Hardware & Closures
To give your backpack a truly professional finish, consider adding magnetic snaps or a twist-lock closure to the front flap. Since the bag is crocheted tightly, you can easily sew on a leather patch or metal hardware without it sagging.
Styling Tips
This neutral, textured backpack is incredibly versatile. Pair it with a casual denim jacket and sundress for a relaxed boho vibe, or wear it over a structured linen blazer for a more polished, artisan look. The crossbody strap design ensures it stays comfortably secure while you go about your day!
Quick Reference Notes
- The base is worked in joined rounds to keep it perfectly flat.
- Switching to continuous rounds for the body prevents an unsightly seam traveling up the side of your bag.
- Use stitch markers generously, especially when tracking the continuous rounds.
- Cotton yarn is essential for this pattern to prevent the strap and bag body from stretching out under weight.
Happy crocheting! Once you finish, you’ll be amazed that you made something this beautiful with your own hands.


0 Comments