

This crochet backpack is worked in the round from a sunburst base, so there is no seaming and no panels to join. It uses worsted weight cotton for structure, with a drawstring closure and an overlapping flap. Full stitch counts for each round, strap instructions and finished measurements follow.
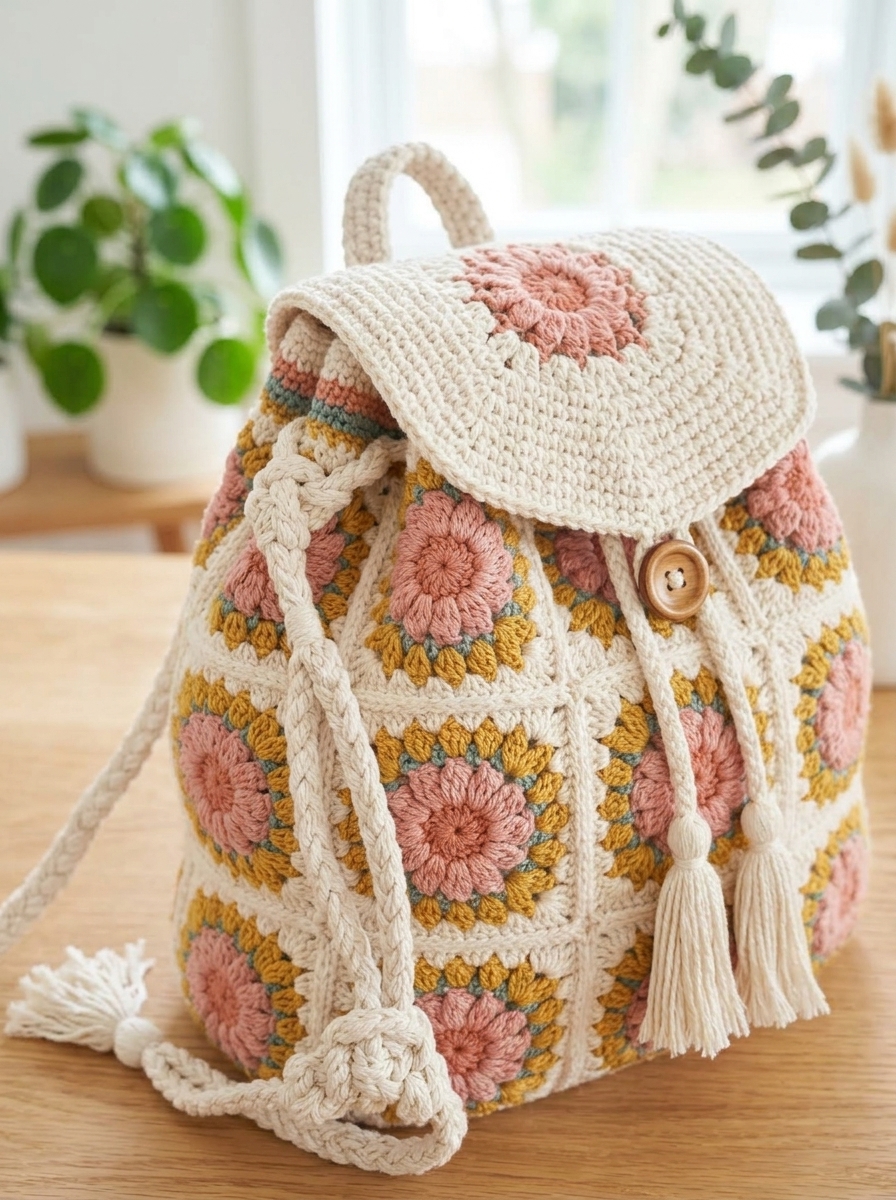
If you’ve been searching for the perfect statement accessory that is as fun to make as it is to wear, you’ve found it. This stunning crochet drawstring backpack combines vintage boho charm with modern functionality, making it the ultimate project for your next free weekend.
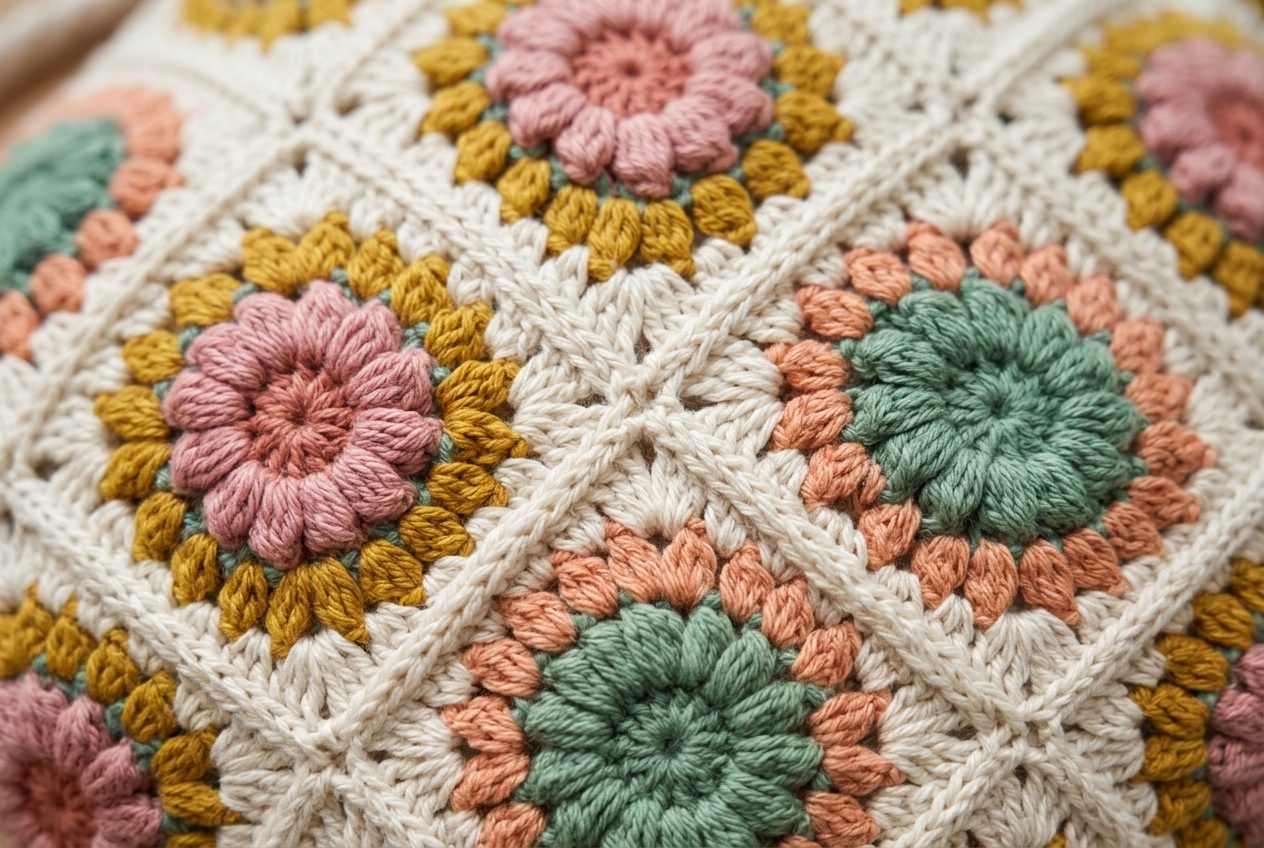
The beauty of this design lies in its use of the classic sunburst granny square. By combining a soft blush pink with a creamy off-white border, the bag takes on a delicate, almost cottagecore aesthetic that pairs effortlessly with any casual outfit.
Whether you’re heading to the farmer’s market, packing a picnic for the park, or just need a reliable daypack for your essentials, this pattern delivers. Plus, the addition of a custom fabric lining means your bag will hold its shape and keep your belongings secure without stretching out your hard work!
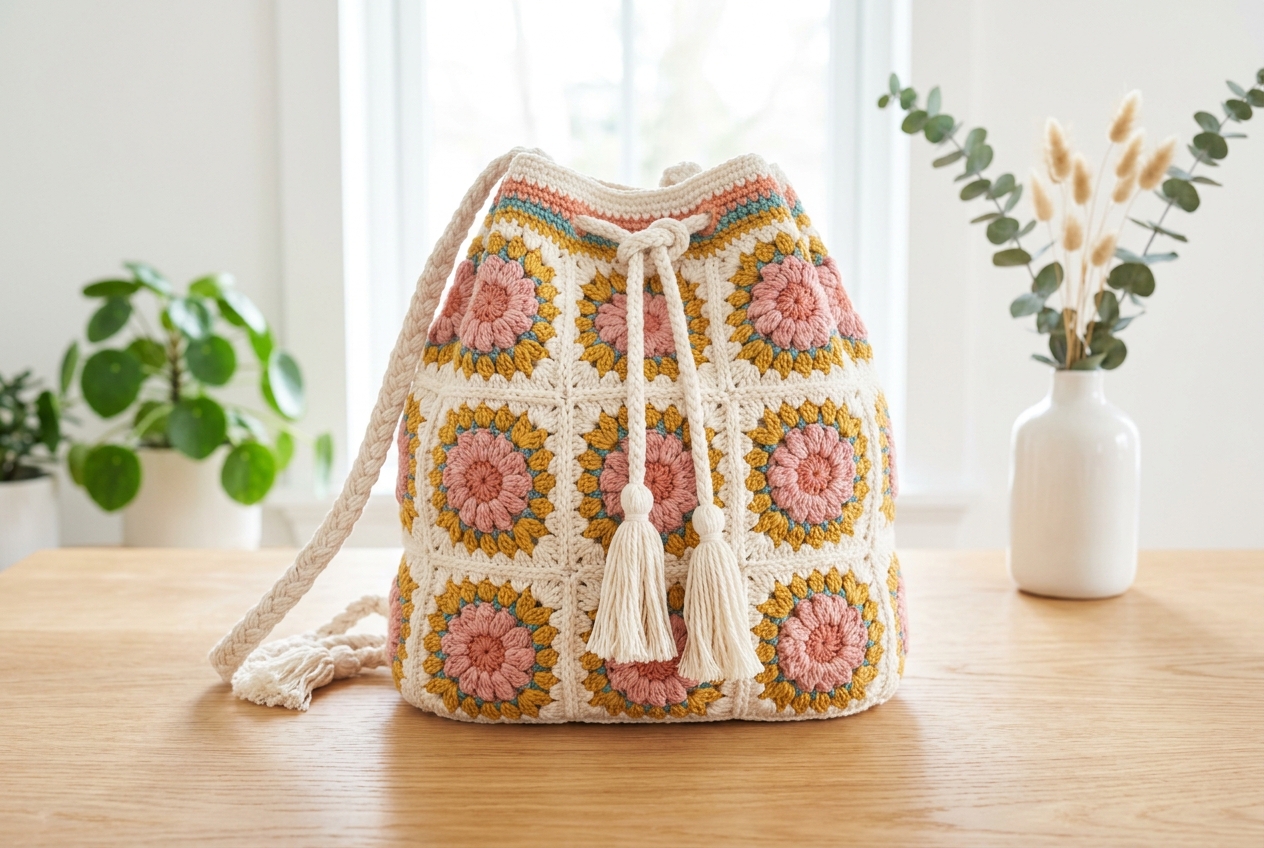
Finished Size
Approximately 12 inches wide by 13 inches tall (30.5 cm x 33 cm).
Gauge
Gauge isn’t strictly critical for this project, but aim to keep your granny squares consistent in size to ensure the cleanest finish when joining them together. A single sunburst granny square should measure roughly 4.5 inches (11.5 cm) across.
Construction Overview
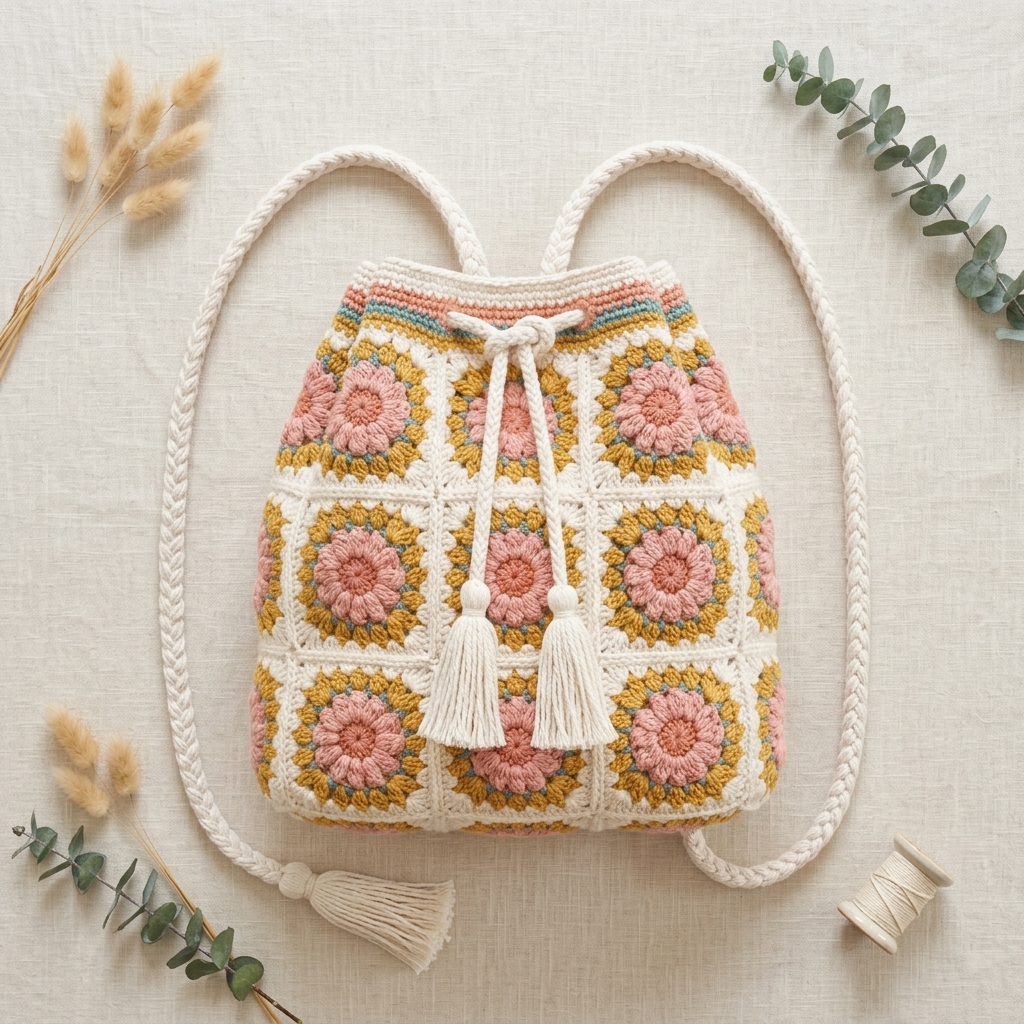
This backpack is constructed using 14 identical sunburst granny squares that are joined together to form the main body (2 for the bottom, 4 for the front, 4 for the back, and 2 for the sides). We’ll then crochet directly onto the top edge to create the drawstring casing. The lid and straps are made separately and sewn on at the end, along with a custom fabric lining to keep the bag sturdy.
Supplies You’ll Need
- Yarn: Worsted weight yarn (like Red Heart Soft). You’ll need 2-3 skeins of the main color (Rose Blush) depending on your tension, and 1 skein of the contrast color (White) for the borders and straps.
- Hooks: 5.0 mm (H) crochet hook for the bag body, and a 4.5 mm (G) hook for the straps and drawstring.
- Notions: A tapestry needle for weaving in ends and assembly.
- Optional but recommended: Fabric for the lining and sewing supplies.
Stitches & Abbreviations (US Terms)
- ch: Chain
- mr: Magic ring
- sc: Single crochet
- hdc: Half double crochet
- dc: Double crochet
- tr: Treble crochet
- sl st: Slip stitch
- puff st: Puff stitch
- dc cluster: Double crochet cluster
Special Stitches
Puff Stitch: Yarn over, insert the hook into the stitch, yarn over and pull up a loop (3 loops on hook). Yarn over, insert hook into same stitch, yarn over and pull up a loop (5 loops). Yarn over, insert hook into same stitch, yarn over and pull up a loop (7 loops). Yarn over and pull through all 7 loops. Chain 1 to close.
3-dc Cluster: *Yarn over, insert hook into the space, yarn over and pull up a loop. Yarn over, pull through 2 loops.* Repeat from * two more times in the same space. You will have 4 loops on the hook. Yarn over and pull through all 4 loops.
4-dc Cluster: Worked exactly like the 3-dc cluster, but repeating the sequence three more times instead of two, ending with 5 loops on the hook before pulling through all of them.
Pattern Instructions
Part 1: The Sunburst Granny Squares (Make 14)
We’ll be working in joined rounds for the squares.
Round 1: Using your 5.0 mm hook, start with a magic ring. Ch 3 (counts as your first dc). Work 15 dc into the magic ring. Sl st to the top of the initial ch-3 to join. (16 dc)
Round 2: Ch 2. In the same stitch, work a puff stitch. *In the next stitch, work a puff stitch.* Repeat from * around. Sl st to the first puff stitch to close the round. (16 puff stitches + 16 ch-1 spaces)
Round 3: Sl st into the first ch-1 space. Ch 2, then make a 3-dc cluster in that same space. Ch 2. *Make a 4-dc cluster in the next ch-1 space, ch 2.* Repeat from * around. Sl st to the top of the first cluster to join. (16 clusters + 16 ch-2 spaces)
Round 4 (Squaring it off): Sl st into the first ch-2 space. Ch 3, then work 2 tr in the same space. In the next ch-2 space, work 3 dc. In the following ch-2 space, work 3 hdc. In the next ch-2 space, work 3 dc.
*In the next ch-2 space, work (3 tr, ch 3, 3 tr) to create a corner. In the next space, 3 dc. In the next space, 3 hdc. In the next space, 3 dc.*
Repeat from * two more times. In the very first space (where you started the round), work 3 tr and ch 3. Sl st to the top of the initial ch-3 to join and complete the final corner. Fasten off.
Part 2: Assembling the Main Body
Arrange your 14 squares into a flat layout (typically a cross shape: 2 squares for the bottom, surrounded by the sides and front/back panels). Seam the squares together using your preferred method (like a whip stitch or flat slip stitch seam). Once the flat shape is joined, fold the sides up and seam the vertical edges to form the bag shape.
Part 3: The Top Edge & Drawstring Casing
Round 1: Attach your main color yarn anywhere along the top edge of the bag. Ch 3 (counts as dc). Work 1 dc in each stitch around the entire top opening. Sl st to the top of the starting ch-3 to join.
Round 2: Ch 3, dc in each stitch around. Sl st to join.
Round 3 (Eyelet Round): Ch 1. Hdc in the same stitch and in the next 4 stitches. Ch 1, skip 1 stitch. *Hdc in the next 5 stitches, ch 1, skip 1 stitch.* Repeat from * around. Sl st to the first hdc to join. (Note: It’s okay if the math doesn’t perfectly align at the end of the round; just ensure the eyelets are somewhat evenly spaced!)
Round 4: Ch 3, dc in each stitch and ch-1 space around. Sl st to join. Fasten off and weave in ends.
Part 4: The Backpack Lid
The lid starts exactly like the granny squares, using the main color yarn.
Rounds 1-3: Repeat Rounds 1-3 of the Sunburst Granny Square pattern.
Round 4: Sl st into the first ch space. Ch 2, then work a 4-dc cluster in the same space. Ch 3. *In the next ch space, work a 5-dc cluster, ch 3.* Repeat from * around. Sl st to the top of the first cluster to join. (16 clusters + 16 ch-3 spaces)
Round 5: Sl st into the first ch space, ch 3. Work 2 tr into the same space. In the next space, work 4 dc. In the next space, work 4 hdc. In the next space, work 4 dc. In the next space, work a corner: (3 tr, ch 3, 3 tr). Now, work 4 dc in every remaining ch space around until you reach the beginning. Finish the first corner by working 3 tr, ch 3 into the starting space, then sl st to the initial ch-3.
Round 6: Ch 2. Dc in each stitch along the straight edge of the lid. At the corners, work (2 dc, ch 2, 2 dc). For the curved section, work 1 dc in each stitch, but add 1 increase (2 dc in one stitch) evenly spaced over each “cluster” section from the previous round. Sl st to the initial ch-2. Fasten off, leaving a long tail for sewing.
Round 7 (Shell Border): Attach the white contrast yarn to the side edge of the lid, right where the curve begins. *Skip 1 stitch, work 5 dc into the next stitch, skip 1 stitch, sc in the next stitch.* Repeat from * along the curved edge of the lid only (do not border the straight edge). Fasten off and weave in ends.
Part 5: Straps, Loop, and Drawstring
Switch to the 4.5 mm hook and white contrast yarn for these parts.
Hook Loop:
Row 1: Ch 7. Sc in the 2nd ch from the hook and in each remaining ch. (6 sc). Ch 1, turn.
Rows 2-25: Sc in each stitch across. Ch 1, turn.
Fasten off, leaving a tail for sewing.
Backpack Straps (Make 2):
Row 1: Ch 7. Sc in the 2nd ch from the hook and each remaining ch. (6 sc). Ch 1, turn.
Rows 2-100: Sc in each stitch across. Ch 1, turn.
Note: Adjust the number of rows if you need shorter or longer straps! Fasten off, leaving a tail for sewing.
Drawstring:
Using the white yarn and 4.5 mm hook, simply chain 175. Fasten off. Weave the chain in and out of the eyelets created in Round 3 of the bag top. Attach simple yarn tassels to the ends of the drawstring for extra boho flair.
Assembly & Finishing
1. Lining the Bag (Highly Recommended!): Cut fabric panels based on the shape of your joined bag (leaving a 1/2-inch seam allowance). Sew the lining together, drop it inside the crocheted bag, and hand-sew the top edge of the lining to the inside of the bag, right below the drawstring section. You can also line the straps for extra durability!
2. Attaching the Lid: Center the straight edge of the lid along the back of the bag (aligning it where the squares meet the solid dc rows). Sew securely.
3. Attaching the Loop and Straps: Fold the Hook Loop in half and sew it to the top center back of the bag, right on the seam line of the lid. Sew the top ends of the two backpack straps on either side of the loop. Finally, sew the bottom ends of the straps to the bottom back corners of the bag.
Styling Tips
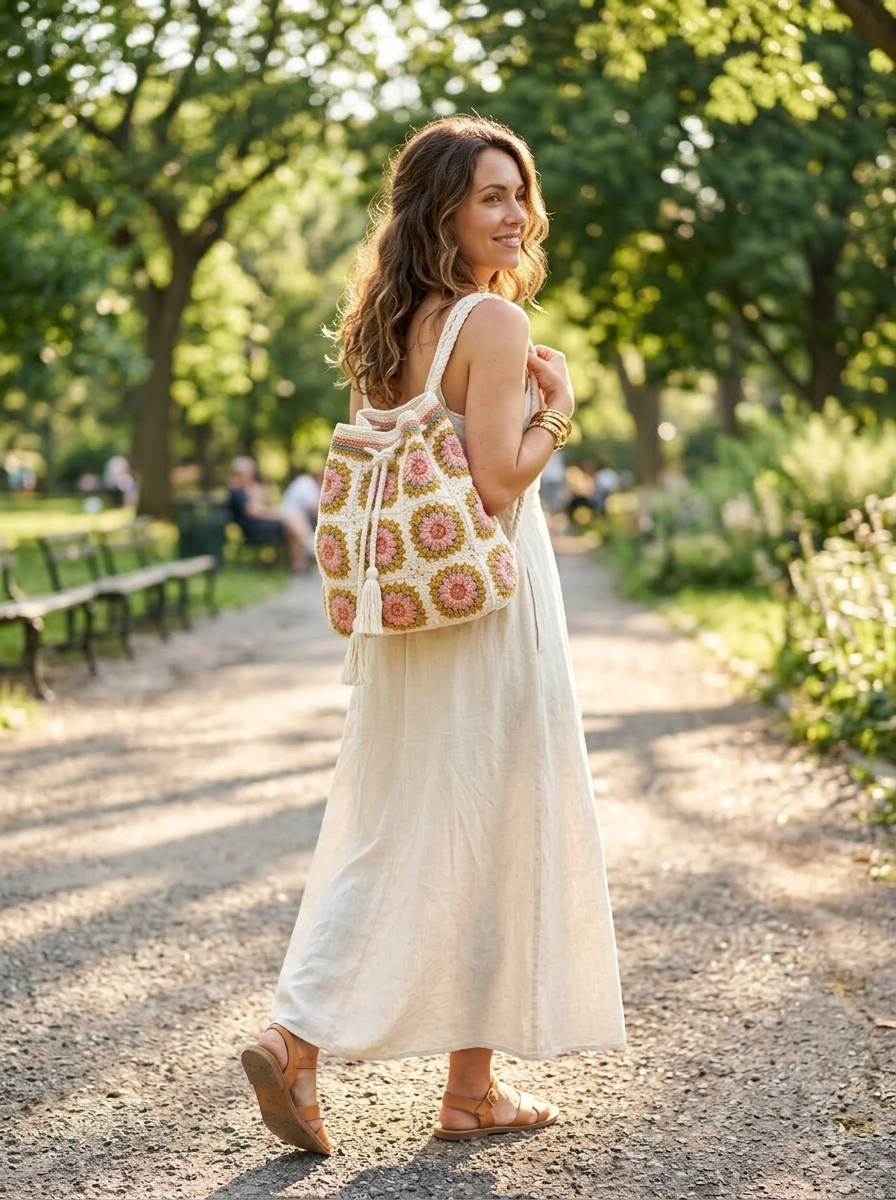
This backpack is the ultimate accessory for a relaxed weekend outfit. Pair it with a flowy linen dress and sandals for a cottagecore vibe, or throw it on with high-waisted vintage jeans and a simple white tee for an everyday boho look. The sturdy straps and lined interior make it perfect for carrying your current read, a water bottle, and a few skeins of yarn for crocheting on the go!
Quick Reference Notes
- Always count your stitches after the cluster rounds, as it’s easy to miss one.
- Lining your crochet bag is crucial to prevent the yarn from stretching under weight.
- Customize the size by making more squares, or change up the colors for a completely different mood!


0 Comments